Migrating Virtual Machines
Migrating a VM from Microsoft Hyper-V to zCompute
VM instances created with Microsoft Hyper-V can be imported into Zadara Cloud Services. The import procedures below were tested with Hyper-V on Windows 2012 and the following guest OS options:
Centos 7
Windows 10
Windows 2016
Preparation for VM Migration
The following should be prepared before beginning the migration:
List of Hyper-V VM instances to be migrated to ZCS. For each of the VM instances, note the following. This information can provide you with and indication of the target resources needed.
Guest operating system
CPU and memory resources used per VM instance
Number of VM instances to be migrated
Total compute resources
Largest drive size
VM instances with multiple volumes
List of connected networks for the VM instances.
Note if VM instance is Generation 1 (typically BIOS) or Generation 2 (typically UEFI).
Export Hyper-V VM Instances
Download the file from the link below to be used in case of driver injection failure.
In Hyper-V Manager, select the VM instance to be migrated and select export.
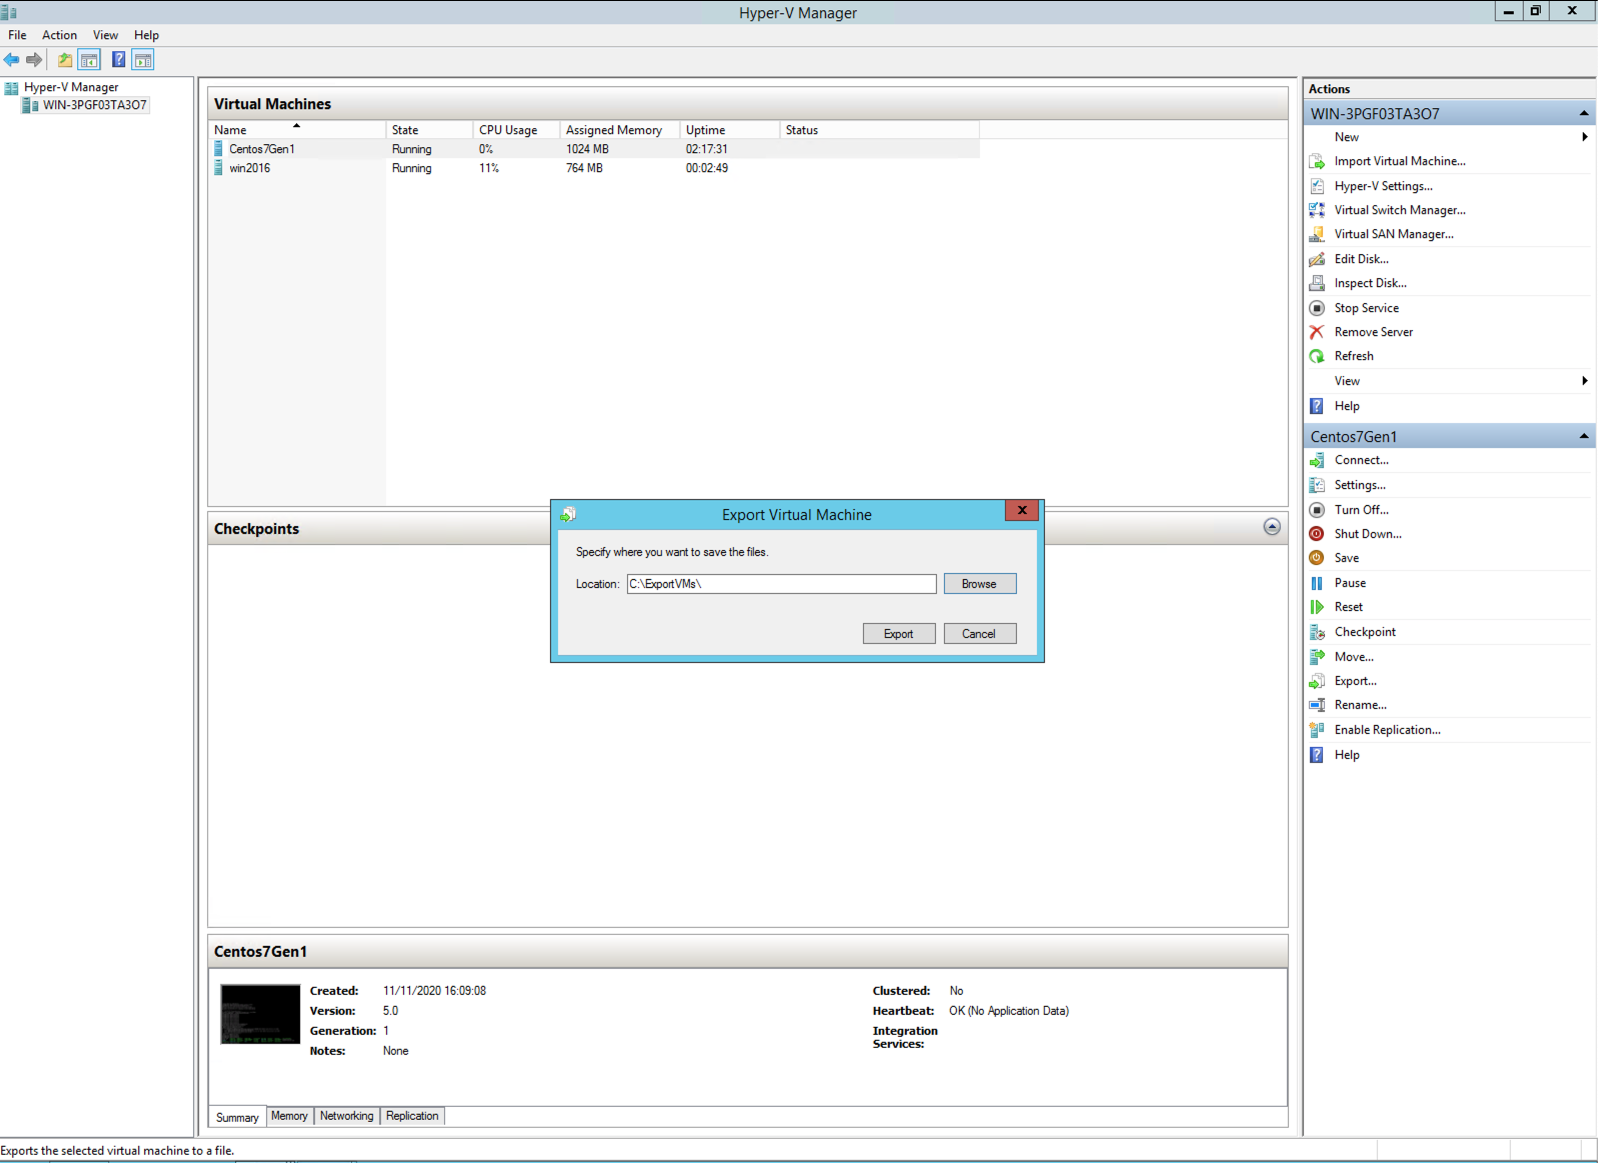
Note
The VM has to be powered off before export, or it may go into recovery mode after migration.
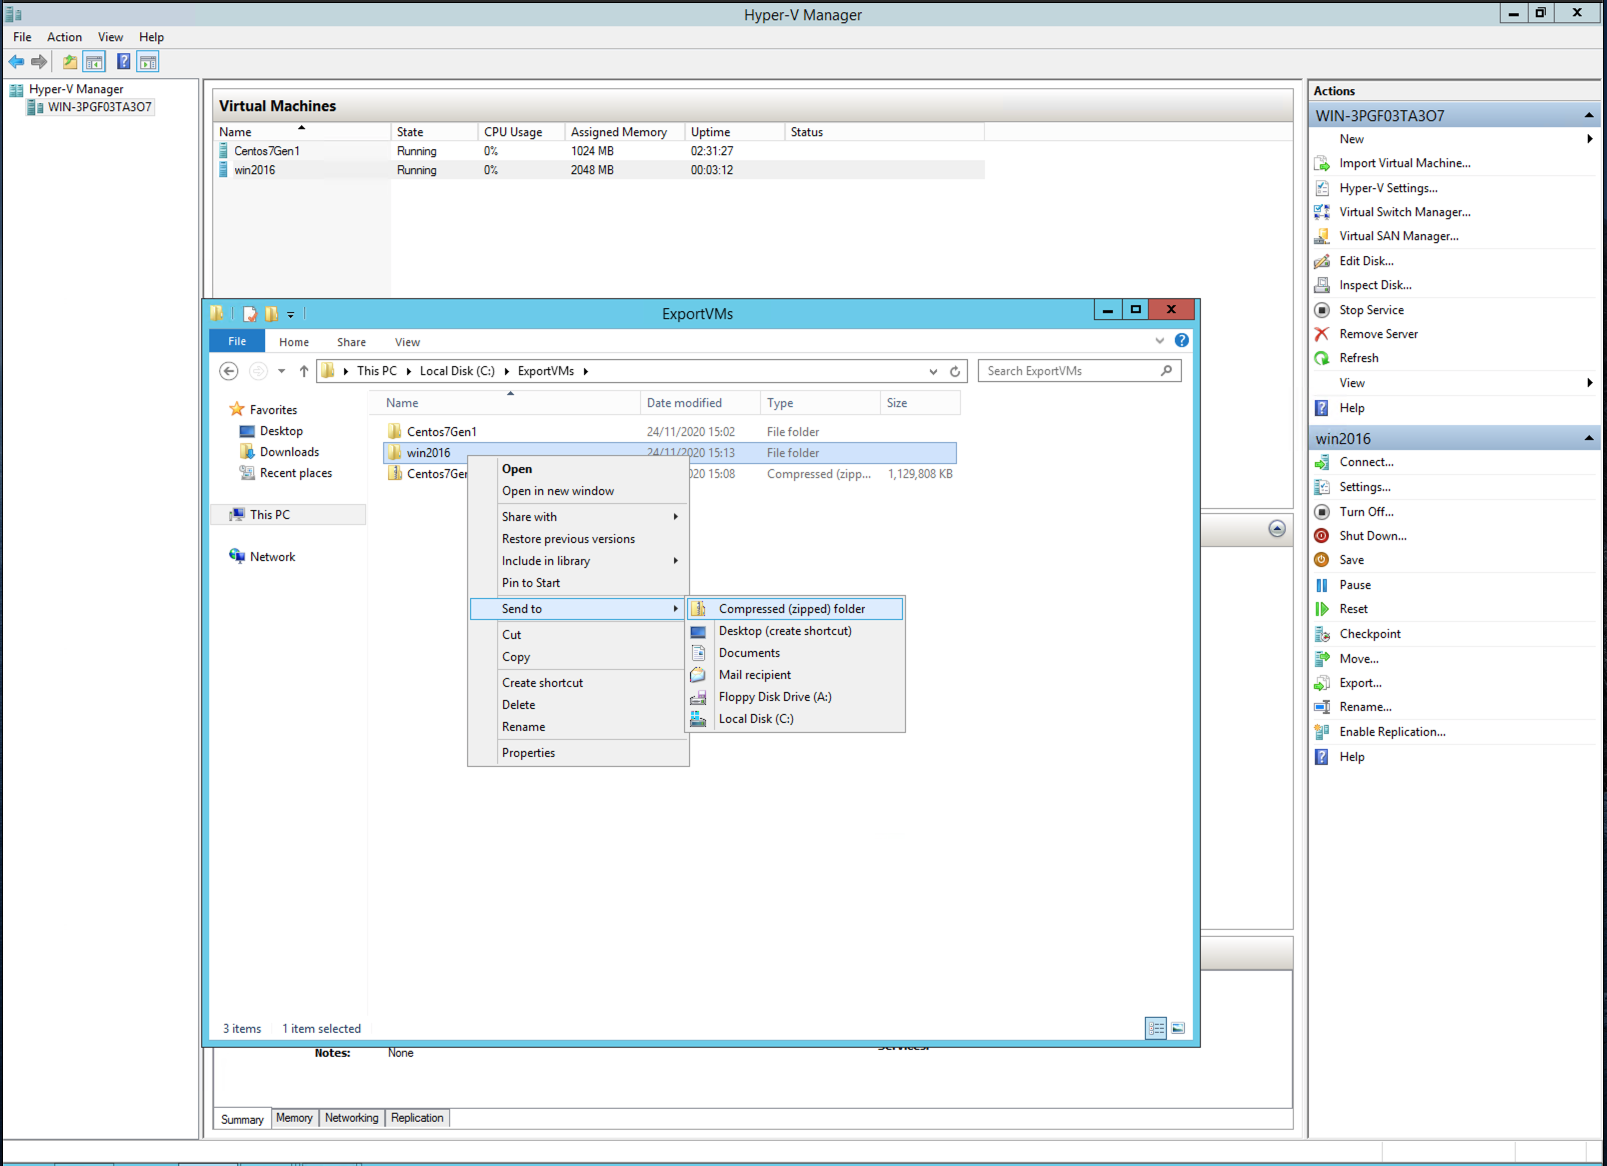
Hyper-V will create a directory in the given path with the VM instance metadata files and virtual disks.
Create a zip file from the folder. The compressed file is the file to use with the Import VM dialogue in the zCompute UI.
Importing the VM via the GUI
Navigate to Compute > Instances. From the top toolbar, click Import.
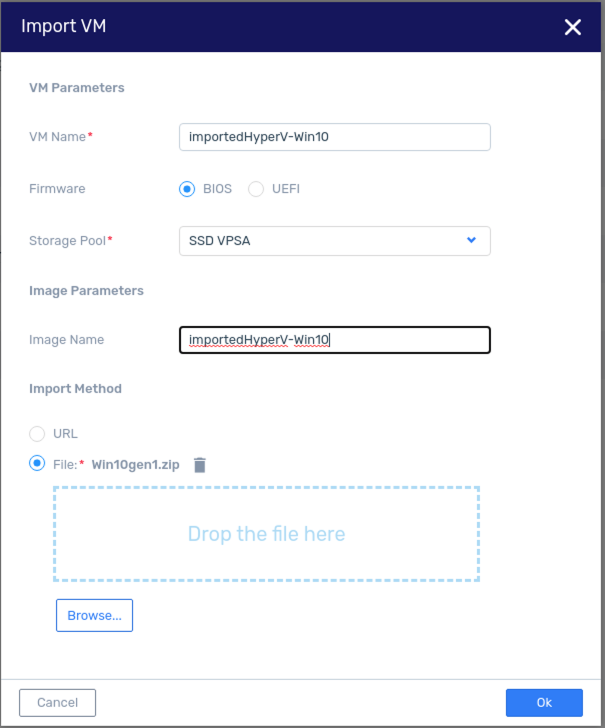
If the VM instance was Generation 1, select BIOS. If it was Generation 2, select UEFI.
Note
In Hyper-V, UEFI is typically the default for Generation 2.
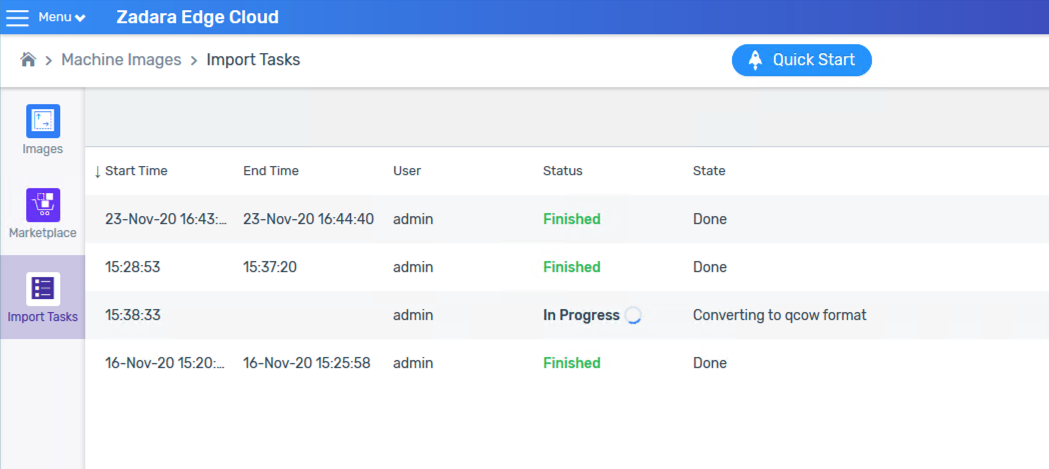
A window will be opened which displays the progress of the import task.
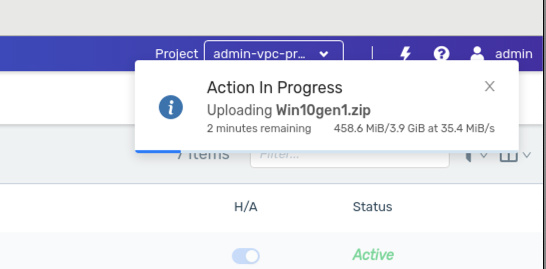
Progress of the task is also disaplyed in Machine Images > Import Tasks.
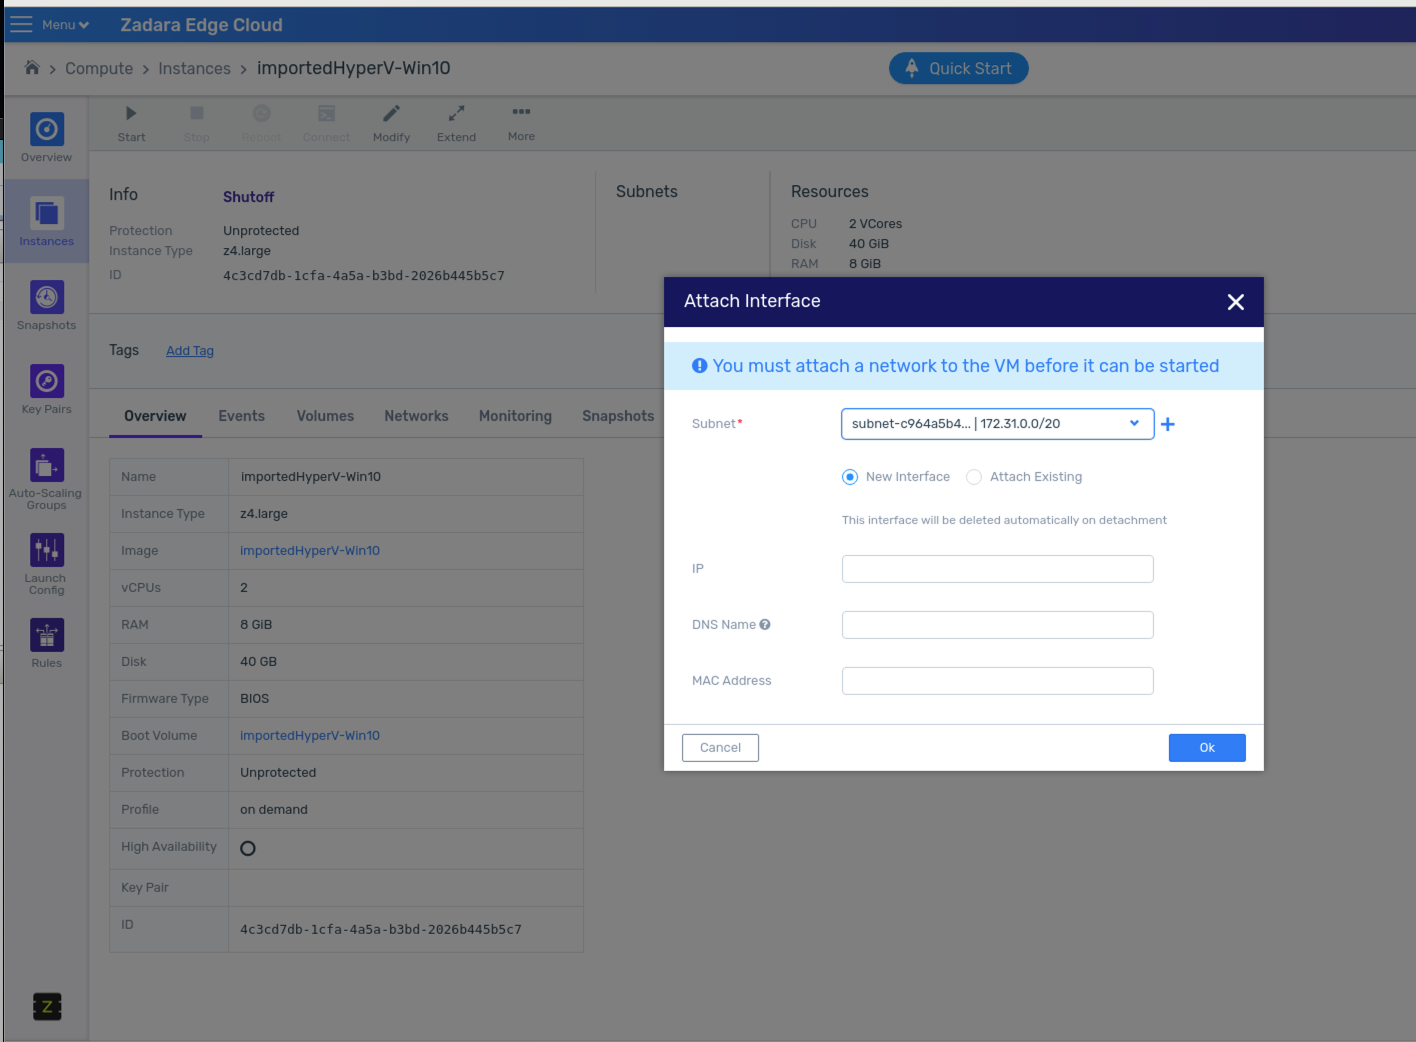
The first time the imported VM instances will be started, you will have to select the networks to be attached.
Resolving Issues after Migration
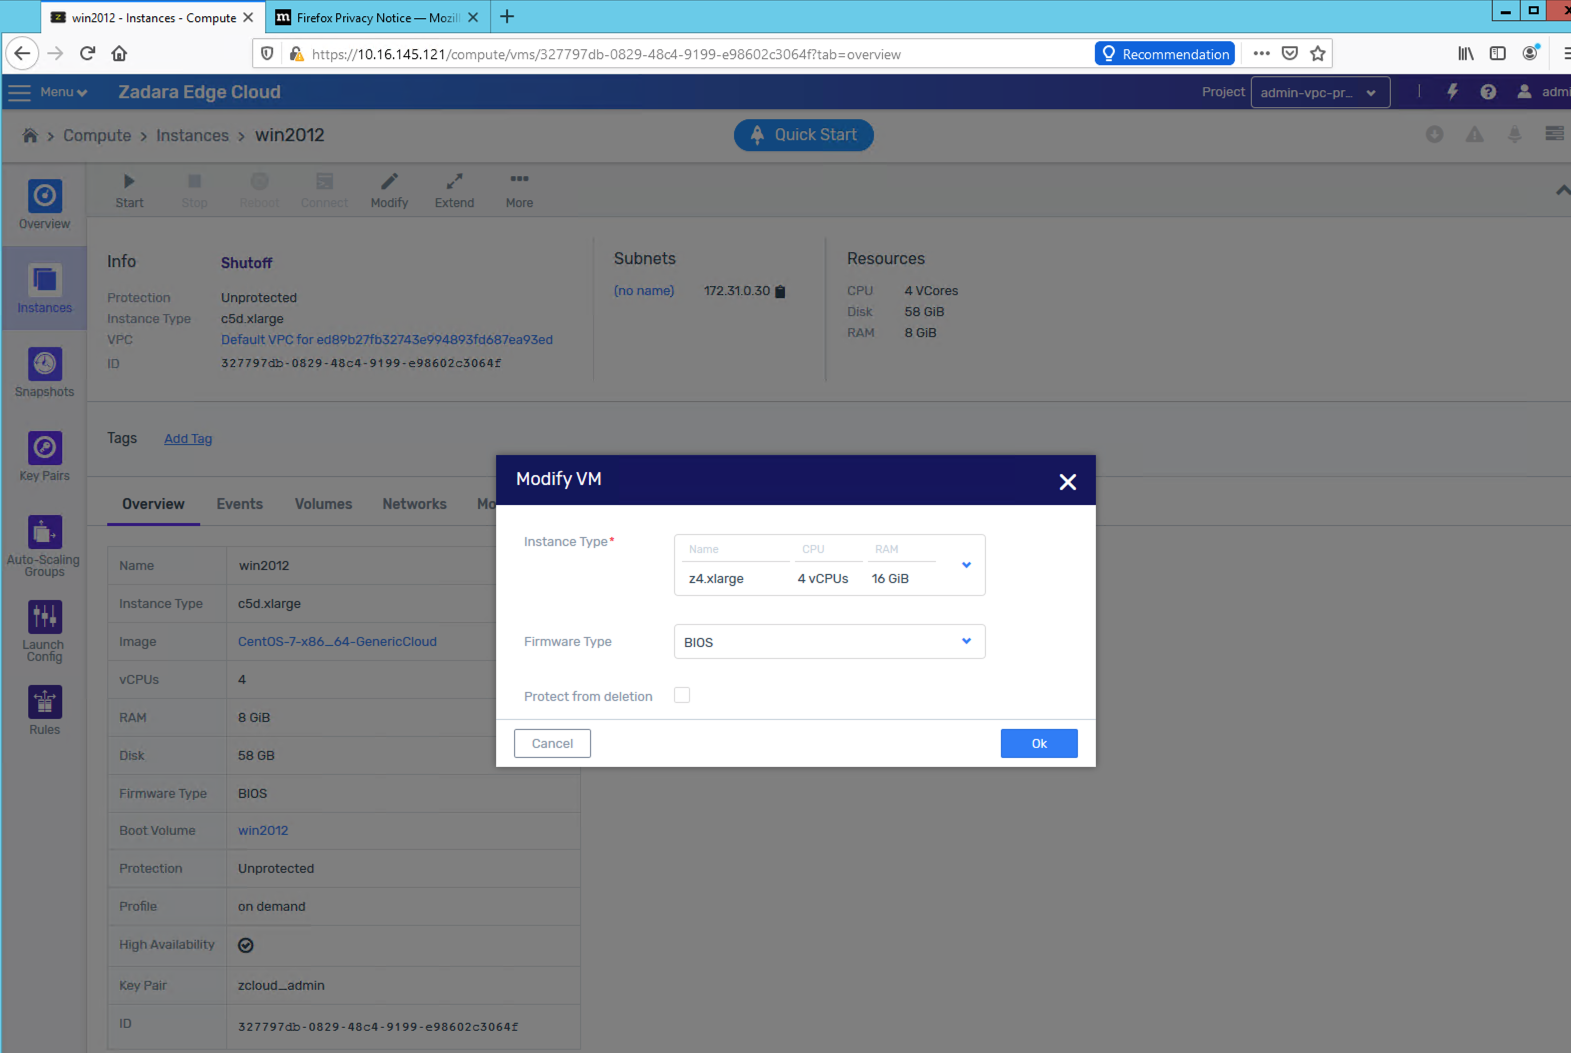
VM size is 1GB Memory and 1 vCPU
Different Hyper-V versions and subversions have different metadata structure. If the system fails to parse the file, it will create the above VM instance size.
To set the VM instance to the correct size, prior to the first boot modify it and select the correct instance type.
Blue screen after Initial Boot of Windows 10
Blue screen is typically due to failure of Windows to register the newly installed VIRTIO drivers.
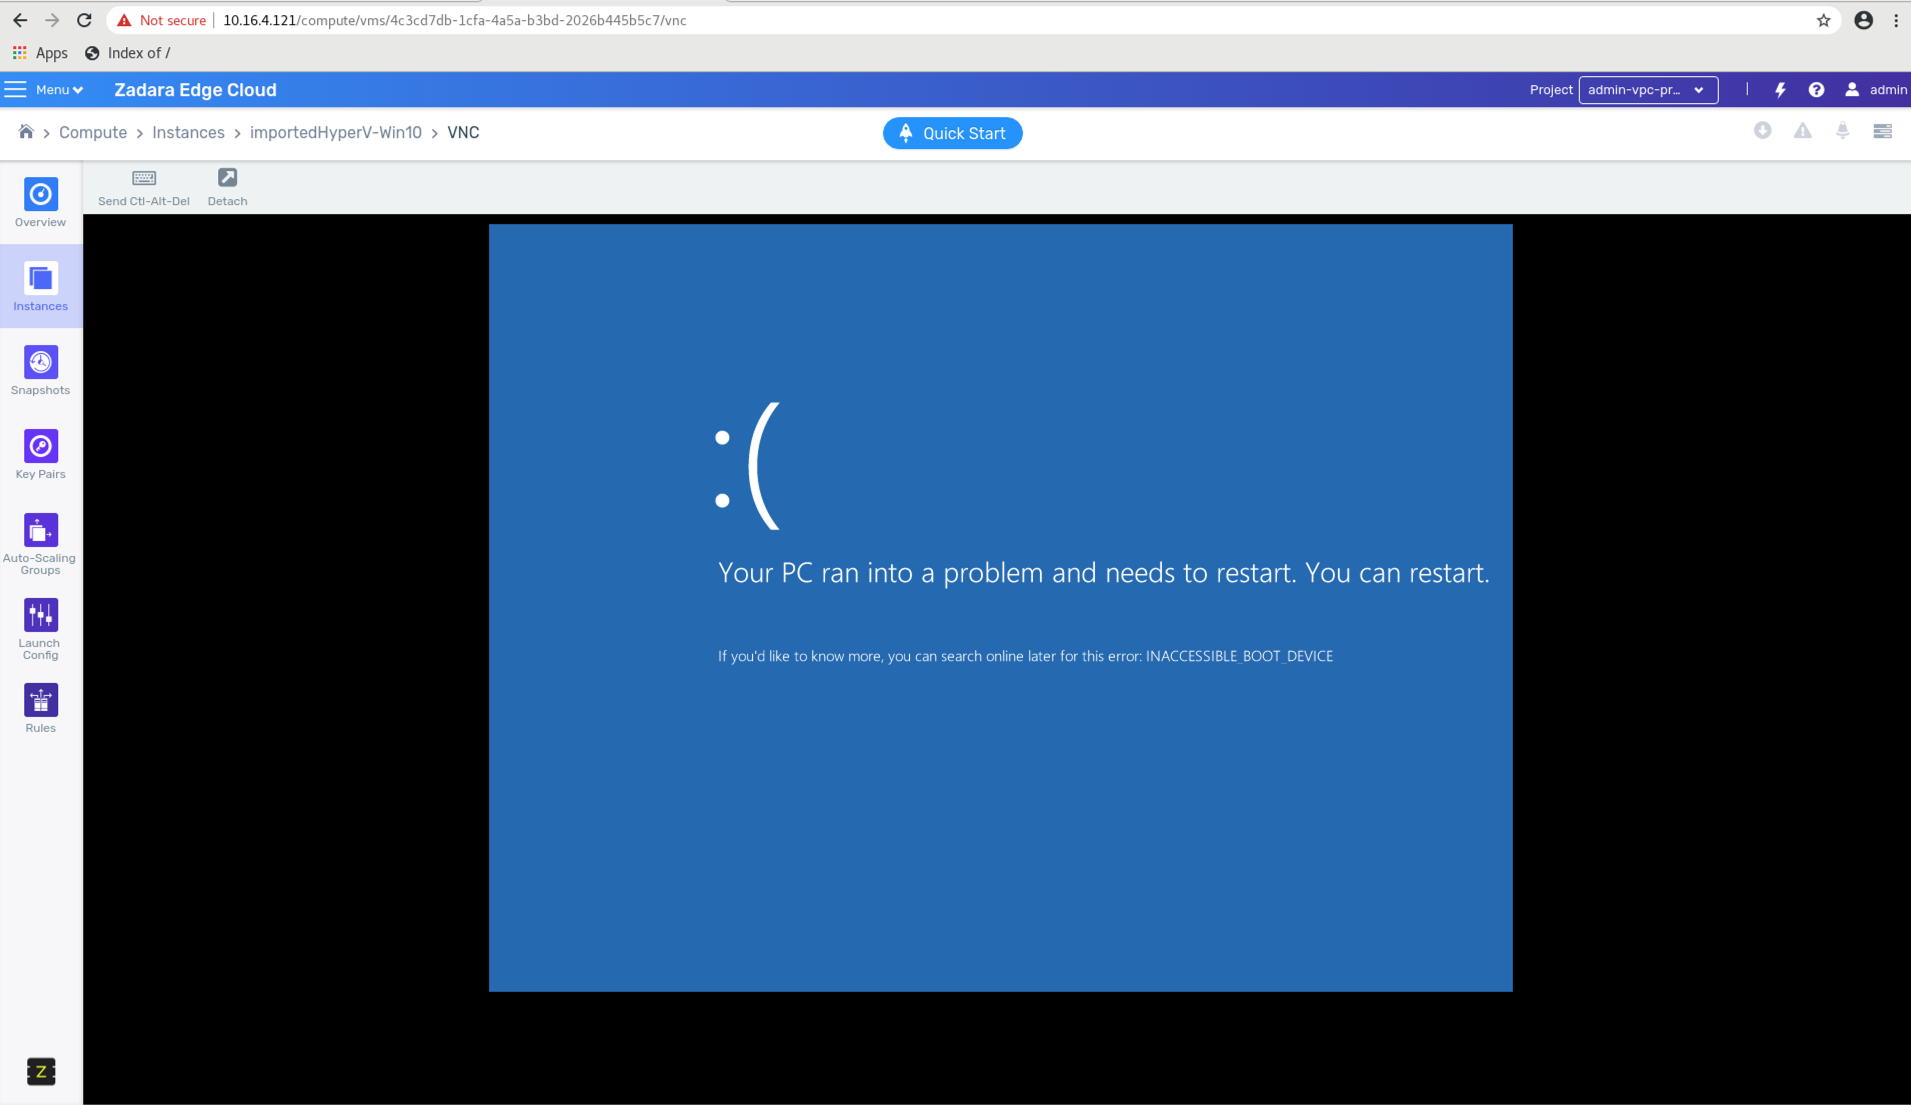
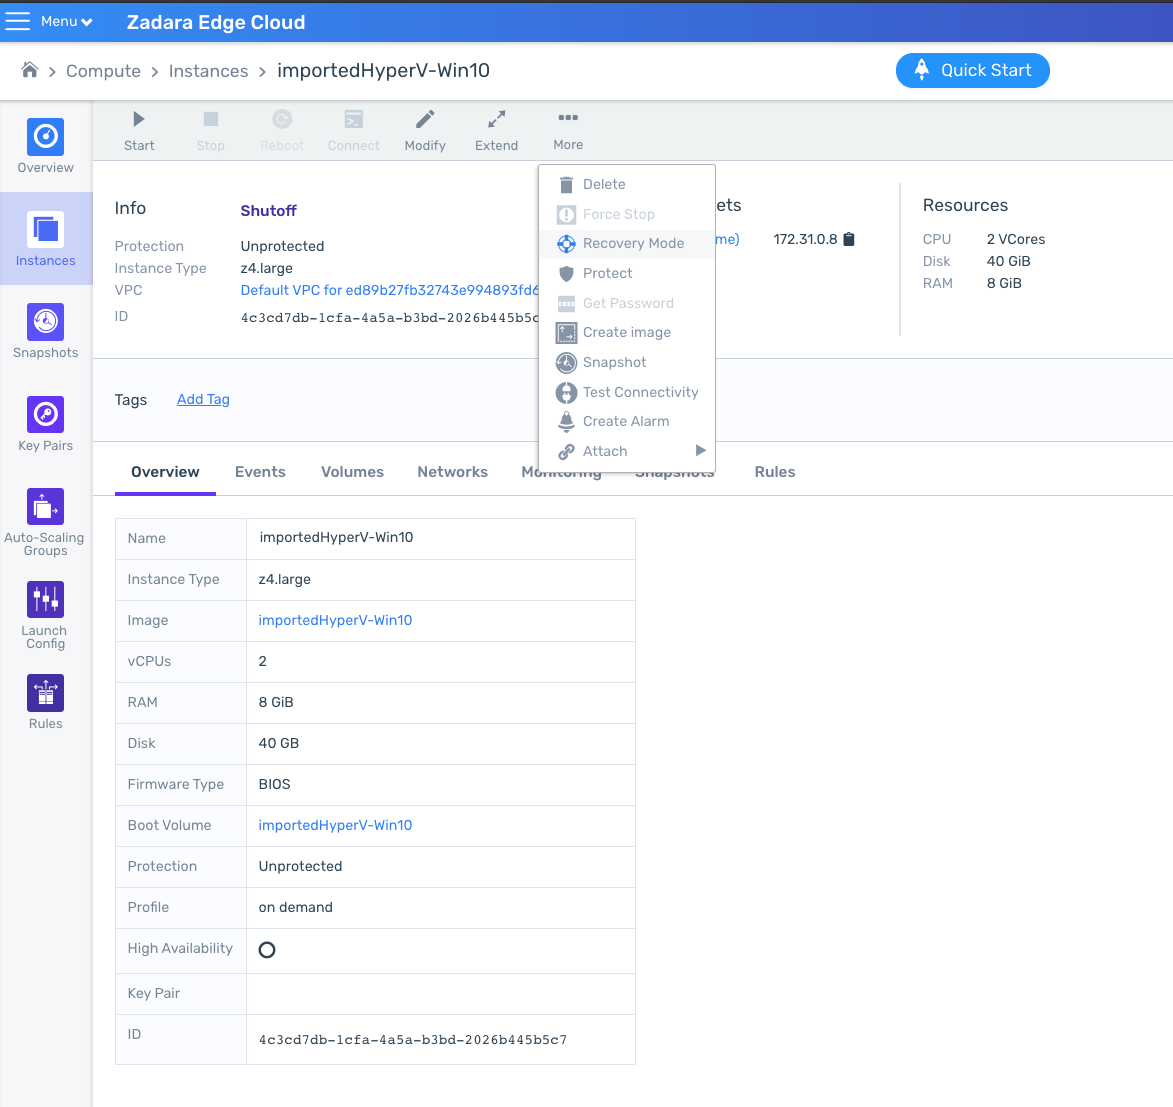
To resolve the issue, perform the following:
Use the recovery mode, which boots in IDE mode, but attaches a virtio disk to the VM instance. Once the virio driver is installed, it will be used on the next VM instance reboot.

If the network device was not recognized, see the following section..
If VxLAN support is needed in the overlay layer, change the MTU to 1450.
Note
These instructions may change in future cloud deployments.
Once the disk and network driver are installed, go to the start menu and shut down the VM.
In the ZCS UI, navigate to Compute > Instances, select the VM instance, and click Stop. Then try to restart the VM Instance normally.
Network Driver not Recognized on Windows 10 VM Instance
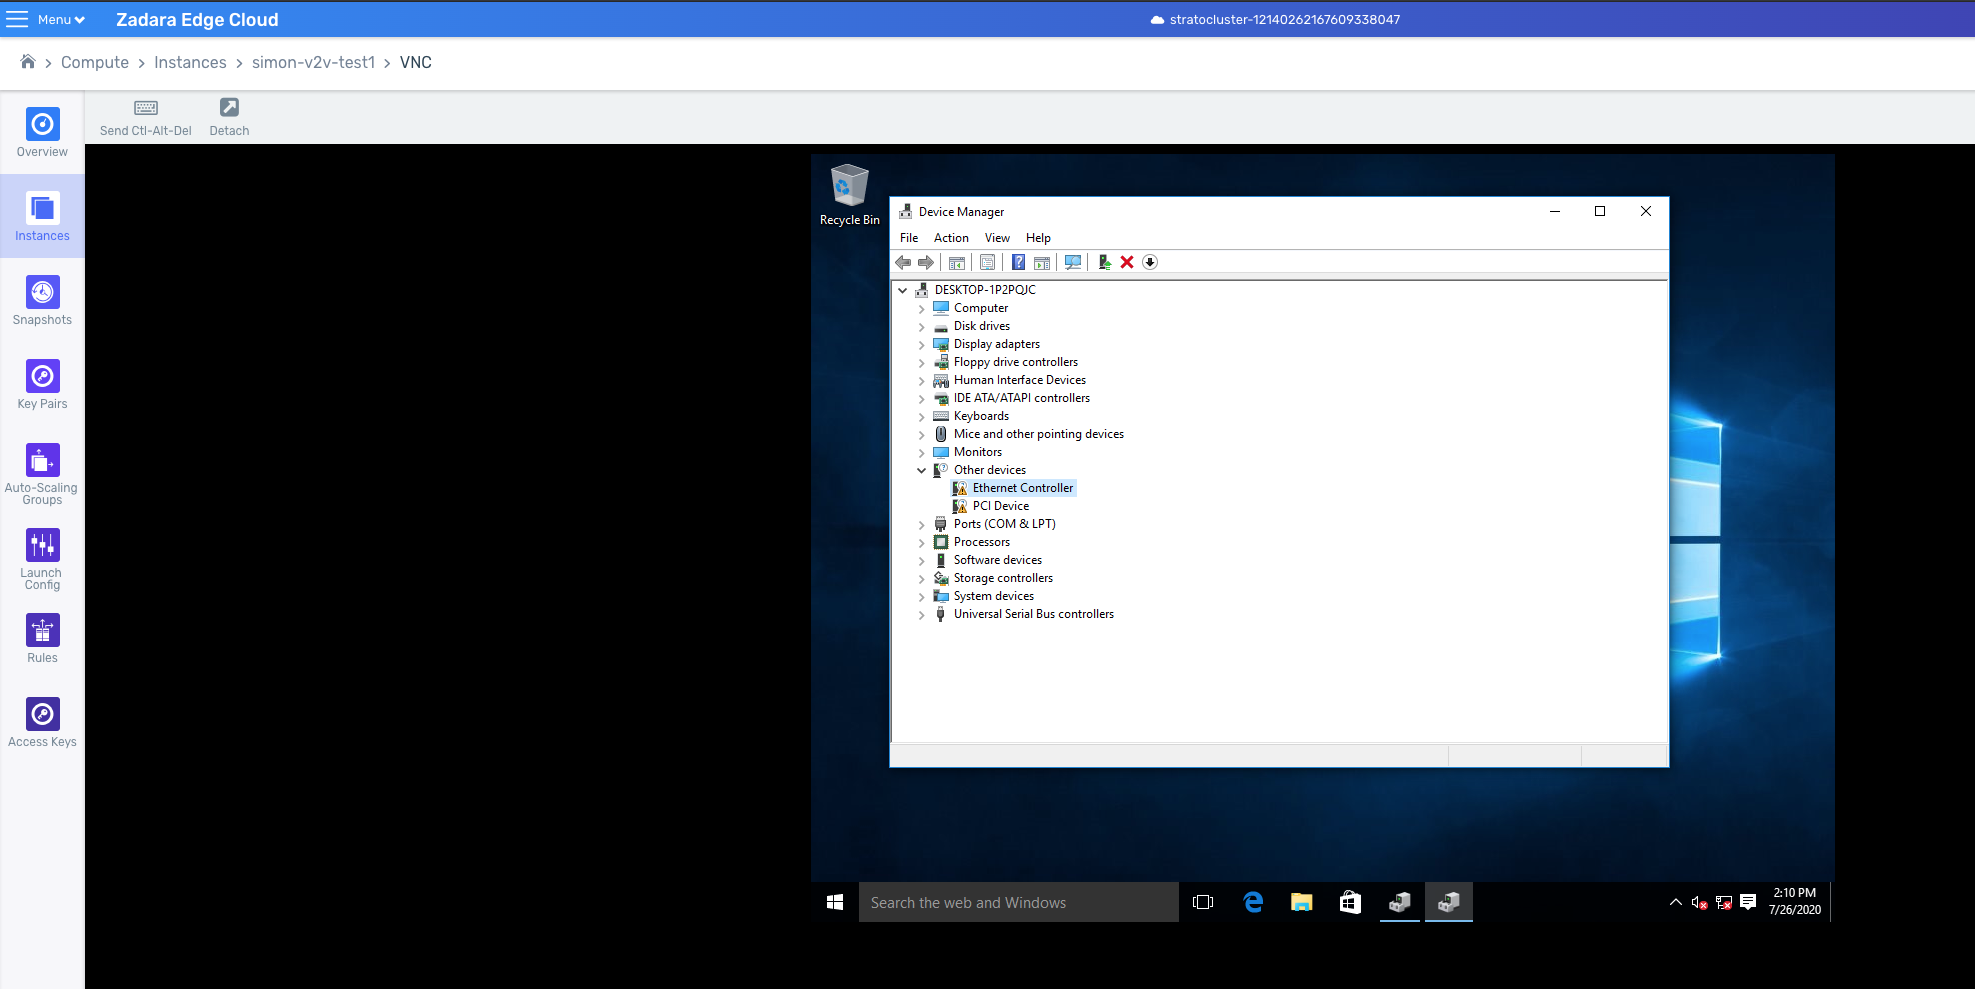
The migration tool should include the correct network driver on the VM instance. However in some cases of Windows, the network driver may not be recognized. In this case, after the first system boot, manually install the Ethernet Controller as follows:
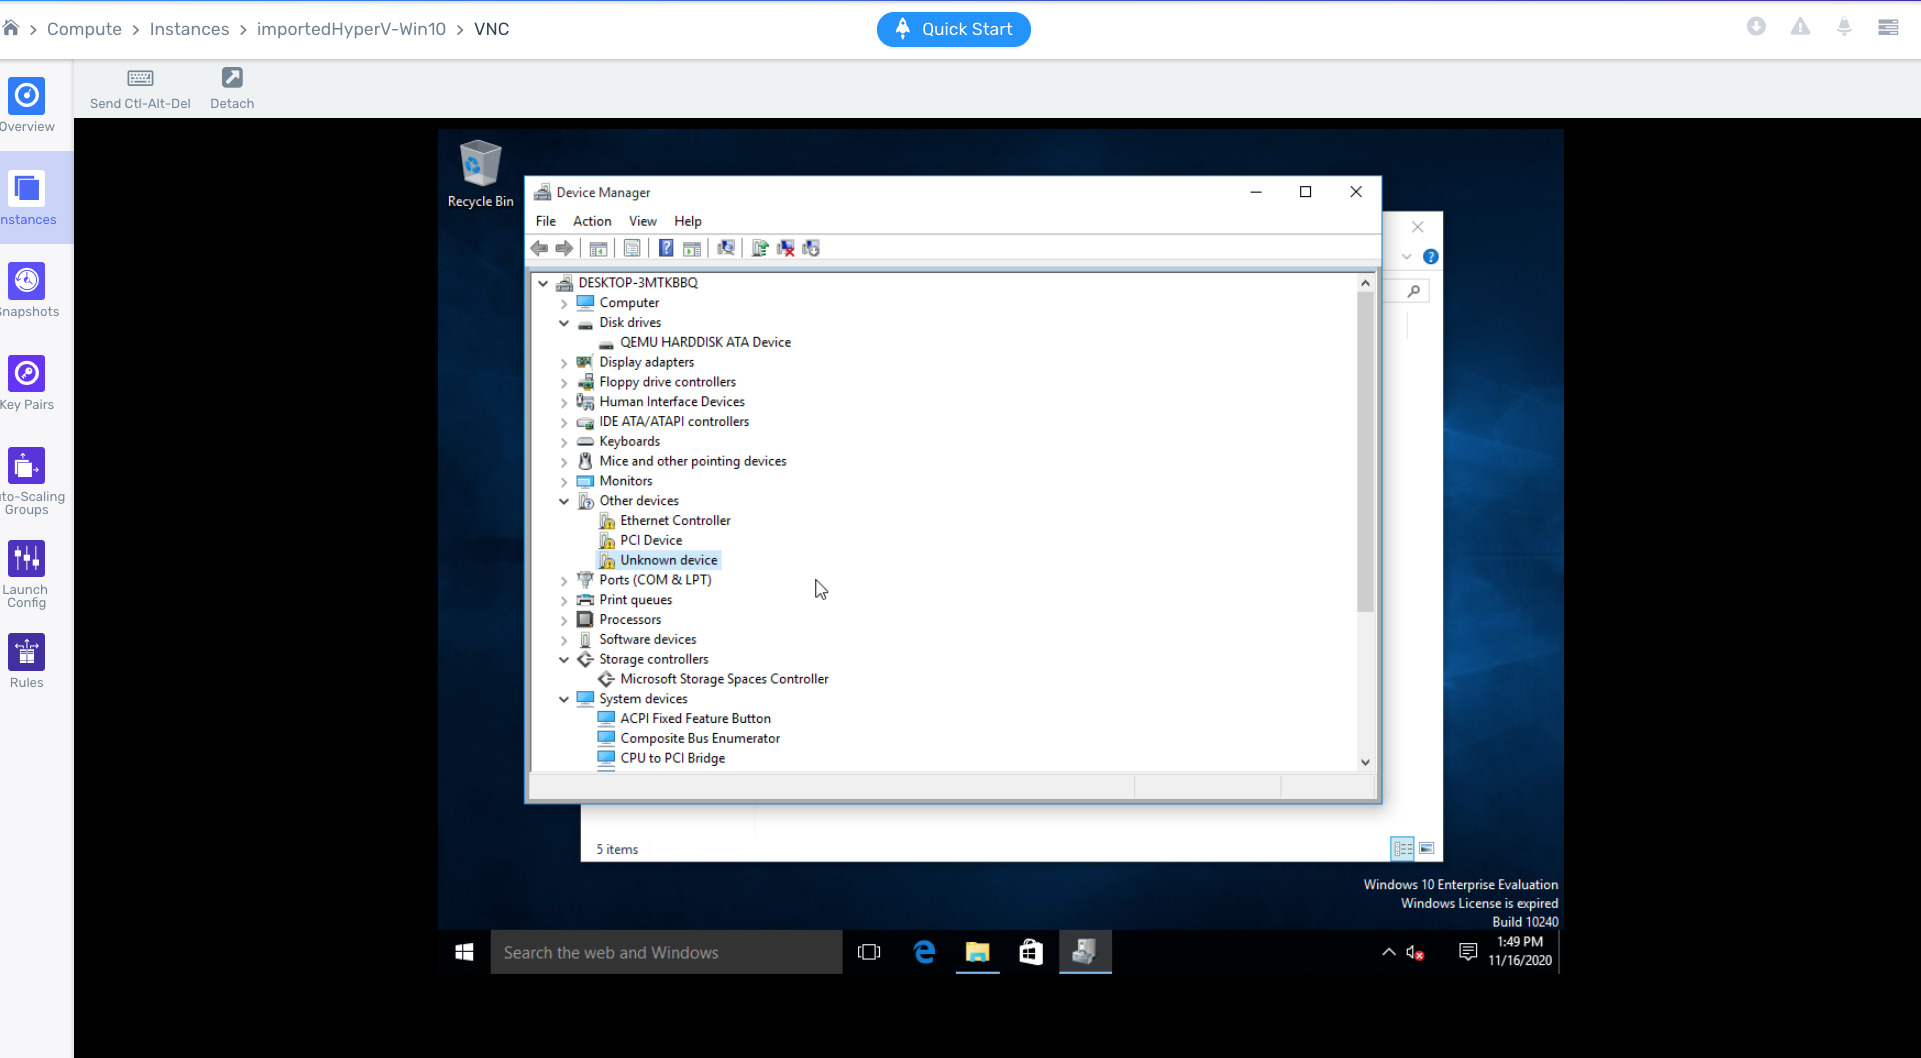
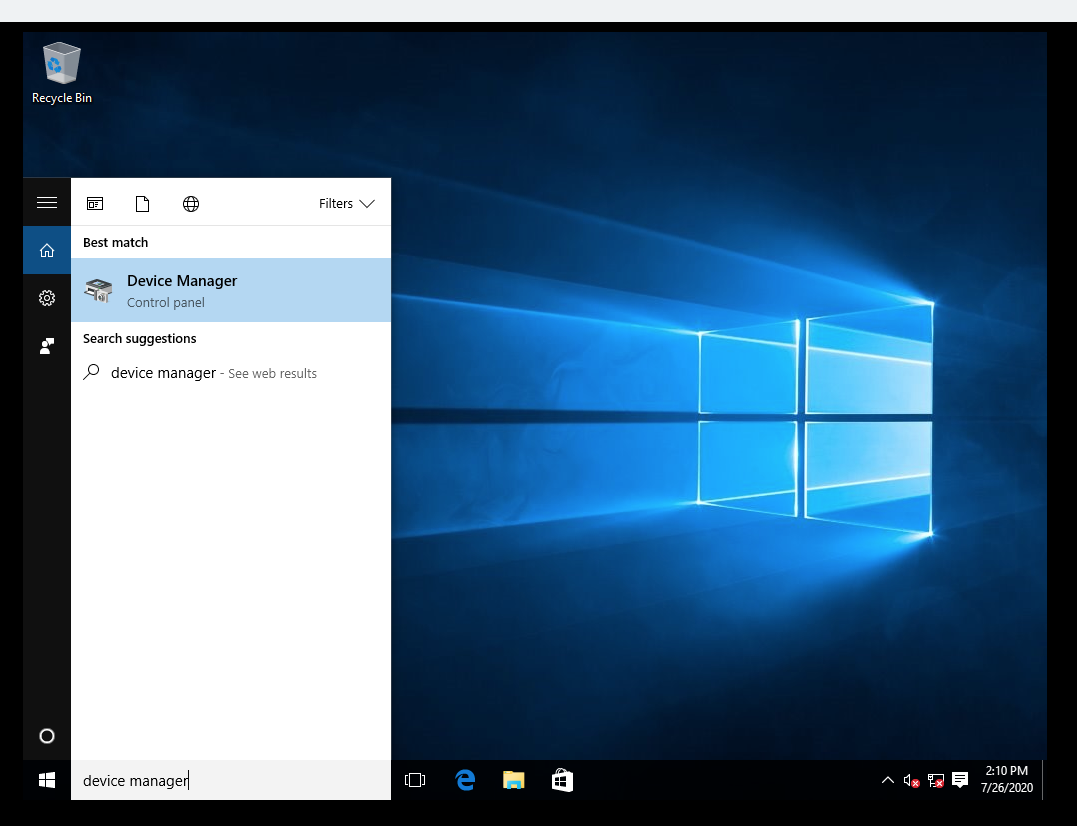
Access the Device Manager from the Windows Search Bar.
From Other devices select Ethernet Controller.
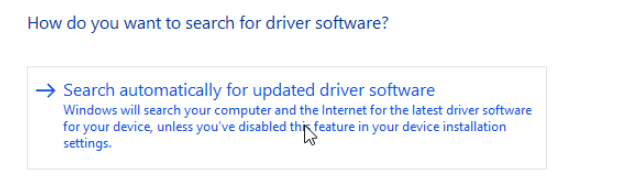
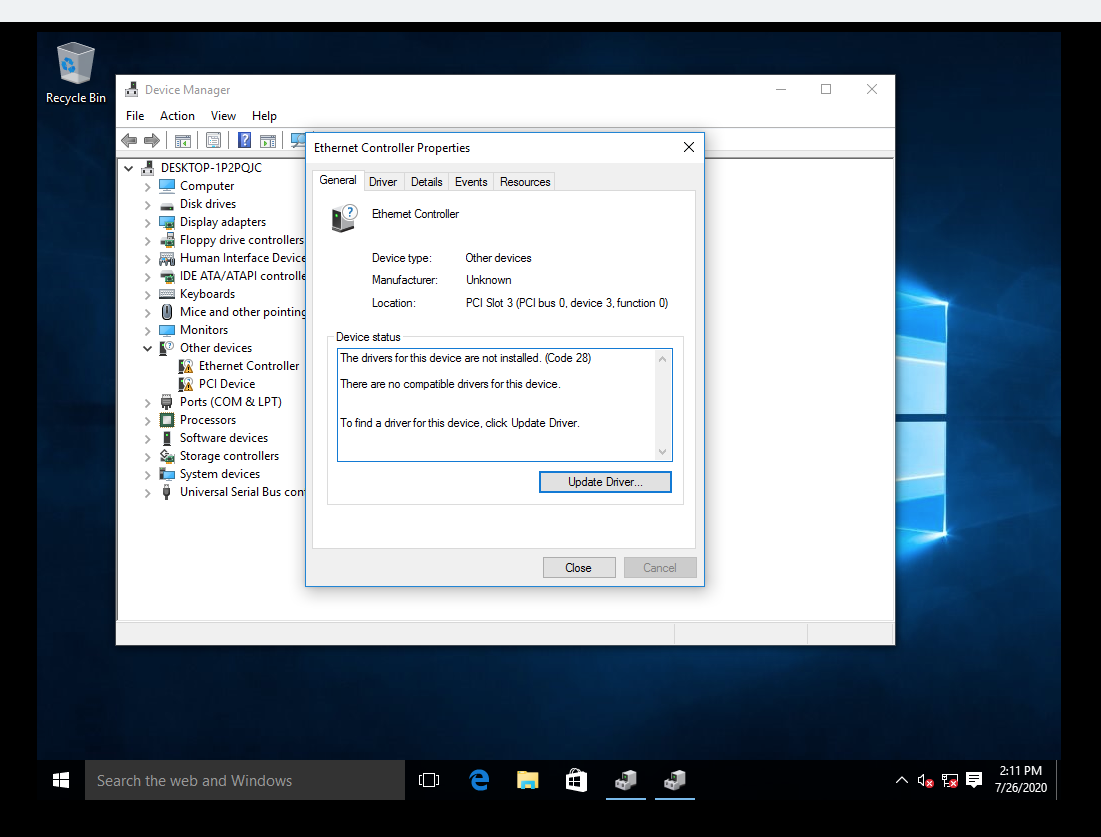
Click Update Driver.
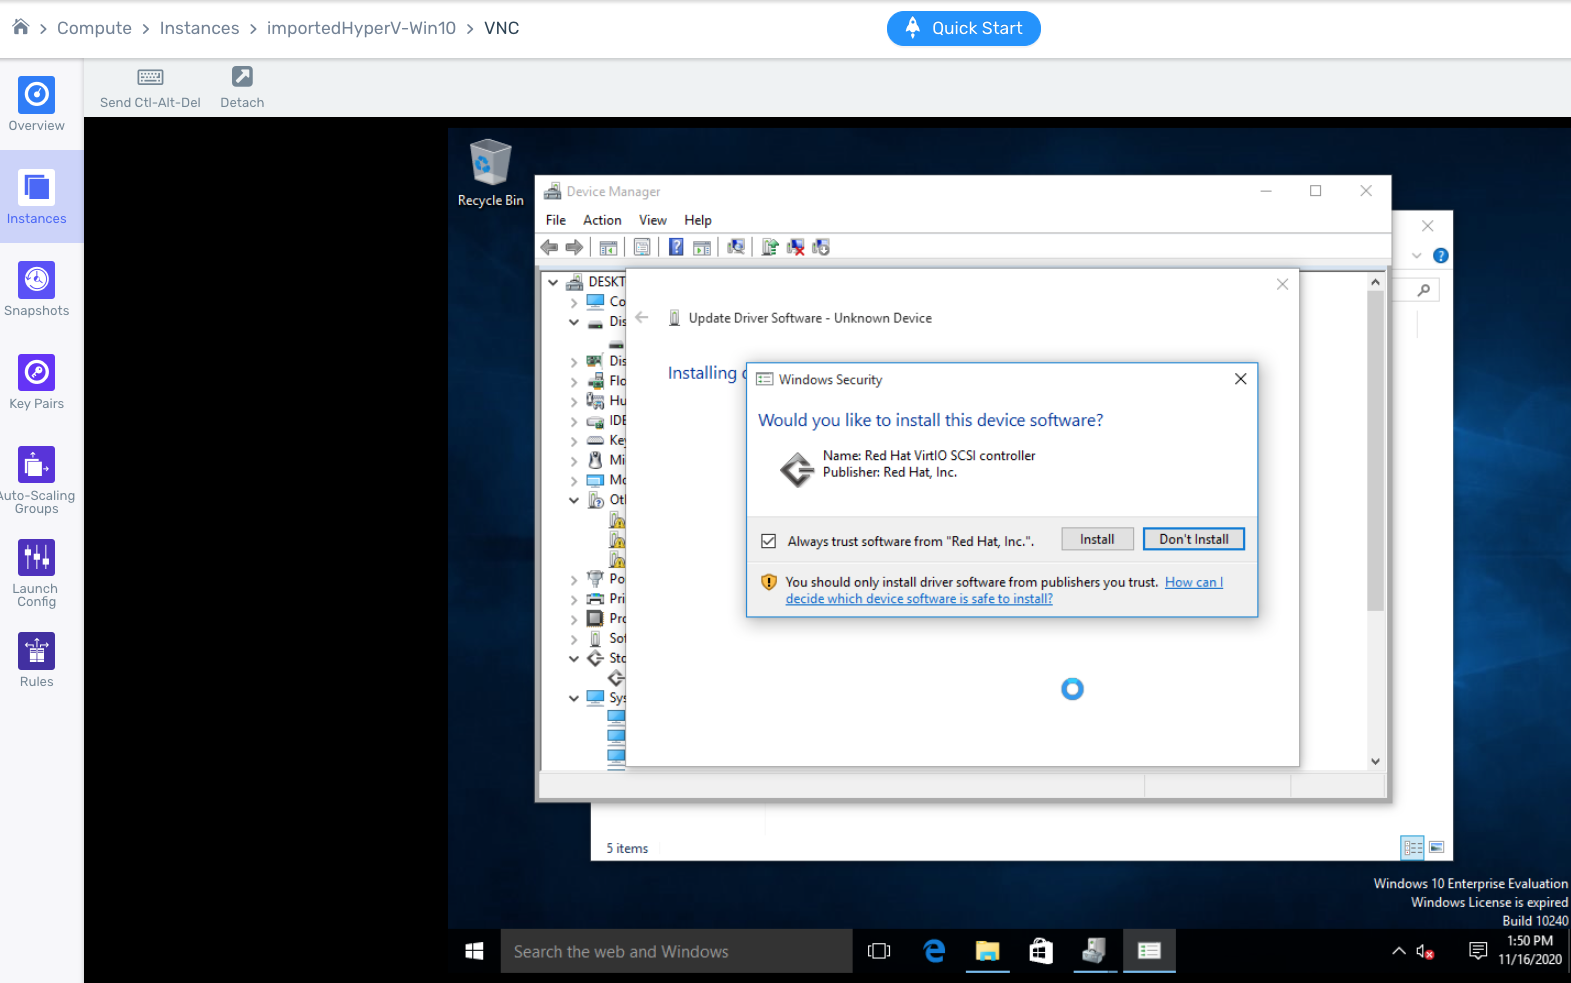
Select Search Automatically.
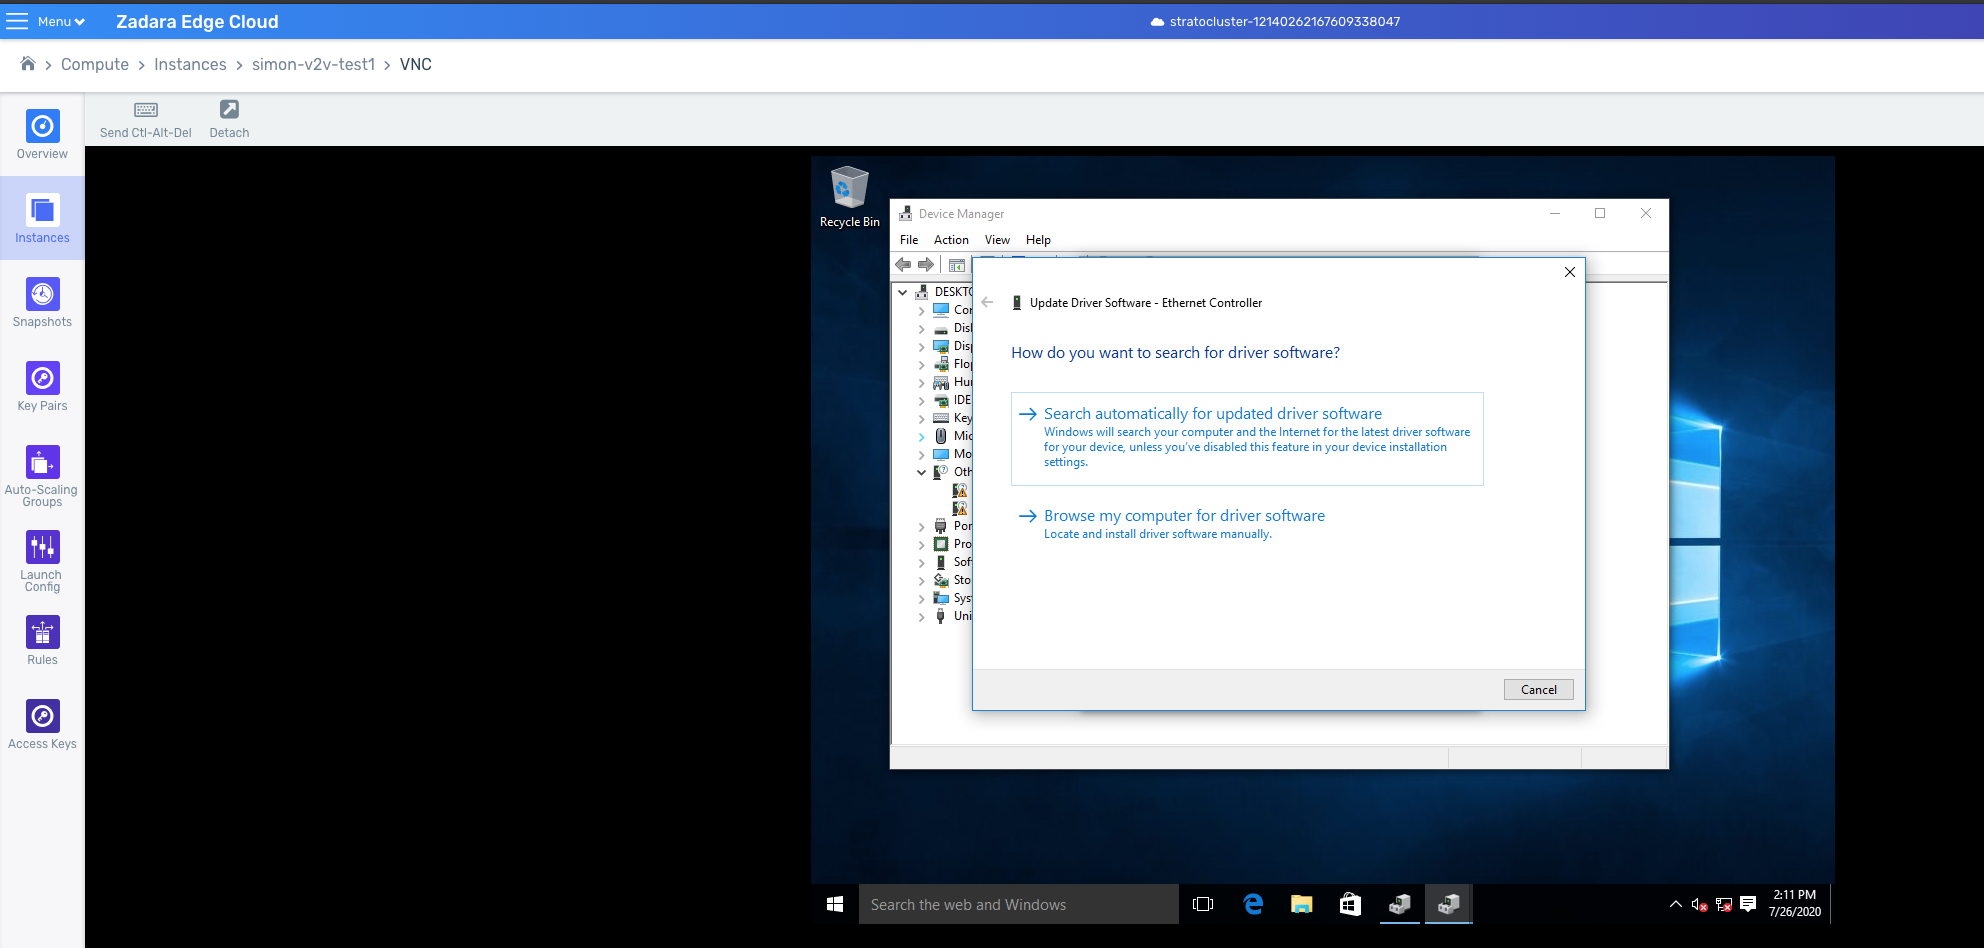
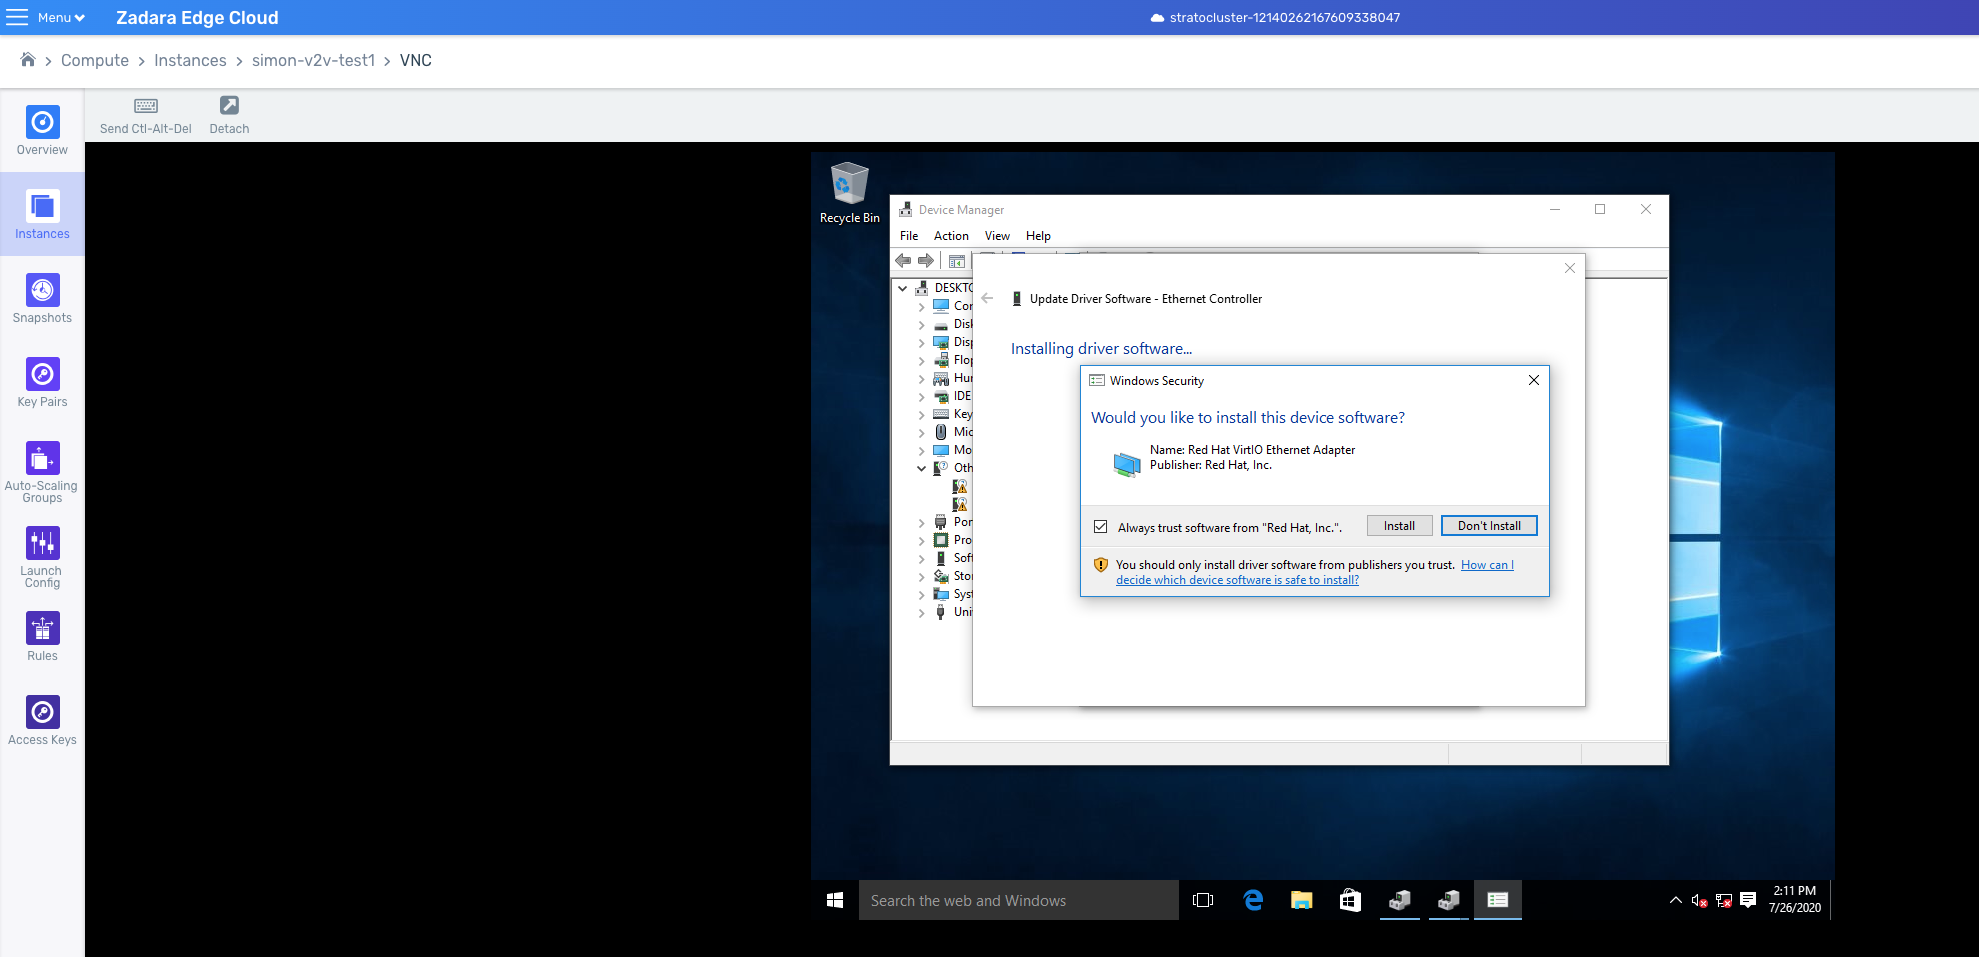
Install the found VirtIO drivers.
Recovery Screen after initial Boot on Windows 2016
TBD (still not verified)
Windows 2016 does not allow unsigned drivers by default.
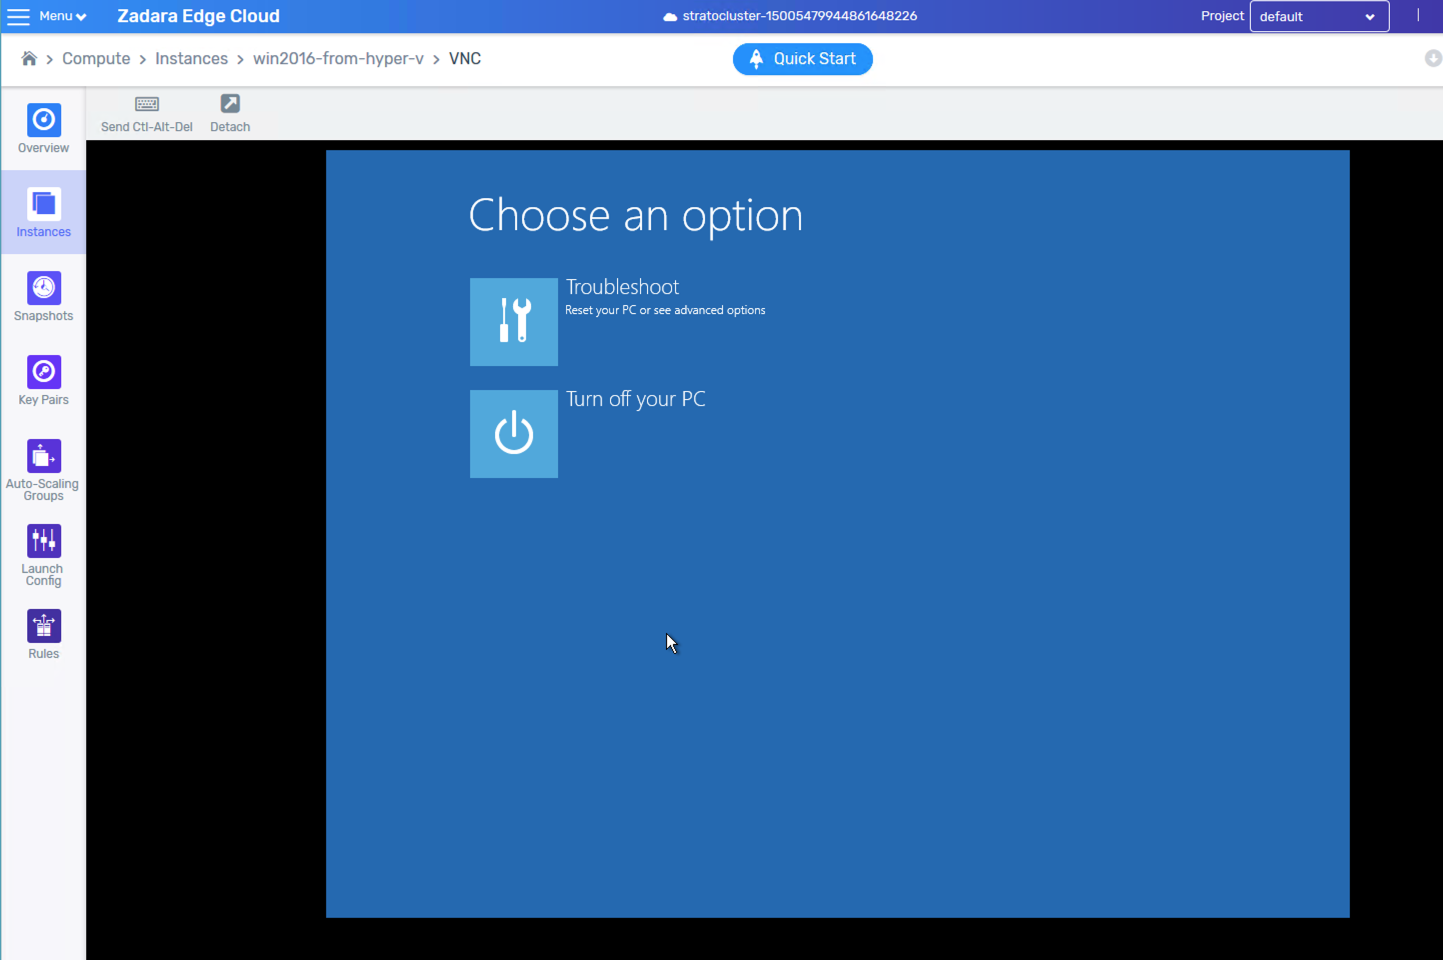
Boot the VM in recovery mode.
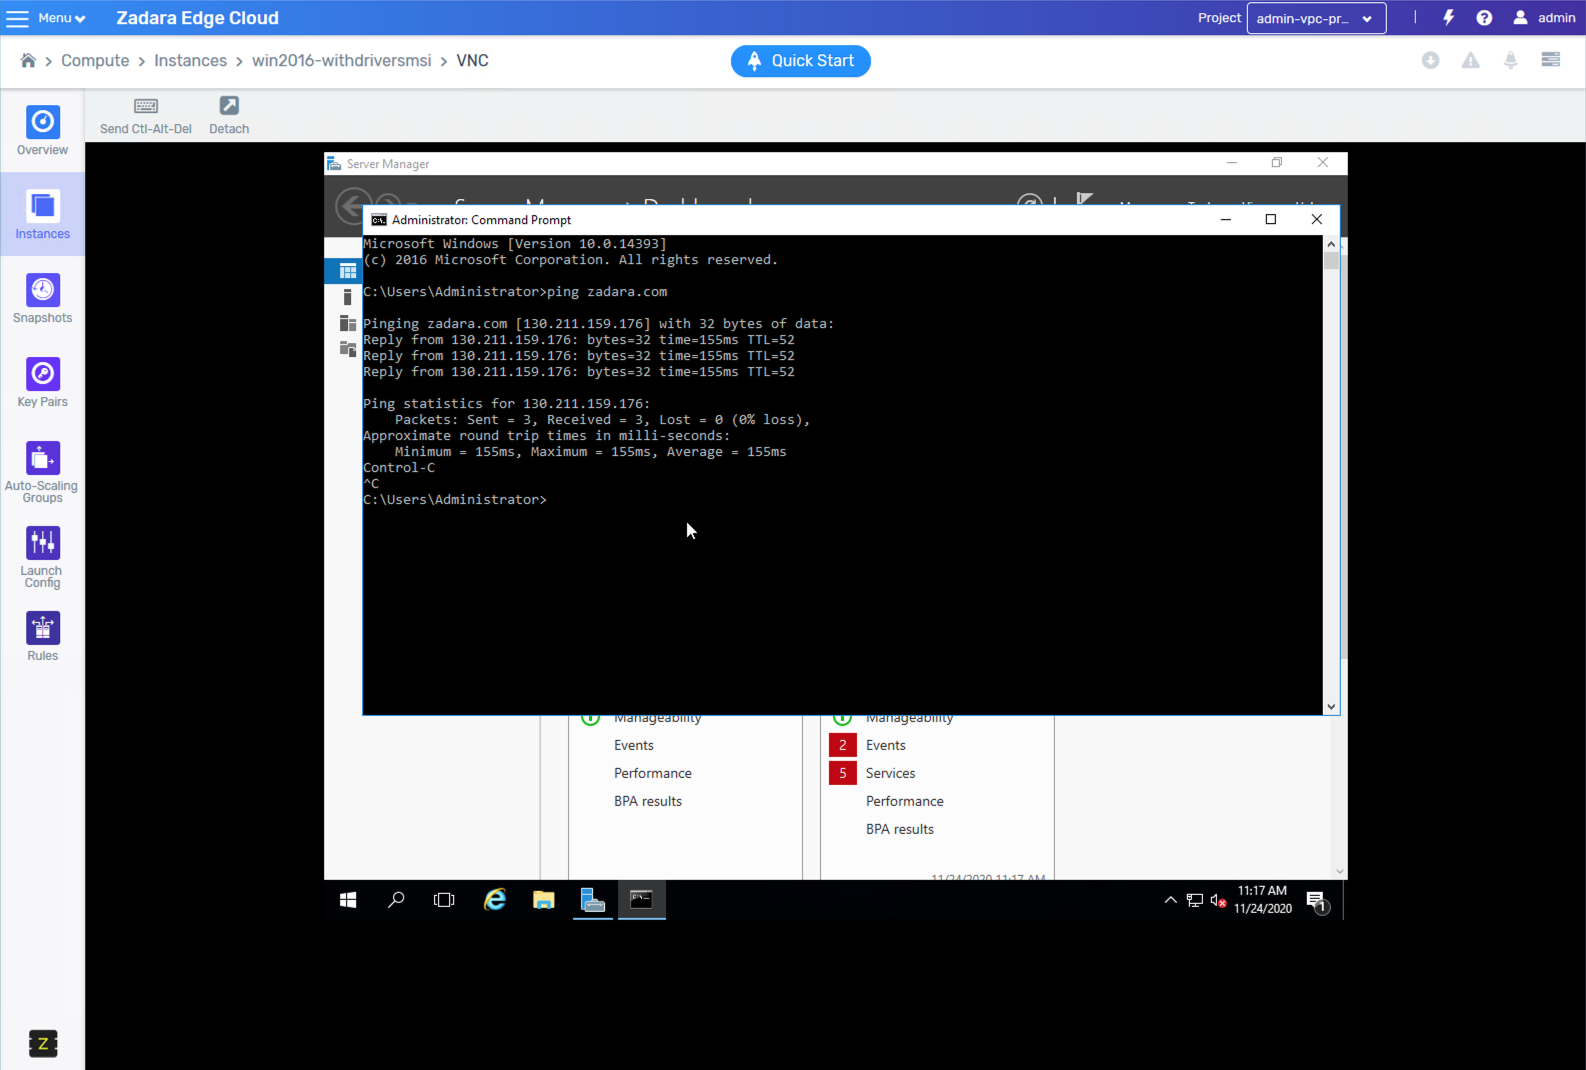
Locate the VirtIO MSI file placed in the VM prior to the migration.
Run the MSI to finish the installation. Note especially inclusion of the network, SCSI, and balloon drivers.
Power Off the VM instance.
Start the VM instance.
Migrating a VM from AWS EC2 to zCompute
The following section describes the process of migrating a VM instance from AWS EC2 to zCompute.
Preparing for VM Migration
AWS has clearly defined rules regarding VM instances may be migrated out of AWS EC2. The full set of rules can be found here . Essentially, an AWS VM instance that is being exported, must meet the following conditions:
Must not have been created from an AWS first-party AMI or Subscription AMI.
Must have only one disk (the boot drive) and only one Network Interface.
Must not use a fixed Virtual Hard Disk.
If the VM qualifies for export, do the following:
Shut down the VM via the AWS Console or AWS CLI.
Record the ID of the instance to be migrated via the AWS Console or CLI.
Verify that there is an S3 bucket in which to store the exported image before transferring it to zCompute.
This S3 bucket must be configured such that AWS ‘vm-import-export’ has List, Upload/Delete, and Manage Permissions rights.
Export from AWS EC2 to AWS S3
When exporting a VM instance from EC2, export the boot volume of the EC2 instance into a vmdk, contained in an OVA file, and formatted for the target platform of VMware. This export can be initiated with the following single AWS C2 CLI command.
aws ec2 create-instance-export-task --instance-id <Instance ID> \
 --target-environment vmware \
 --export-to-s3-task DiskImageFormat=vmdk,ContainerFormat=ova,S3Bucket=<Name of S3 Bucket>,S3Prefix=<Prefix>
Where:
<Instance ID> is the ID string of the instance exported, as noted earlier.
–target-environment vmware - When exporting an OVA to be imported into zCompute, the –target-environment should always be ‘vmware’.
<Name of S3 Bucket> is the name of the S3 Bucket to use in order to house the exported VM for transfer to zCompute.
<Prefix> is the export process defined by some alphanumeric string.
The exported instance will be named ‘<Prefix>-<Instance ID>’ in the S3 Bucket of your choice. So, for example, an ID of “i-1234546” and a prefix of “exported” would result in an exported object with the name “exported-i-123456.ova” in your S3 Bucket.
Complete AWS documentation for this command can be found here.
Monitoring the Export Progress
Once the export is initiated, progress can be monitored using the ExportTaskID and the following command:
aws ec2 describe-export-tasks --export-task-ids <ExportTaskID>
Note
Progress percentage is not displayed. Wait for the State to become Complete. The time till Complete can vary depending on the current AWS activity and the overall size and complexity of the VM instance being exported.
Preparing the OVA for Import
Once the export has been completed, locate the <Prefix>-<InstanceID>.ova object in your S3 bucket.
If public access to the OVA object is allowed:
In the Properties tab, set the permissions to allow Everyone to Open/Download”. This allows zCompute to import the file.
Locate the object URL in the Properties page of the exported ova file in S3, and record this URL for use in the zCompute Create Image workflow.
If public access to the file is not provided:
Download the image from S3.
Importing the OVA image into zCompute and Converting it to a VM Instance
Login to zCompute as a Tenant Admin or Admin.
Navigate to Compute > Instances and click Import.
In the displayed Import VM window, enter the following:
VM Name - name of VM instance to be spawned from the image.
Firmware - select BIOS or UEFI.
Storage Pool - storage pool to be used for VM instance.
Image Name - image name to be used after import in zCompute.
Note
As an Admin User, you may also specify that the image should be Public and available to all users in the cluster, rather than just being available to the users of the project of the logged-in user.
Import Method
URL - If public access to the OVA object was allowed while preparing OVA for import, enter the URL of the S3 object into the URL field.
File - If public access to the OVA object was not allowed while preparing OVA for import, either drop the file in the appropriate area or browse for file location on your system.
Click OK.
Once import is completed, the following new entities will be displayed in zCompute:
A new VM instance will appear in list in Compute > Instances.
The boot volume of the new VM will appear in list in Storage > Block Storage. This volume has the same name as the VM instance.
The image of the new VM will appear in list in Machine Images > Image.
Migrating VMs from zCompute to AWS
To migrate a VM instance from zCompute to AWS:
Attach the cloned volume to a physical server (a stratonode).
If needed, launch a new EC2 instance from this newly created AWS AMI. The AWS AMI is based on your original zCompute VM.
Clone a Volume
To clone the boot volume during migration, use either zCompute, or ssh into a stratonode and run the following CLI commands.
First get the
sourceId, using the volume list command:[root@stratonode0 ~]# symp volume list -f json -c name -c sourceId ... { "sourceId": "665a9c31-11e0-473b-a792-7b110684dd36", "name": "VM1" } ...
In this example, the name of the VM is VM1, so the
sourceIdis 665a9c31-11e0-473b-a792-7b110684dd36.Clone the boot volume using the
sourceIdand the volume create command with the following values:sourceIdClone Name
[root@stratonode0 ~]# symp volume create --source-id 665a9c31-11e0-473b-a792-7b110684dd36 my_new_copied_VM1_boot_disk
+---------------------+--------------------------------------+
| Field               | Value                                |
+=====================+======================================+
| id                  | 7b02f685-d48c-4b3f-93f8-e9f5cf4e4756 |
+---------------------+--------------------------------------+
| name                | my_new_copied_VM1_boot_disk          |
+---------------------+--------------------------------------+
| status              | ready                                |
+---------------------+--------------------------------------+
| storagePool         | a93b9655-cc32-4734-9766-7fe2a5121d52 |
+---------------------+--------------------------------------+
| projectID           | 7275c7cd700b43ee974fc107dbe1a816     |
+---------------------+--------------------------------------+
| attachedTo          | None                                 |
+---------------------+--------------------------------------+
| taskThroughputMbps  | None                                 |
+---------------------+--------------------------------------+
| attachedHost        | None                                 |
+---------------------+--------------------------------------+
| attachedDevice      | None                                 |
+---------------------+--------------------------------------+
| createdAt           | 2017-05-16T19:55:52Z                 |
+---------------------+--------------------------------------+
| size                | 1.0                                  |
+---------------------+--------------------------------------+
| accessMode          | read-write                           |
+---------------------+--------------------------------------+
| userID              | admin                                |
+---------------------+--------------------------------------+
| taskProgress        | None                                 |
+---------------------+--------------------------------------+
| health              | healthy                              |
+---------------------+--------------------------------------+
| attachmentType      | None                                 |
+---------------------+--------------------------------------+
| deletedAt           | None                                 |
+---------------------+--------------------------------------+
| description         | None                                 |
+---------------------+--------------------------------------+
| tags                |                                      |
+---------------------+--------------------------------------+
| replicationSourceID | None                                 |
+---------------------+--------------------------------------+
| properties          | {}                                   |
+---------------------+--------------------------------------+
| info                | None                                 |
+---------------------+--------------------------------------+
| bootable            | True                                 |
+---------------------+--------------------------------------+
| sourceId            | 665a9c31-11e0-473b-a792-7b110684dd36 |
+---------------------+--------------------------------------+
| attachedMode        | None                                 |
+---------------------+--------------------------------------+
| attachedAt          | None                                 |
+---------------------+--------------------------------------+
Note the cloned volume’s id which in this example is
7b02f685-d48c-4b3f-93f8-e9f5cf4e4756.
Attach Cloned Volume to Physical Server
To attach the cloned volume to a physical server (a stratonode), use the command mancala volumes attach-to-host with the following values:
Volume
idName of physical server
For example, to attach the volume to stratonode0.node.strato, use the following
command:
[root@stratonode0 ~]# mancala volumes attach-to-host 7b02f685-d48c-4b3f-93f8-e9f5cf4e4756 stratonode0.node.strato
+---------------------+------------------------------------------------------------------------------------------------------------------------------------------------------------+
|       Property      |                                                                                        Value                                                               |
+=====================+============================================================================================================================================================+
|      accessMode     |                                                                                      read-write                                                            |
+---------------------+------------------------------------------------------------------------------------------------------------------------------------------------------------+
|     attachments     | [{'computeID': None, 'ownerToken': None, 'hosts': , 'mode': 'read-write', 'time': 1494964939, 'owner': None, 'mountpoint': u'/dev/nbd63', 'type': 'hbd'}]  |
+---------------------+------------------------------------------------------------------------------------------------------------------------------------------------------------+
|    bitmapVolumeID   |                                                                                         None                                                               |
+---------------------+------------------------------------------------------------------------------------------------------------------------------------------------------------+
|       bootable      |                                                                                         True                                                               |
+---------------------+------------------------------------------------------------------------------------------------------------------------------------------------------------+
|      createdAt      |                                                                                      1494964552                                                            |
+---------------------+------------------------------------------------------------------------------------------------------------------------------------------------------------+
|      deletedAt      |                                                                                         None                                                               |
+---------------------+------------------------------------------------------------------------------------------------------------------------------------------------------------+
|     description     |                                                                                         None                                                               |
+---------------------+------------------------------------------------------------------------------------------------------------------------------------------------------------+
|        health       |                                                                                       healthy                                                              |
+---------------------+------------------------------------------------------------------------------------------------------------------------------------------------------------+
|          id         |                                                                         7b02f685-d48c-4b3f-93f8-e9f5cf4e4756                                               |
+---------------------+------------------------------------------------------------------------------------------------------------------------------------------------------------+
|      isTracked      |                                                                                        False                                                               |
+---------------------+------------------------------------------------------------------------------------------------------------------------------------------------------------+
|         kind        |                                                                                        volume                                                              |
+---------------------+------------------------------------------------------------------------------------------------------------------------------------------------------------+
|         name        |                                                                             my_new_copied_VM1_boot_disk                                                    |
+---------------------+------------------------------------------------------------------------------------------------------------------------------------------------------------+
|         pool        |                                                                         a93b9655-cc32-4734-9766-7fe2a5121d52                                               |
+---------------------+------------------------------------------------------------------------------------------------------------------------------------------------------------+
|      projectID      |                                                                           7275c7cd700b43ee974fc107dbe1a816                                                 |
+---------------------+------------------------------------------------------------------------------------------------------------------------------------------------------------+
|      properties     |                                                                                          {}                                                                |
+---------------------+------------------------------------------------------------------------------------------------------------------------------------------------------------+
| replicationSourceID |                                                                                         None                                                               |
+---------------------+------------------------------------------------------------------------------------------------------------------------------------------------------------+
|         size        |                                                                                          40                                                                |
+---------------------+------------------------------------------------------------------------------------------------------------------------------------------------------------+
|       sourceID      |                                                                         665a9c31-11e0-473b-a792-7b110684dd36                                               |
+---------------------+------------------------------------------------------------------------------------------------------------------------------------------------------------+
|        state        |                                                                                        ready                                                               |
+---------------------+------------------------------------------------------------------------------------------------------------------------------------------------------------+
|      stateInfo      |                                                                                         None                                                               |
+---------------------+------------------------------------------------------------------------------------------------------------------------------------------------------------+
|     taskProgress    |                                                                                         None                                                               |
+---------------------+------------------------------------------------------------------------------------------------------------------------------------------------------------+
|  taskThroughputMbps |                                                                                         None                                                               |
+---------------------+------------------------------------------------------------------------------------------------------------------------------------------------------------+
|        userID       |                                                                                        admin                                                               |
+---------------------+------------------------------------------------------------------------------------------------------------------------------------------------------------+
You should note the volume’s mountpoint, listed as a value in the
attachments property. In this example, the mountpoint is /dev/nbd63.
Copy the Volume to External Storage
To copy the volume from block to file, use the dd utility with the following values:
Set input file (
if=xxx) to the mountpoint which from the output of the mancala command. In this example, the input file mountpoint is/dev/nbd63.Set output file (
of=yyy) to some convenient storage location such as a share/NFS or a USB mass storage flash device. In this example, assume that the volume is copied to a USB flash drive mounted to the mountpoint/media/flash.
# dd if=/dev/nbd63 of=/media/flash/cirros-ex.raw
      81920+0 records in
      81920+0 records out
      41943040 bytes (42 MB) copied, 0.597927 s, 70.1 MB/s
Upload the Volume to Amazon S3
Copy the volume file from the flash drive to a machine that has the following Amazon utilities installed and configured:
Make sure to have the Amazon access and secret keys. Plug in the keys with the
command $ s3cmd --configure and reply to the requested prompts.
Use the command s3cmd put to upload the volume file to your Amazon S3 bucket
as in the following example:
$ s3cmd put /media/flash/cirros-ex.raw s3://bucket-cs1/cirros-ex.raw
Create an AWS AMI from the Volume
Create an AWS AMI from the volume that was just uploaded to S3, using the command aws ec2 import-image.
Before running import-image, set up some role prerequisites: * define a new role * indicate what the role is authorized to do * indicate which users can assume the role
Start by creating the following files:
File |
What is the purpose of the file? |
Sample contents |
|---|---|---|
|
Specifies which users can assume the role being created. |
{
"Version": "2012-10-17",
"Statement": {
"Effect": "Allow",
"Principal": { "AWS": "arn:aws:iam::12345:root" },
"Action": "sts:AssumeRole"
}
}
|
|
Specifies what this role is authorized to do. |
{
  "Version": "2012-10-17",
  "Statement": {
    "Effect": "Allow",
    "Action": "ec2:import-image",
  }
}
|
Now use the create-role command to create a new role called vmimport which is the default role used by the import-image command.
Specify which users can assume this role by using the --assume-role-policy-document
argument to point to the trust-policy.json file that was created.
$ aws iam create-role –role-name vmimpt –assume-role-policy-document file:///root/trust-policy.json
Assign the new vmimport role its policy as included in role-policy.json
which allows it to run the import-image command:
$ aws iam put-role-policy –role-name vmimport –policy-name vmimport –policy-document file://role-policy.json
Create the containers.json file which indicates to the import-image
command to use the zCompute volume that was just put in an S3 bucket:
File |
What is the purpose of the file? |
Sample contents |
|---|---|---|
|
Tells import-image to use the zCompute volume that was just put in an S3 bucket. |
Create the AWS AMI by running the import-image command:
$ aws ec2 import-image –description “cirros” –disk-containers file://containers.json
The output from this command includes a <task_ID>. You can use the ID to
check the status of the import operation as follows:
$ aws ec2 describe-import-image-tasks –import-task-ids <task_ID>
Upon successful completion of the import operation, the new AMI appears in the list of available AMIs, and may be used to launch a new EC2 instance.
Migrating a Virtual Machine from VMware
Export a VM from VMware vCenter into the OVA format. Refer to the VMware documentation for information about the OVA export.
Import the OVA file into zCompute. As part of the import procedure, zCompute converts the OVA file into a QCOW2 image and also creates a VM instance. This is in contrast to the procedure of uploading a KVM image, when an entire VM instance, including its volumes, are uploaded with the OVA file.
Import an OVA VM
Naviagate to Compute > Instances and select Import from the top toolbar. The Import VM dialog box appears.
In the displayed Import VM window, enter the following:
VM Name - name of VM instance to be created
Firmware - select BIOS or UEFI.
Storage Pool - storage pool to be used for VM instance.
Image Name - image name to be used after import in zCompute.
Import Method
URL - If public access to the OVA object was allowed while preparing OVA for import, enter the URL of the S3 object into the URL field.
File - If public access to the OVA object was not allowed while preparing OVA for import, either drop the file in the appropriate area or browse for file location on your system.
Click OK.
zCompute uploads and converts the OVA file. This may take a few minutes.
Once import is completed, the following new entities will be displayed in zCompute:
A new VM instance will appear in list in Compute > Instances.
The boot volume of the new VM will appear in list in Storage > Block Storage. This volume has the same name as the VM instance.
The image of the new VM will appear in list in Machine Images > Image.
VMware Virtual Machine migration using the CLI
When migrating a VM from VMware into zCompute, first export an image from vCenter into the OVA format. You then import the OVA image into zCompute.
During the import, zCompute converts the OVA image into the QCOW2 format. This section describes how to import a VM using the CLI.
To import a VM into zCompute
Export the VM from VMware vCenter. Save the exported image as an OVA file, as described in the VMware documentation.
Install the symp client on a Linux machine. Use the symp client to run zCompute CLI commands.
Place the OVA file on the Linux machine where the symp client was just installed, or on a NAS share that the machine can access.
Get the ID of the storage pool where to place the VMware VM. To do this, run the storage pool list command. This example uses the -c argument to display just the name and ID of the storage pool:
$ symp storage pool list -f json -c name -c id
[
  {
    "id": "9e740eb2-99f3-4600-b07f-16dfdbe81311",
    "name": "test-pool"
  }
]
Import the VMware VM into zCompute by using the conversions create command. This command converts the OVA into a zCompute VM, and imports it into the storage pool specified. Pass in the following values with the conversions create command:
Path to the OVA file, using the –file argument.
Image name. When the conversions create command imports the OVA, it also creates an image. Specify a name for this image, using the –image-name argument.
Name to give this VM within the zCompute, using the –vm-name argument.
Storage pool ID
$ symp conversions create --file dsl-4-4-10.ova --image-name dsl-4-4-10 --vm-name vm-from-ova 9e740eb2-99f3-4600-b07f-16dfdbe81311
View the newly imported VM by running the vm list command, or by using the GUI – Compute > Virtual Machines view.
Exporting zCompute Images in QCOW2
ZCompute supports exporting a volume as may be needed for downloading the volume to a PC for backup or for uploading it to another hypervisor. The basic procedure for such an export is to attach the volume to a zCompute host, convert it to a QCOW2 file, and then export the QCOW2 file out of the system. The detailed procedure is as follows:
Stop the VM instance.
Clone the volume.
Navigate to Storage > Block Storage.
Select the volume from the displayed list, and copy the volume’s UUID from the volume details at the bottom of the list.
SSH to any host in the cluster.
Issue the following mancala command:
mancala volumes attach-to-host <volume_id> <host-name>For example:
[root@stratonode1 mancala0]# mancala volumes attach-to-host 64e3e44c-7d9e-402d-8924-ce9e61883450 stratonode1.node.strato
+---------------------+--------------------------------------------------------------------------------------------------------------------------------------------------------------------------------------+
|       Property      |                                                                                        Value                                                                                         |
+---------------------+--------------------------------------------------------------------------------------------------------------------------------------------------------------------------------------+
|      accessMode     |                                                                                      read-write                                                                                      |
|     attachments     | [{'computeID': None, 'ownerToken': None, 'hosts': , 'mode': 'read-write', 'time': 1528738936, 'owner': None, 'mountpoint': u'/dev/nbd62', 'type': 'hbd'}]                            |
|    bitmapVolumeID   |                                                                                         None                                                                                         |
|       bootable      |                                                                                        False                                                                                         |
|      createdAt      |                                                                                      1528737478                                                                                      |
|      deletedAt      |                                                                                         None                                                                                         |
|     description     |                                                                                         None                                                                                         |
|        health       |                                                                                       healthy                                                                                        |
|      healthInfo     |                                                                                         None                                                                                         |
|          id         |                                                                         64e3e44c-7d9e-402d-8924-ce9e61883450                                                                         |
|      isTracked      |                                                                                        False                                                                                         |
|         kind        |                                                                                        volume                                                                                        |
|         name        |                                                                              testexport_11Jun2018_1317                                                                               |
|         pool        |                                                                         c9e2297b-ba04-4919-9138-d595847cf741                                                                         |
|      projectID      |                                                                           53e99283cf03479e9b12177d512fbb39                                                                           |
|      properties     |                                                                                          {}                                                                                          |
| replicationSourceID |                                                                                         None                                                                                         |
|         size        |                                                                                         3072                                                                                         |
|       sourceID      |                                                                         20412ae4-f447-4a9f-8f10-2f607e27f794                                                                         |
|        state        |                                                                                        ready                                                                                         |
|      stateInfo      |                                                                                         None                                                                                         |
+---------------------+--------------------------------------------------------------------------------------------------------------------------------------------------------------------------------------+
This command mounts the volume as a block device on the specified host. Verify this with an lsblk command.
Locate the block device ID from the command output. This ID is the mountpoint value listed next to the attachments property.
In the example above the block device ID is /dev/nbd62
Look for free space on
/mnt/mancalaX, and based on the size of the exported volume, find a target location for the exported file.You can check for free space using the command zpool list. Check the FREE column to pick the disk that looks like it has the most free space.
Example:
[root@stratonode1 mancala0]# zpool list
NAME       SIZE  ALLOC   FREE  EXPANDSZ   FRAG    CAP  DEDUP  HEALTH  ALTROOT
mancala0  1.81T  9.77G  1.80T         -     0%     0%  1.00x  ONLINE  -
mancala1  1.81T  9.55G  1.80T         -     0%     0%  1.00x  ONLINE  -
Once the target disk has been selected, export the volume by using the qemu-img command, which converts the volume file to QCOW2, and exports it to the disk.
``qemu-img convert -f host_device -O qcow2 <block-device-id> <output-file-location-and-name>``
Example:
# qemu-img convert -f host_device -O qcow2 /dev/nbd62 /mnt/mancala0/file.qcow2