NAT Gateways
Introduction
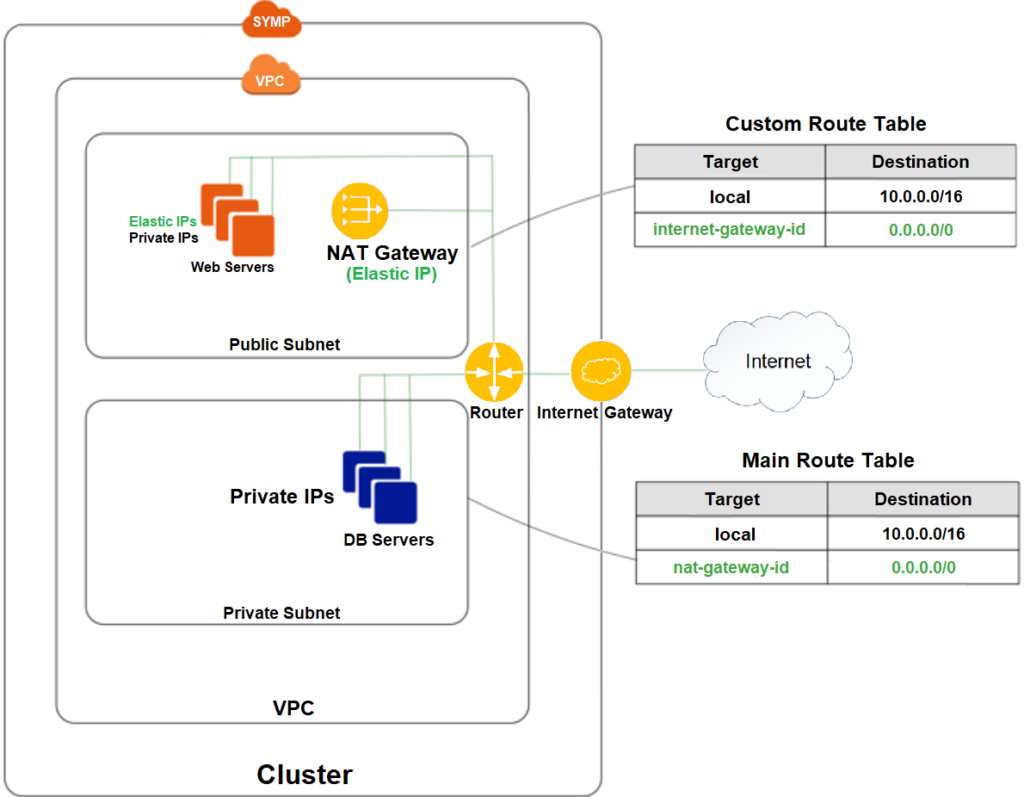
A network address translation (NAT) gateway enables instances in a private subnet to connect to the internet via an elastic IP address, as shown in the diagram below:
Creating a NAT Gateway
To create a NAT Gateway:
Navigate to the Networking > NAT Gateways view.
From the top toolbar, click Create.
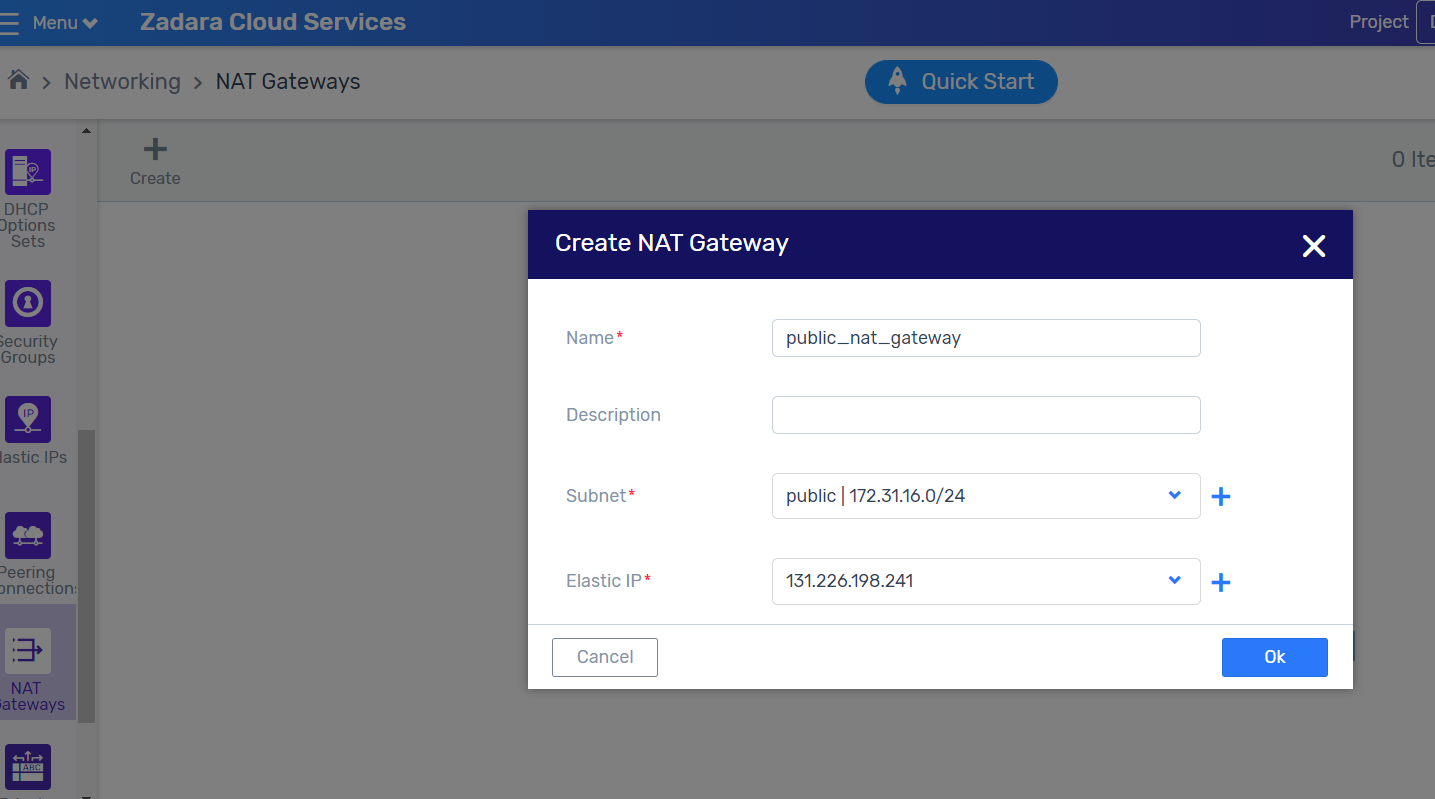
In the Create NAT Gateway dialogue, enter the following:
Name - name of the NAT gateway.
Description - optional description of the NAT gateway.
VPC - VPC which is associated with this route table.
Subnet - select subnet in which the NAT gateway will reside.
Elastic IP - select elastic IP for NAT gateway.
Click OK.
After creation of the NAT gateway, update the route table associated with at least one of your private subnets such that Internet-bound traffic is directed towards the NAT gateway.
The instances in your private subnets will now be able to communicate with the internet.
Sample NAT Gateway Configuration Flow
The following procedure provides a complete end-to-end configuration example including VPC and route table configurations related to NAT gateways.
To create a VPC with a NAT Gateway, navigate to the Networking > VPCs view, and click Create.
In the Create VPC window, select an existing Internet Gateway from the pull-down list or create a new one by clicking +.
Create two subnets in the VPC, one called Public and the other called Private.
Navigate to the Networking > Subnets view and click Create.
In the Create Subnet window, create a subnet called ‘public’.
Click OK.
Click Create again.
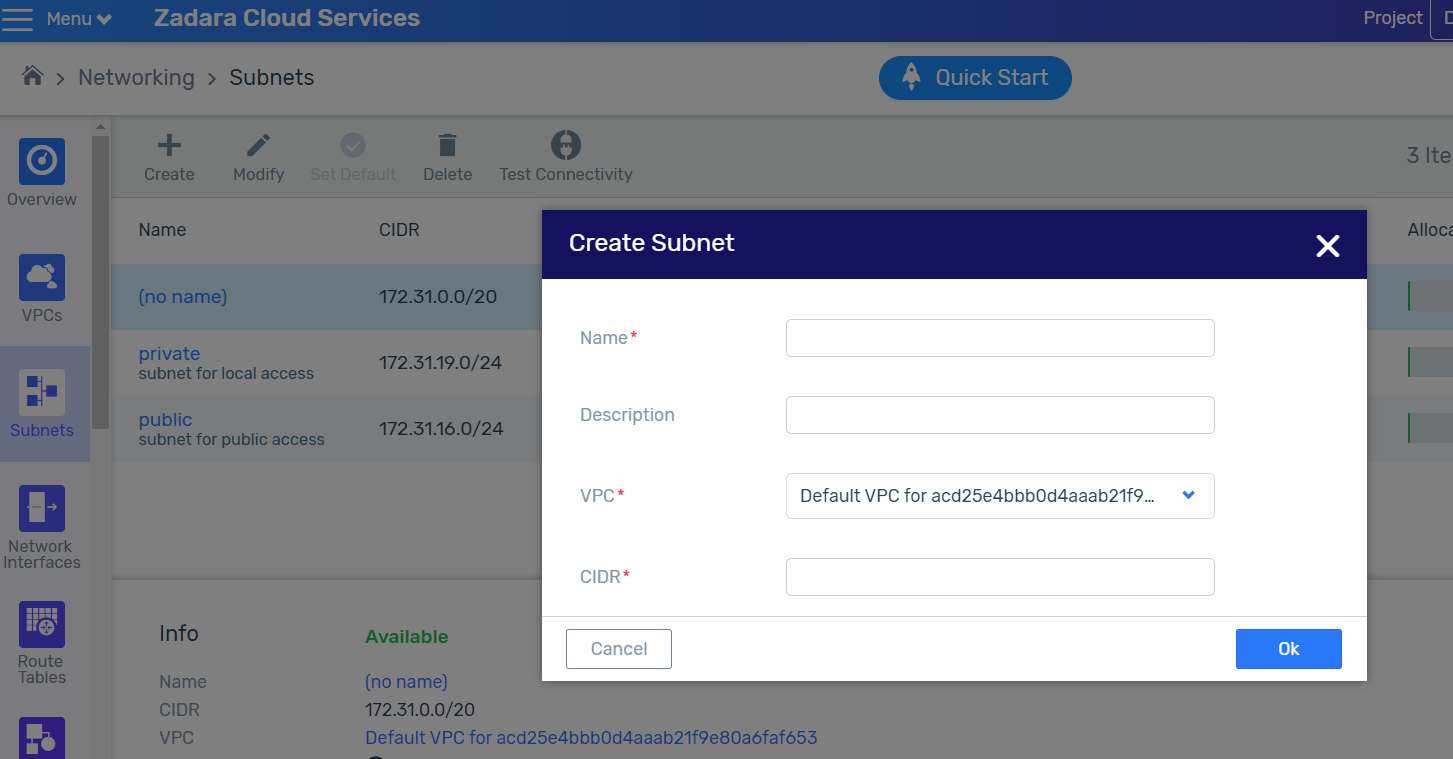
In the Create Subnet window, create a subnet called ‘private’.
Click OK.
Create two route tables in the VPC, one called public and the other called private.
Navigate to the Networking > Route Tables view and click Create.
In the Create Route Table window, create a Route Table called ‘public’.
Click OK.
Click Create again.
In the Create Route Table window, create a Route Table called ‘private’.
Click OK.
Associate the public subnet to the public route table, and the private subnet to the private route table.
Navigate to the Networking > Route Tables view and click on the public route table.
In the bottom of the display showing the Route Table details, select the Subnet Associations tab.
Click Associate.
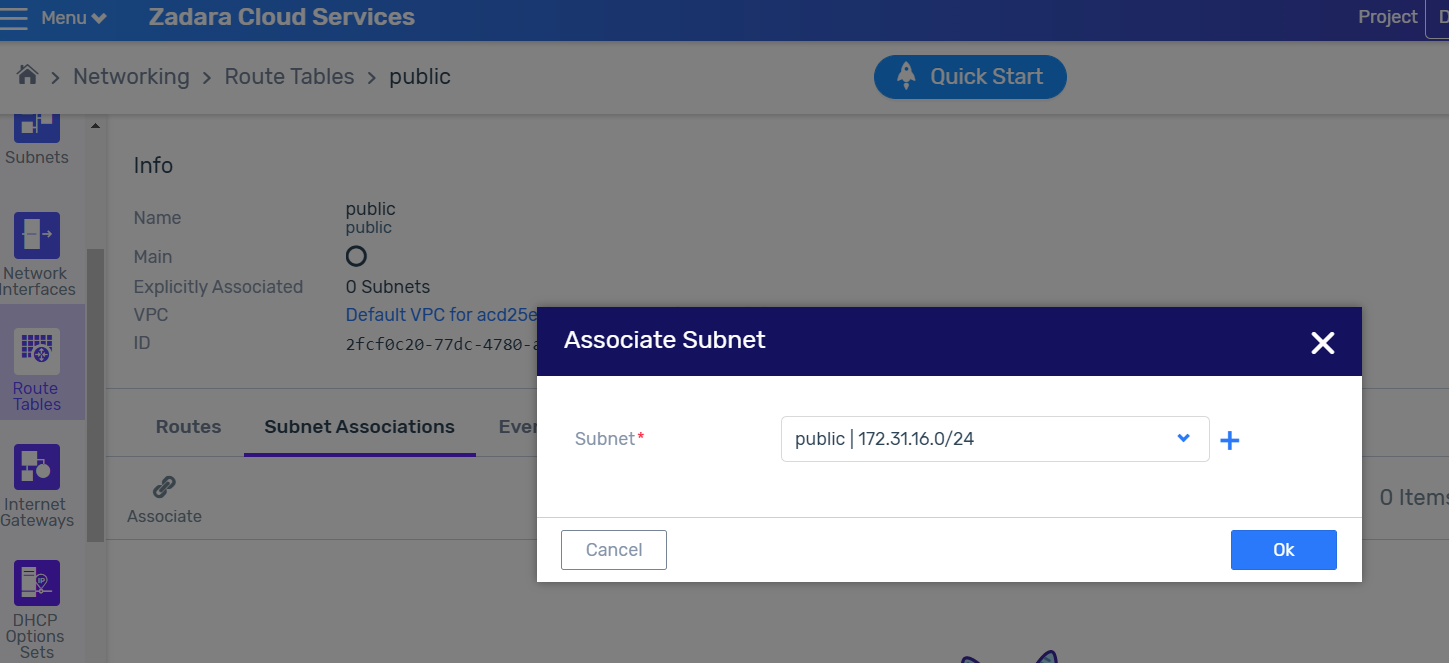
In the Associate Subnet window, associate the public subnet to the public route table.
Click OK.
Navigate to the Networking > Route Tables view and click on the private route table.
In the bottom of the display showing the Route Table details, select the Subnet Associations tab.
Click Associate.
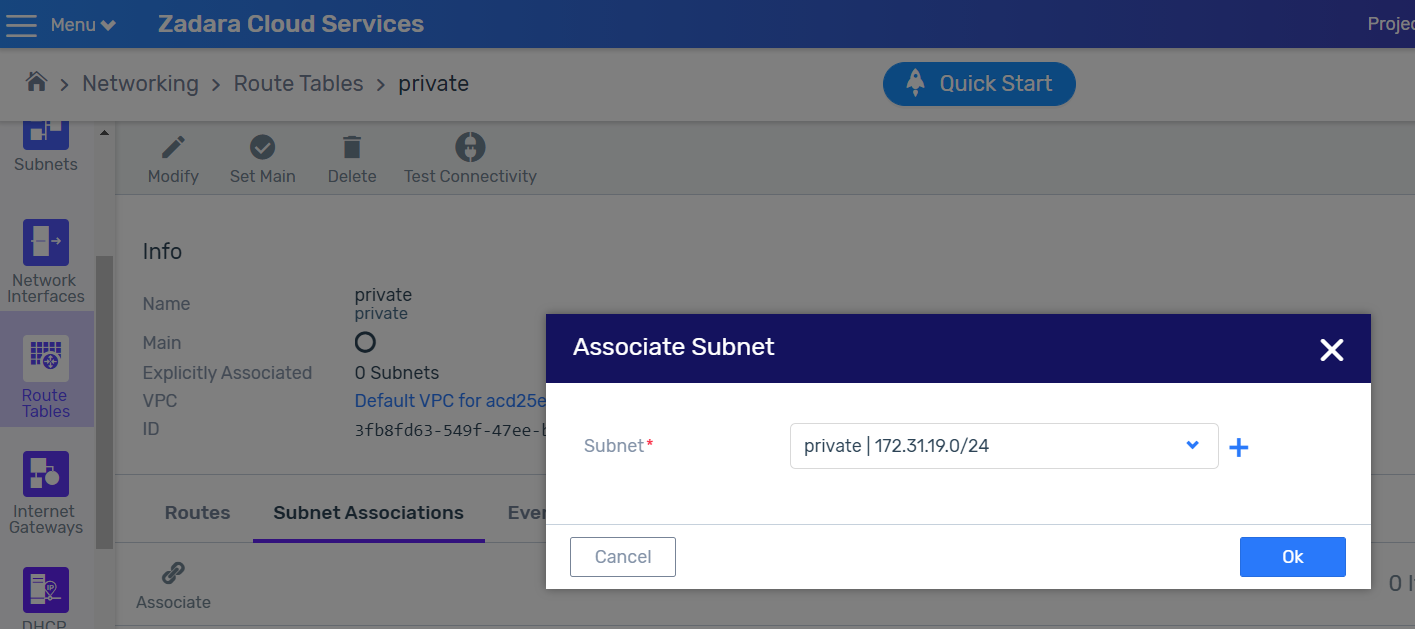
In the Associate Subnet window, associate the private subnet to the private route table.
Click OK.
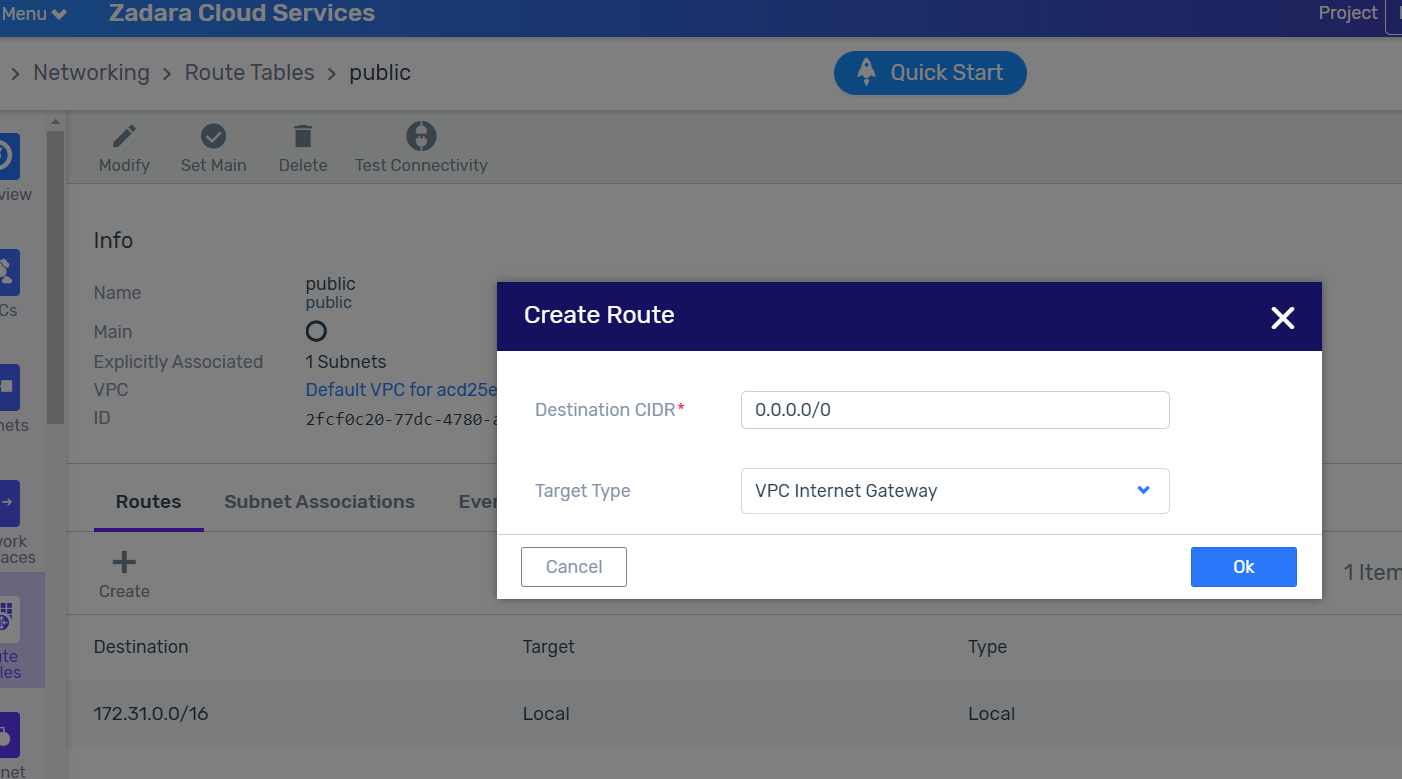
In the public route table create a default route with the VPC Internet Gateway as the target.
Navigate to the Networking > Route Tables view and click on the public route table.
In the bottom of the display showing the Route Table details, select the Routes tab.
Click Create.
In the Create Route window, create a default route (0.0.0.0/0) with the VPC Internet Gateway as the target.
Click OK.
Create a NAT gateway on the public subnet and allocate an elastic IP to it. Wait for the NAT GW state to move from pending to available.
Navigate to the Networking > NAT Gateways view and click Create.
In the Create NAT Gateway dialog window, select an existing elastic IP from the drop down list or click + to create a new one.
Click OK.
In the private route table create a default route with the created NAT Gateway as the target.
Navigate to the Networking > Route Tables view and click on the private route table.
In the bottom of the display showing the Route Table details, select the Routes tab.
Click Create.
In the Create Route window, create a default route (0.0.0.0/0) with the created NAT Gateway as the target.

Click OK.
Create a VM on the private subnet
Navigate to the Compute > Instances and click Create.
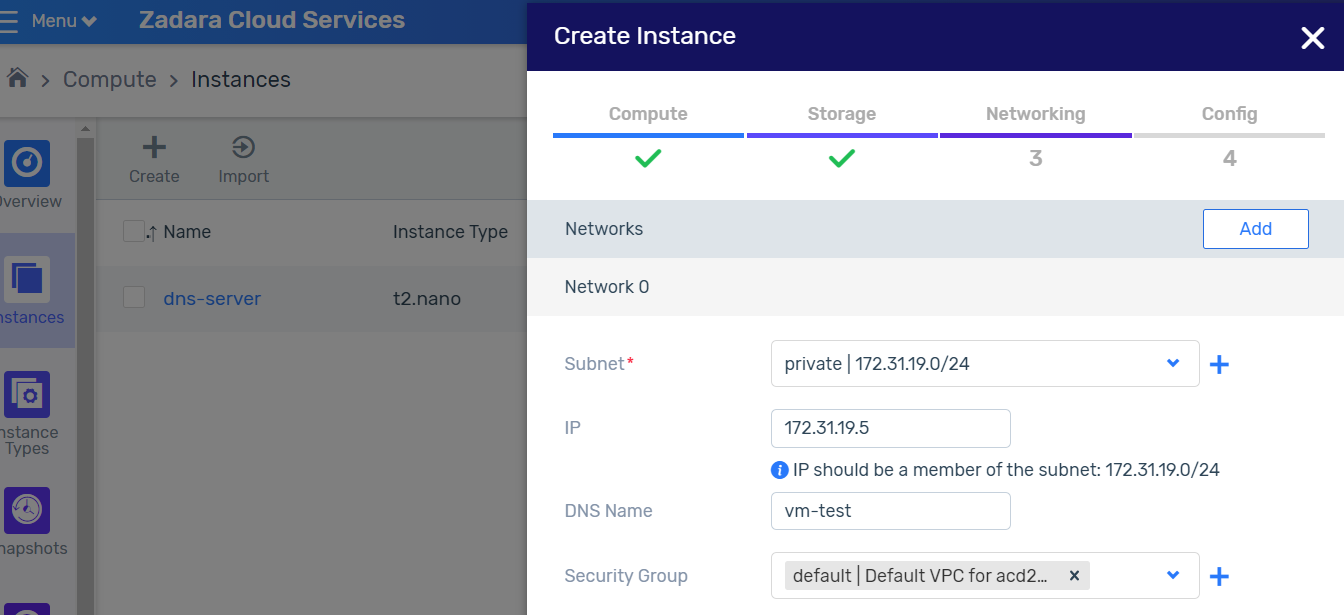
In the Create VM wizard, associate the VM with the private subnet created.
You can now connect the VM to the internet via the NAT Gateway Elastic IP.
View the Network Topology diagram of the NAT Gateway in a VPC.
In the Networking > Overview screen see the VPC view of the Network Topology.

Note: The red Subnet and VPC frames and labels shown in the diagram are illustrative only and not part of the Zadara Cloud Services Network Topology UI display.