VPSA Object Storage Administration
Monitoring Drives
To monitor drives in your Object Storage system open the GUI > Resources > Drives
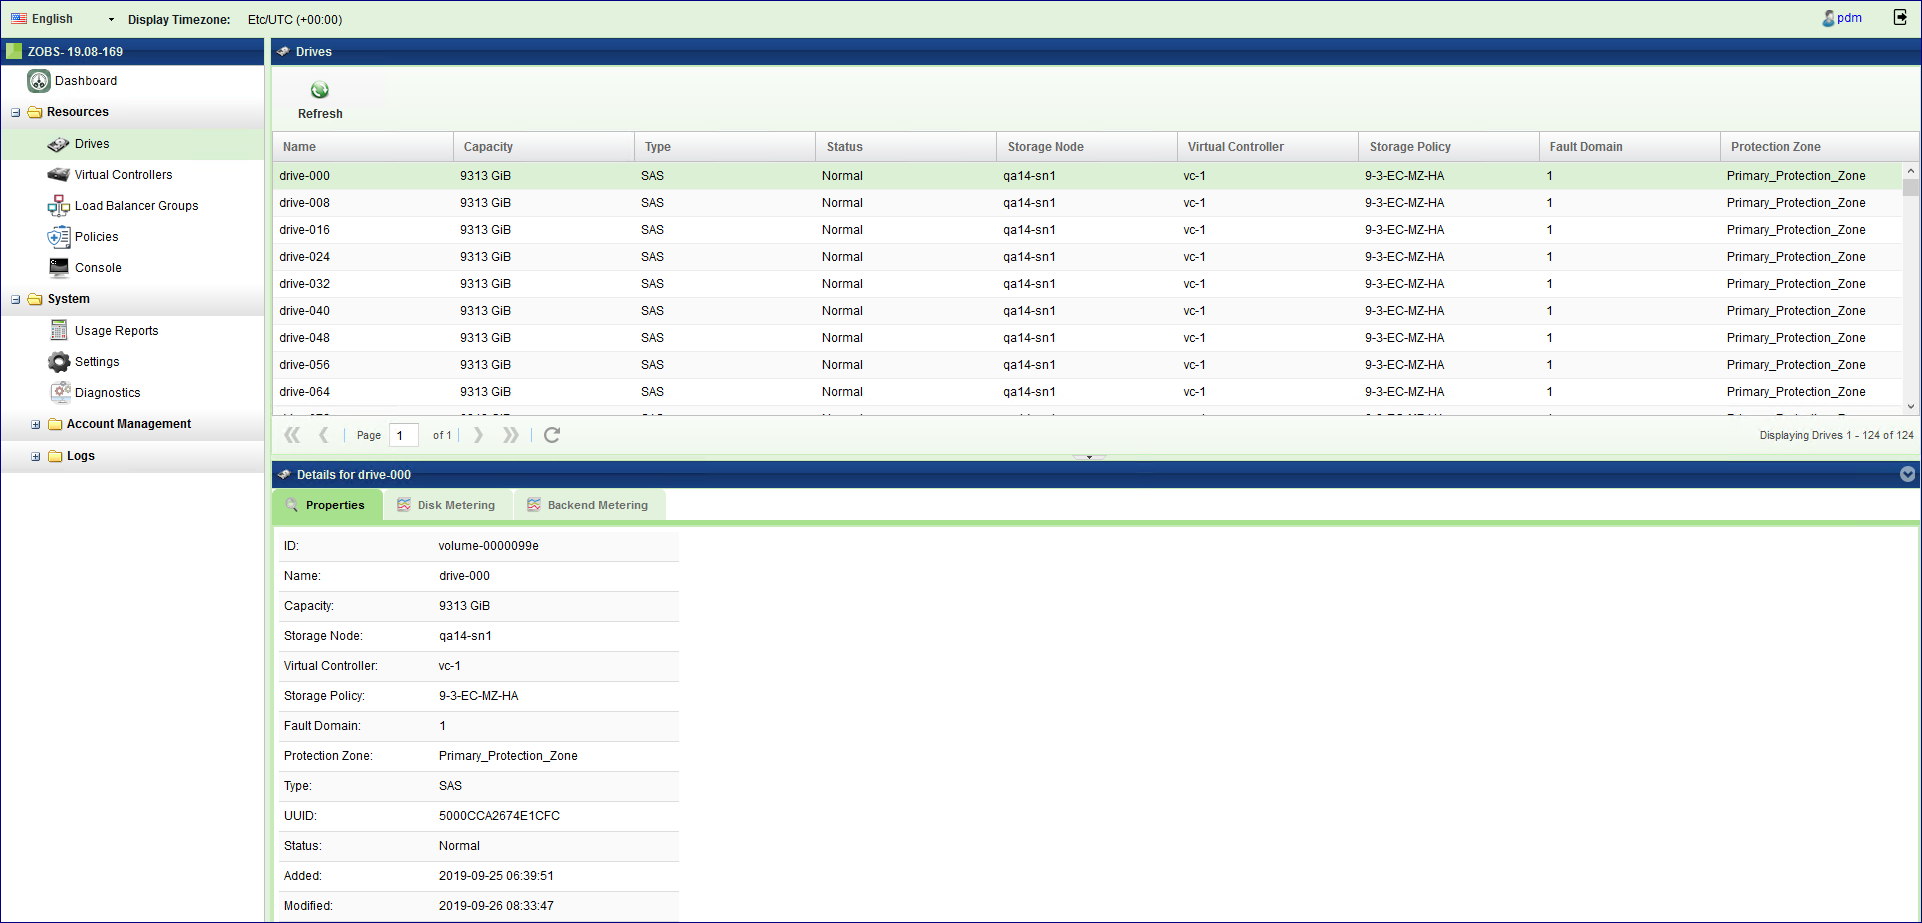
Viewing Drives Properties (VPSA Object Storage Admin)
The Drives details (properties and metering), are shown in the South Panel tabs:
Properties
Each Drive includes the following properties:
Property |
Description |
|---|---|
ID |
An internally assigned unique ID |
Name |
Automatically assigned name. |
Capacity |
The Drive capacity in GiB |
Storage Node |
The Storage Node that contains the selected Drive |
Virtual Controller |
The virtual controller that owns the selected drives and performs IO operations on it |
Storage Policy |
The Storage Policy where the selected Drive belongs |
Fault Domain |
The Zadara cloud Fault Domain this Drive resides belongs to |
Protection Zone |
The Zadara cloud protection zone this drive is physically located at |
Type |
Drive type: SATA, SAS, SSD |
UUID |
The unique identifier of the drive |
Status |
|
Added |
Date & time when the drive was added |
Modified |
Date & time when the drive was last modified |
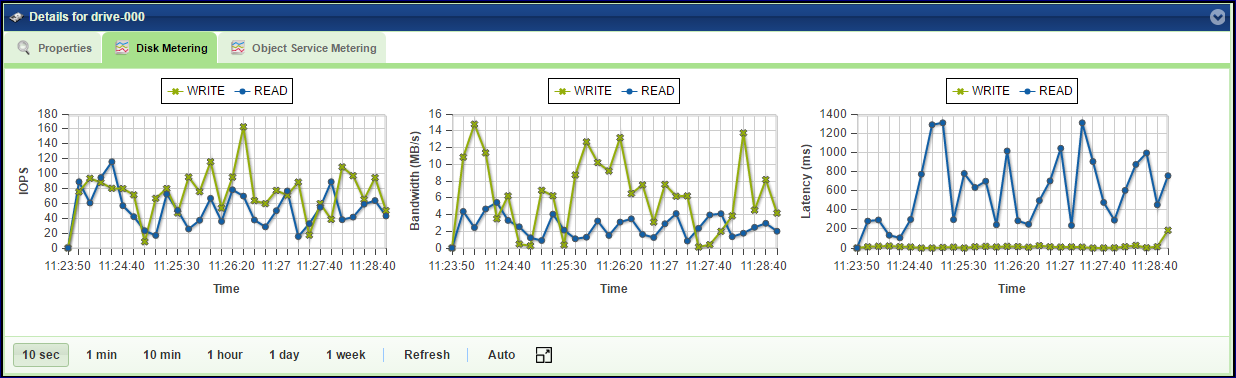
Disk Metering
The Metering Charts provide live metering of the IO workload associated with the selected Drive.
The charts display the metering data as it was captured in the past 20 intervals. An interval length can be one of the following: 10 second, 1 minute, 10 minutes, 1 hour, 1 day, 1 week. The Auto button lets you see continuously-update live metering info.
The following charts are displayed:
Chart |
Description |
|---|---|
IOPs |
The number of read and write commands issued to the selected Drive per second |
Bandwidth (MB/s) |
Total throughput (in MB) of read and write commands issued to the selected Drive per second |
Latency (ms) |
Average response time of all read and write commands issued to the selected Drive per selected interval |
Backend Metering
The Metering Charts provide live metering of the IO workload on the selected Drive.
The charts display the metering data as it was captured in the past 20 intervals. An interval length can be one of the following: 10 second, 1 minute, 10 minutes, or 1 hour, 1 day, 1 week. The Auto button lets you see continuously-updating live metering info.
The following charts are displayed:
Chart |
Description |
|---|---|
Throughput (OP/s) |
The number of operations (PUT/GET/DELETE) that were sent to the selected Drive per second |
Bandwidth (MB/s) |
Total throughput (in MB) of read and write commands that were sent to the selected Drive per second |
Latency (ms) |
Average response time of all operations (PUT/GET/DELETE) that were sent to the selected Drive per selected interval |

Monitoring Virtual Controllers
Virtual Controllers are Virtual Machines (VM) on the Zadara cloud that serves client operations on the Object Storage. For a full list of the VC responsibilities refer to Virtual Controller. Virtual Controllers are automatically created and added/removed to the Object Storage configuration, depending on the number of the allocated drives. There are minimum of two VCs in each VPSA Object Storage deployment: vc-0, vc-1. These VCs have role of Proxy+Storage. To improve performance you can add Proxy only VCs from the Zadara Provisioning Portal as described at Adding Proxy Virtual Controllers (VPSA Object Storage Admin).
Viewing VCs Properties (VPSA Object Storage Admin)
Properties
Each Virtual Controller has the following properties:
Property |
Description |
|---|---|
ID |
An internally assigned unique ID |
Storage Role |
Proxy+Storage / Proxy-Only |
Management Role |
|
Status |
|
Storage Node |
The Storage Node hosting selected VC |
Fault Domain |
The Zadara cloud Fault Domain this VC resides belongs to |
Protection Zone |
The Zadara cloud protection zone this VC is allocated to |
Frontend IP |
The IPv4 or IPv6 address allocated to the VC |
Backend IP |
The VC IP address on the backend network that connects to the Drives |
Load Balancer Group |
(Optional) In case an ELB is enabled, represent the LB Group of the VC |
Added |
Date & time when the VC was added |
Modified |
Date & time when the VC was last modified |
Drives
List the drives assigned to the selected Storage Policy.
System Usage
This chart shows the CPU utilization of the selected VC.
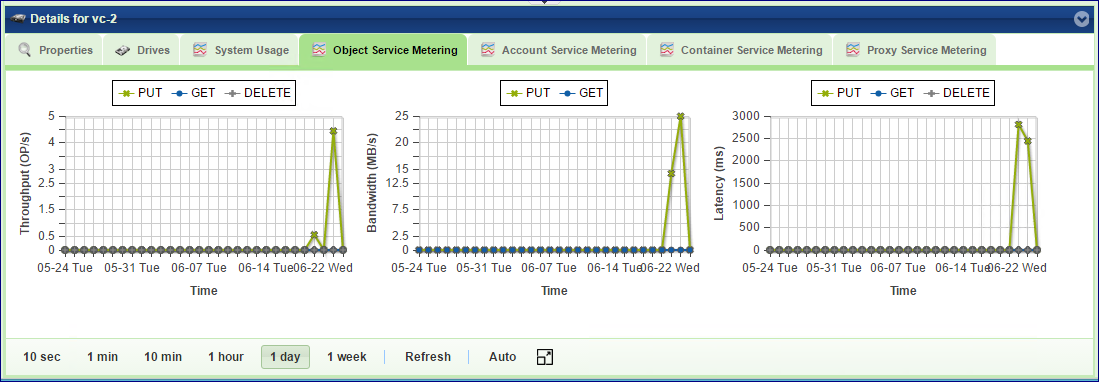
Backend Metering
The Metering Charts provide live metering of the IO workload at the backend of the selected VC.
The charts display the metering data as it was captured in the past 20 intervals. An interval length can be one of the following: 10 second, 1 minute, 10 minutes, or 1 hour, 1 day, 1 week. The Auto button lets you see continuously-updating live metering info.
The following charts are displayed:
Chart |
Description |
|---|---|
Throughput (OP/s) |
The number of operations (PUT/GET/DELETE) issued to objects and handled by the selected VC per second |
Bandwidth (MB/s) |
Total throughput (in MB) of read and write commands issued by the selected VC per second |
Latency (ms) |
Average response time of all operations (PUT/GET/DELETE) issued to objects and handled by the selected VC per selected interval |
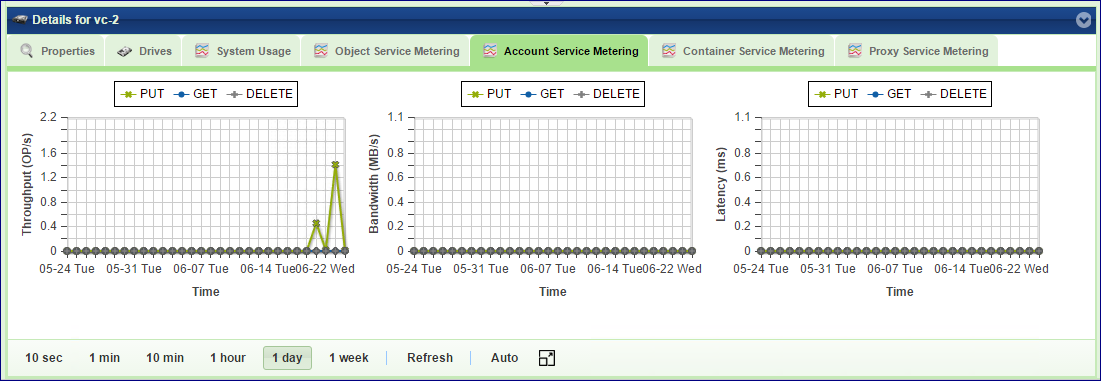
Account Service Metering
The Metering Charts provide live metering of the IO workload on the accounts database at the backend of the selected VC.
The charts display the metering data as it was captured in the past 20 intervals. An interval length can be one of the following: 10 second, 1 minute, 10 minutes, or 1 hour, 1 day, 1 week. The Auto button lets you see continuously-updating live metering info.
The following charts are displayed:
Chart |
Description |
|---|---|
Throughput (OP/s) |
The number of operations (PUT/GET/DELETE) issued to the accounts database and handled by the selected VC per second |
Bandwidth (MB/s) |
Total throughput (in MB) of read and write commands issued by the selected VC to the accounts DB per second |
Latency (ms) |
Average response time of all operations (PUT/GET/DELETE) issued to the accounts database and handled by the selected VC per selected interval |
Container Service Metering
The Metering Charts provide live metering of the IO workload on the containers database at the backend of the selected VC .
The charts display the metering data as it was captured in the past 20 intervals. An interval length can be one of the following: 10 second, 1 minute, 10 minutes, or 1 hour, 1 day, 1 week. The Auto button lets you see continuously-updating live metering info.
The following charts are displayed:
Chart |
Description |
|---|---|
Throughput (OP/s) |
The number of operations (PUT/GET/DELETE) issued to containers and handled by the selected VC per second |
Bandwidth (MB/s) |
Total throughput (in MB) of operations (PUT/GET/DELETE) issued by the selected VC to containers per second |
Latency (ms) |
Average response time of all operations (PUT/GET/DELETE) issued to containers and handled by the selected VC per selected interval |
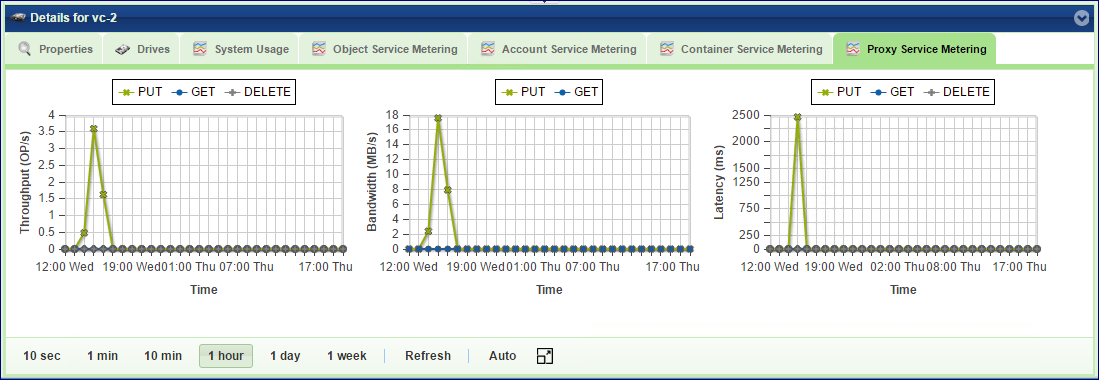
Frontend Metering
The Metering Charts provide live metering of the IO workload at the frontend of the selected VC.
The charts display the metering data as it was captured in the past 20 intervals. An interval length can be one of the following: 10 second, 1 minute, 10 minutes, or 1 hour, 1 day, 1 week. The Auto button lets you see continuously-updating live metering info.
The following charts are displayed:
Chart |
Description |
|---|---|
Throughput (OP/s) |
The number of operations (PUT/GET/DELETE) issued to objects and handled by the proxy of the selected VC per second |
Bandwidth (MB/s) |
Total throughput (in MB) of read and write commands issued to proxy of the selected VC per second |
Latency (ms) |
Average response time of all operations (PUT/GET/DELETE) issued to objects and handled by proxy of the selected VC per selected interval |
Load Balancer Groups (Optional)
Zadara Elastic Load Balancer can be enabled for the VPSA Object Storage in order to provide improved performance and load allocation across the VPSA Object Storage VCs. Once enabled, a dedicated VC will be added to the VPSA Object Storage as the Load Balancer Master. The Load Balancer Master VC will aggregate a bulk of up to 12 VCs from the same protection zone under the same VRID index.
From this view, a VPSA Object Storage administrator can review the utilization and distribution of each Load Balancer Group.
Property |
Description |
|---|---|
ID |
An internally assigned unique ID |
VRID |
The VRRP VRID assigned to the Elastic Load Balancer Group |
VC Master |
The Load Balancer Group Active (Master) VC |
IPv4/IPv6 |
The Load Balancer Group Active (Master) VC IP address |
Protection Zone |
The Zadara cloud protection zone |
Added |
Date & time when the LBG was created |
Modified |
Date & time when the LBG was last modified |
Managing Storage Policies
Storage Policies provide a way for object storage providers to differentiate service levels, features and behaviors of a Object Storage deployment.
Policies can be think of as a group of drives, with a redundancy level policy assigned to it.
Before placing object data into the VPSA Object Storage, users create a container which holds the listing of all objects stored under the container’s namespace. Users can select the Storage Policy that will be used when storing data objects under a container’s namespace when they create the container. All objects stored in a container will be placed according the configuration of the Storage Policy which was set when the container was created. If no policy was specified at the container creation time, the default policy is used.
To ensure availability of the VPSA object Storage data, the drives assigned to a Storage Policy are evenly distributed between Object Storage Fault Domains. The cloud administrator defines the Fault Domain of each Storage Node. The system makes sure to allocated drives across zones based on the Storage Policy type
Storage Policies allow some level of segmenting in terms of quality of service, within a single system for various purposes. Storage Policies allow objects to be stored based on the following criteria:
Quality of Service: By using different disk drives for different policies, tiers of storage performance can be created. For example, an SSD-only policy can be created used to implement a low-latency/high performance tier.
Number of Replicas: offer different protection levels in the same VPSA Object Storage cluster
2x replication offers protection for one FD failure, at the cost of 50% storage utilization.
3x replication offers protection for 2 FDs failures, at the cost of 33.33% storage utilization.
Erasure Coding (4+2, 6+3) offers protection for 1 FD failures, at the cost of 67% storage utilization.
Erasure Coding (6+2, 9+3) offers protection for 1 FD failures, at the cost of 75% storage utilization.
Erasure Coding (4+2 - Multizone-HA) offers protection for 1 FD failures, on each zone or a complete protection zone failure at the cost of 67% storage utilization per protection zone.
Erasure Coding (9+3 - Multizone-HA) offers protection for 1 FD failures, on each zone or a complete protection zone failure at the cost of 75% storage utilization per protection zone.
The following Storage Policies are supported:
Object Storage Data Protection Policies¶ Policy Type
Redundancy
Minimal Configuration
2 Way
x 2
2 VCs on 2 SNs, each in a different Fault Domain
3 Way
x 3
3 VCs on 3 SNs, each in a different Fault Domain
Erasure Coding 4+2
x 1.5
3 VCs on 3 SNs, each in a different Fault Domain
Erasure Coding 6+3
x 1.5
3 VCs on 3 SNs, each in a different Fault Domain
Erasure Coding 6+2
x 1.33
4 VCs on 4 SNs, each in a different Fault Domain
Erasure Coding 9+3
x 1.33
4 VCs on 4 SNs, each in a different Fault Domain
Erasure Coding 4+2 (Multizone-HA)
x 1.5
3 VCs on 3 SNs, each in a different Fault Domain (in each region)
Erasure Coding 9+3 (Multizone-HA)
x 1.33
4 VCs on 4 SNs, each in a different Fault Domain (in each region)
Each drive in the system is assigned to one Storage Policy.
VPSA Object Storage is created with a default data Storage Policy for objects and another system Storage Policy for metadata. The VPSA Object Storage administrator (zios_admin) can later on create additional storage policies, expand existing policies and set a specific policy as the Default Policy.
For Multizone HA VPSA Object Storage, the protection policy is created symmetrically on both zones, in each availability zone, the same protection policy will be created in order to sustain a complete availability zone failure.
Policies are assigned when a container is created. Once a container has been assigned for a policy, it cannot be changed (unless it is deleted/recreated).
Creating Policy (VPSA Object Storage Admin)
When a VPSA Object Storage system is created, 2 policies are created by default:
MetadataPolicy: Used to store the Accounts and Containers metadata, usually contains 2 SSD drives, with 2-way replication
2/3-way/EC-protection-policy: Used to store the users’ objects, usually contain all the drives that were assigned to the Object Storage at creation time, with 3-way or 2-way replication or EC protection, according to the initial selection on the provisioning portal.
Storage Policies can be added form the provisioning Portal by the VPSA Object Storage admin. To create additional Policies, Go to the Provisioning Portal, select the VPSA Object Storage of the new Storage Policy, and then click the Add Storage Policy button in the right panel. Follow the instruction here: Adding Storage Policy (VPSA Object Storage Admin)
Viewing Policies Properties (VPSA Object Storage Admin)
You can view the following properties and metering information in the Policies Details South Panel tabs:
Properties
Each Policy includes the following properties:
Property |
Description |
|---|---|
ID |
An internally assigned unique ID |
Name |
The name of Policy |
Type |
Object or Account/Container |
State |
Not Configured / Configuring / Initialized |
Description |
A user defined policy description |
GB per Month Price |
Price of used capacity for charge back purposes |
Health Status |
Normal / Degraded / Critical |
Health Percentage |
Indicates the percentage of the stored data that is accessible. |
Rebalance Status |
Normal / Rebalancing / Failed |
Rebalance Prec. |
Indicates the progress of the rebalance process |
Cross-Region Rep-mode |
Synchronous (for VPSA Multizone HA) |
Capacity |
Total usable capacity of the Storage Policy |
Used Capacity |
Amount of written data in the Storage Policy |
Containers |
Total amount of containers created within the policy |
Objects |
Total amount of objects created within the policy |
Default |
Yes/No |
Redundancy Level |
2-way/3-way/EC |
Ring Version |
Ring Database version |
Rebalanced |
The date and time when the Policy was last rebalanced. (Rebalance usually happens when the HW configuration changes, Adding/removing drives, failed components, etc.) |
Added |
The date and time when the Policy was added |
Modified |
The date and time when the Policy was last modified |
Drives
List the drives assigned with the selected Storage Policy.
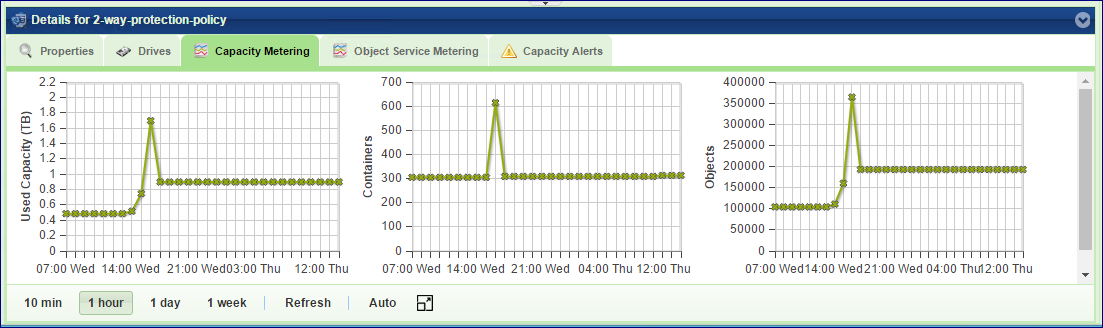
Capacity Metering
The Metering Charts provide live metering of the capacity usage associated with the selected Policy.
The charts display the metering data as it was captured in the past 20 intervals. An interval length can be one of the following: 10 minutes, or 1 hour, 1 day, 1 week. The Auto button lets you see continuously-updating live metering info.
The following charts are displayed:
Chart |
Description |
|---|---|
Used Capacity |
Total storage capacity consumed in the selected Policy |
Containers |
Total numbers of containers that store their objects in the selected policy |
Objects |
Total numbers of objects stored in the selected policy |
Backend Metering
The Metering Charts provide live metering of the IO workload associated with the selected Policy.
The charts display the metering data as it was captured in the past 20 intervals. An interval length can be one of the following: 10 second, 1 minute, 10 minutes, or 1 hour, 1 day, 1 week. The Auto button lets you see continuously-updating live metering info.
The following charts are displayed:
Chart |
Description |
|---|---|
Throughput (OP/s) |
The number of operations (PUT/GET/DELETE) issued to the Drives of the selected Policy per second |
Bandwidth (MB/s) |
Total throughput (in MB) of read and write commands issued to the Drives of selected Policy per second |
Av. Drive Latency |
Average response time of all operations (PUT/GET/DELETE) issued to objects in the selected Policy per selected interval |
Frontend Metering
The Metering Charts provide live metering of the IO workload associated with the traffic coming to the selected Policy.
The charts display the metering data as it was captured in the past 20 intervals. An interval length can be one of the following: 10 second, 1 minute, 10 minutes, or 1 hour, 1 day, 1 week. The Auto button lets you see continuously-updating live metering info.
The following charts are displayed:
Chart |
Description |
|---|---|
Throughput (OP/s) |
The number of operations (PUT/GET/DELETE) issued to objects in the selected Policy per second |
Bandwidth (MB\s) |
Total throughput (in MB) of read and write commands issued to the selected Policy per second |
Avg. Latency (ms) |
Average response time of all operations (PUT/GET/DELETE) issued to objects in the selected Policy per selected interval |
Capacity Alerts
Alert Threshold – Send Alert when it is estimated that the Policy will be at full capacity within the given time period (in minutes)
Alert Interval - Calculate the above threshold based on the capacity usage growth in the previous given time period (in minutes)
Set default Policy (VPSA Object Storage Admin)
The default Policy is the Policy used by default for newly created containers, if no other policy is explicitly specified. To change the default Policy, select the Policy you want to make the default and click “Set as Default”.
Note
As long as there is only one Policy for user data (this is the situation when a new VPSA Object Storage system is created), that only Policy is the default, and there no way to change it.
Adding Drives to Policy (VPSA Object Storage Admin)
Drives are added to an Object Storage policy via the Provisioning Portal. To add drives into a policy, go to the Provisioning Portal, select the VPSA Object Storage of interest and click Add Storage. Follow the instruction here: Adding Drives to an Existing Storage Policy (VPSA Object Storage Admin).
Note
Drive-related operations in a storage policy will require rebalance that might take several hours until completion.
Removing Drives from Policy (VPSA Object Storage Admin)
If the there is a need to reduce the total available capacity of a given policy, or to remove some failed drives that were detached from the policy, you may remove drives from the policy and return them to the cloud for a different use. To remove drives from a Policy go to GUI > Policies, select the policy of interest, and click Remove Drives.
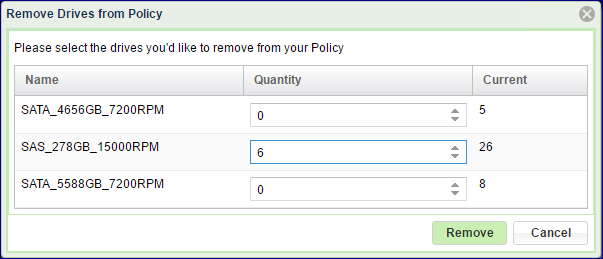
The dialog that will open will list all the drives types and quantities that currently belong to the policy. Set the number of drives you want to remove from each type, and click Remove.
Note
Drive-related operations in a storage policy will require rebalance that might take several hours until completion.
Managing Accounts
Object Storage Account is a collection of Containers. Typically an account is associated with a tenant. Access rights can be granted for users per account.
Creating account (VPSA Object Storage Admin)
When the system is first built, a default account is created called zios_admin account. At that point only the VPSA Object Storage admin has access to this account. In order to provision object storage to customers, the VPSA Object Storage administrator needs to create Accounts.
To create additional Accounts, first select the Accounts entity in the Main Navigation Panel (Left Panel) under Account Management, and then click the Create button in the Center Panel.

In the dialog that opens give a name to the new account. And click Add. The new account will be added.
Viewing Accounts Properties (VPSA Object Storage and Account Admin)
You can view the following properties and metering information in the Accounts Details South Panel tabs:
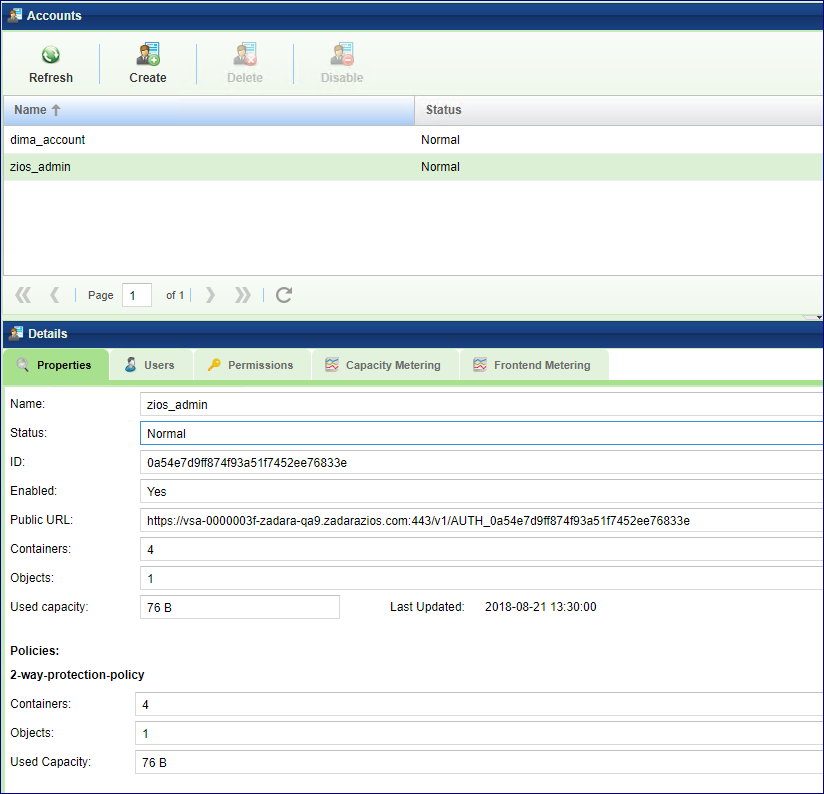
Properties
Each Account includes the following properties:
Property |
Description |
|---|---|
Name |
The name of the Account |
Status |
Normal / Deleting / Deleted, awaiting cleanup |
ID |
An internally assigned unique ID |
Enabled |
Yes/No |
Public URL |
The URL that identifies this account. To be used by the REST API |
Containers |
Number of containers in the selected Account |
Objects |
Number of objects stored in the selected Account |
Used Capacity |
Amount of written data in the Account |
Policies |
Show statistics per each policy used by this account Details include:
|
Users
Lists the users of the selected account.
Permissions
For account permissions see here Setting Account Permissions (Account Admin)
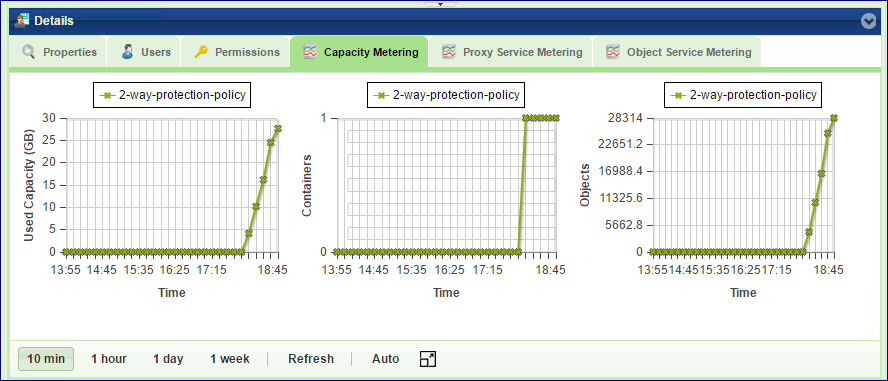
Capacity Metering
The Metering Charts provide live metering of the capacity usage associated with the selected Account.
The charts display the metering data as it was captured in the past 20 intervals. An interval length can be one of the following: 10 minutes, or 1 hour, 1 day, 1 week. The Auto button lets you see continuously-updating live metering info.
The following charts are displayed:
Chart |
Description |
|---|---|
Used Capacity |
Total storage capacity consumed in the selected Account |
Containers |
Total numbers of containers belonging to the selected Account, by Storage Policy |
Objects |
Total numbers of objects belonging to the selected Account, by Storage Policy |
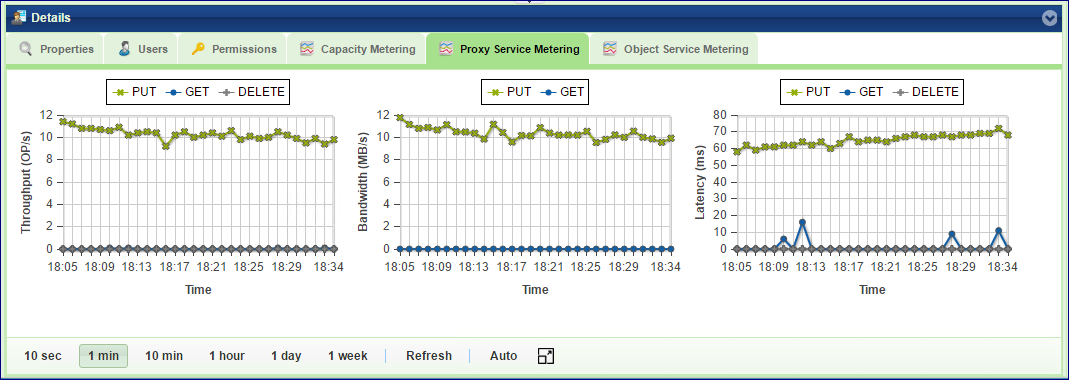
Frontend Metering
The Metering Charts provide live metering of the IO workload at the Object Storage frontend that belong to the selected Account.
The charts display the metering data as it was captured in the past 20 intervals. An interval length can be one of the following: 10 second, 1 minute, 10 minutes, or 1 hour, 1 day, 1 week. The Auto button lets you see continuously-updating live metering info.
The following charts are displayed:
Chart |
Description |
|---|---|
Throughput (OP/s) |
The number of operations (PUT/GET/DELETE) issued to objects that belong to the selected Account. |
Bandwidth (MB/s) |
Total throughput (in MB) of read and write commands issued to proxy for the selected account. |
Latency (ms) |
Average response time of all operations (PUT/GET/DELETE) issued to objects of the selected Account per selected interval. |
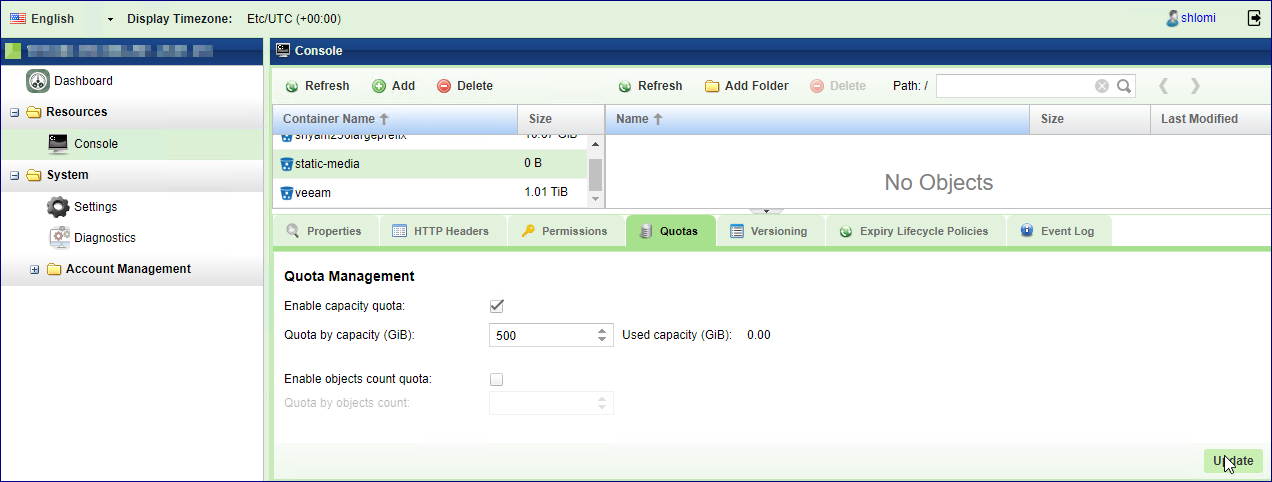
Account Quota Management (Object Storage Administrator or Account Admin)
If needed, a VPSA Object Storage administrator (zios_admin) or Account administrator can set an account level/container level quota.
Note
Once enabled, It will take up to 10 minutes for the quota management to be activated.
Enable Account - Quota Management
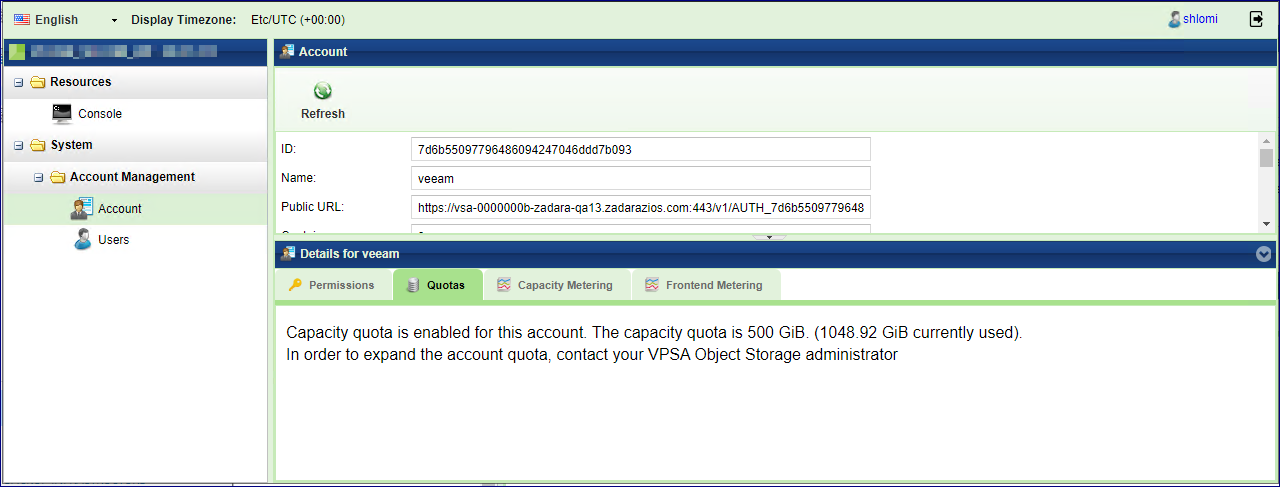
In the VPSA Object Storage management interface navigate to the Account view: Account Management > Accounts, select an Object Storage Account. In the view south pane open the Quotas tab and check the Enable quota by capacity checkbox.

Note
Account level quota can be enabled by the VPSA Object Storage administrator (zios_admin)
Enable Container Quota Management
In the VPSA Object Storage management interface navigate to the Console view. Select a container, in the view south pane open the Quotas tab and check the Enable capacity quota, and/or the Enable objects count quota.
View quota consumption
Account quota
Once quota management was enabled for a given account, the account administrator will have a clear visibility for the current consumption. In the VPSA Object Storage management interface navigate to the Account view, Account Management > Accounts. In the view south pane open the Quotas.
Container quota
Once quota management was enabled for a given container, the account member will have a clear visibility for the current consumption. In the VPSA Object Storage management interface navigate to the Console view, select a container and in the view south pane open the :guilabel:’Quotas`.
Deleting account (VPSA Object Storage Admin)
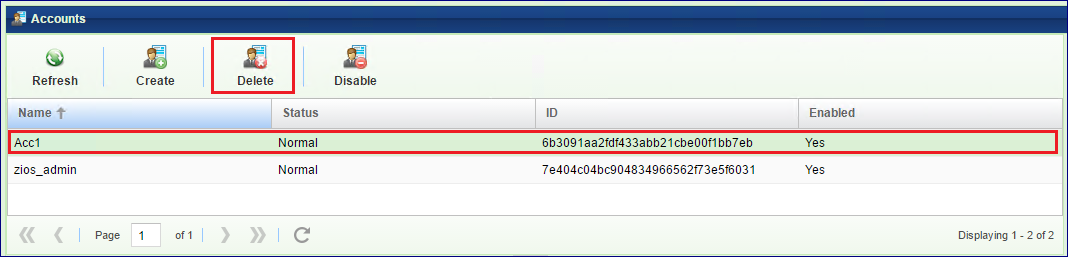
To Delete an Account, first select the Accounts entity in the Main Navigation Panel (Left Panel) under Account Management, select the Account to be deleted, and then click the Delete button in the Center Panel.
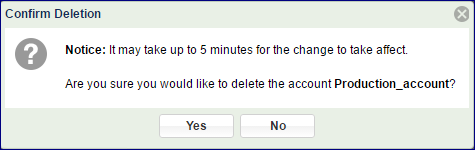
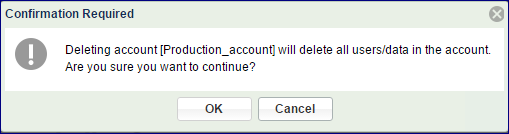
Deleting an account is an irreversible operation, and requires double confirmation
Note
After an account is deleted, all account user data is removed however account billing information still exist in the system for usage report generation. The VPSA Object Storage Admin need to click the “Cleanup” button in the Center Panel in order to completely remove it from the system.
Disabling an account (VPSA Object Storage Admin)
When an account is disabled by the VPSA Object Storage Administrator, no one can access that account, not for read nor for write operations. However, VPSA Object Storage keeps all the account definitions (Users, access rights, etc.), and all the containers and objects.
To Disable an Account, first select the Accounts entity in the Main Navigation Panel (Left Panel) under Account Management, select the Account to be disabled, and then click the Disable button in the Center Panel.
Note
Disable/Enable button toggles as the account state changes.
Self Service Account Creation (Account Admin)
VPSA Object Storage Administrator have an alternative procedure for creating new accounts. Instead of creating the Account (as described here Creating account (VPSA Object Storage Admin)) and creating Account admin, the VPSA Object Storage admin can let users to create their own Accounts. The procedure is as follows:
VPSA Object Storage admin gives the GUI URL to the person that will create the Account (Account admin)
The account admin uses the GUI to create a request for new account
VPSA Object Storage admin approves the request
A new Account is being built, and a new admin user is defined in it.
Below is a detailed description of this procedure.
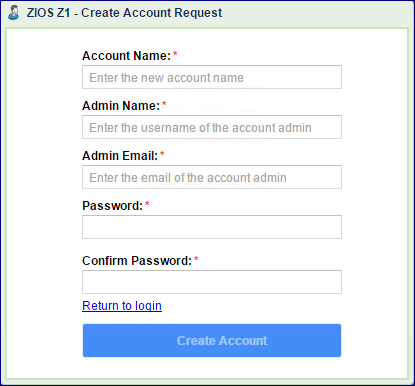
Use the GUI URL and get to the login screen:

Since you don’t have login credentials, and you want to create a new account, click the Create new account link. In the new account dialog enter the following fields:
Name for the new Account
Your username as the Account admin
Your email address
Select a password
Note
While account name and the username for a given user are unique across the VPSA Object Storage, the same email address can be used for multiple users. This is useful in cases the same entity needs visibility to more than a single account.
And click Create Account. This will create an Account creation request that will go to the VPSA Object Storage Admin for approval. You will automatically become the Account admin of your new account.
You will receive the following email, as confirmation for the request:
Important
Subject : Your new account creation request (Production_Account - requested 2016-06-27 10:27:12)
Your new account creation request has been sent.
Please notice that the Account will not be active until the creation request is approved. A mail notification will be sent to you upon approval.
User: Prod_Account_Admin
Email: myname@zadarastorage.com
Account: Production_Account
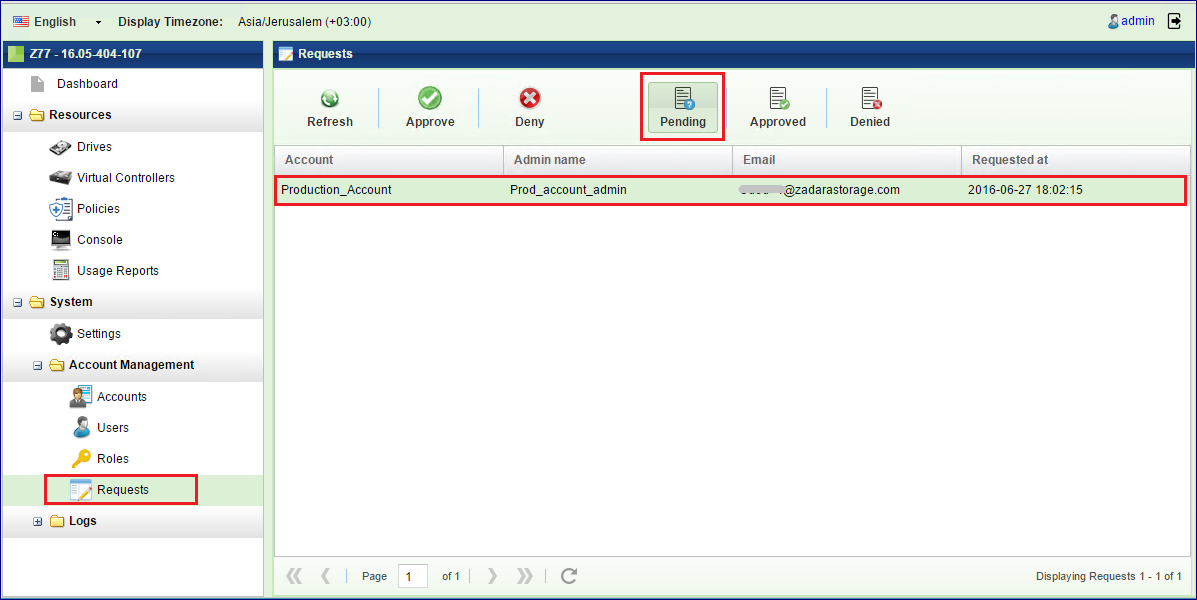
The VPSA Object Storage admin will receive an email informing him about the pending request:
Important
Subject : New Account creation request (Production_Account - requested 2016-06-27 10:27:11)
A new account creation request created on cloud zadara-qa3
You can approve/deny requests on your VPSA Object Storage Z1 at https://vsa-00000144-zadaraqa3.zadarazios.com:8443.
Details:
User: Prod_Account_Admin
Email: myname@zadarastorage.com
The VPSA Object Storage Admin should open the GUI, select Users entity in the Main Navigation Panel (Left Panel) under Account Management, select the pending Account request, and either Approve or Deny it.
Upon approval the new account will be created, the account admin will be defined with the given credentials. You will receive an email notification about the new account:
Important
Subject : Your new account creation request has been approved
Your Account Creation request was approved, and you were added to Z77 VPSA Object Storage as Admin user under Production_Account account.
Your role allows you to manage objects and users under your account.
To start working with your VPSA Object Storage use the following information:
VPSA Object Storage Account Management & Console URL: https://vsa-00000152-zadara-qa3.zadarazios.com:8443
VPSA Object Storage API Endpoint URL: https://vsa-00000152-zadara-qa3.zadarazios.com:443
Account: Production_Account
Username: Prod_account_admin
The Account is ready. You can now login to the GUI, add members to the Account, create containers and start store objects.
Managing Users
Understanding users roles
The VPSA Object Storage support the following roles:
VPSA Object Storage Administrator(zios_admin): Responsible for the administration of the VPSA Object Storage. This is the user that created the VPSA Object Storage in the Zadara Provisioning Portal.
VPSA Object Storage Admin - Read Only a dedicated Read-Only account for cross-accounts monitoring and reporting purposes. The Read-Only role is available for the zios_admin account only. A Read-Only user will have access to the VPSA Object Storage RestAPI, however it will not have data access. The user role is designated for monitoring and reporting purposes, such as:
Performance monitoring
Capacity monitoring
Usage reports & billing automation
Account Administrators : Responsible for the administration of their account
Account Member can do object storage operations according to the given permissions within the limits of that account.
User Information
Information about the user currently logged in to the GUI is displayed by clicking the user name on the GUI upper right corner.
The following User’s properties are displayed:
Property |
Description |
|---|---|
Username |
The login ID of the User |
User’s email address |
|
Account |
The account where the user belongs |
Public URL |
The URL that identifies this user’s account. To be used by the REST API |
User ID |
An internally assigned unique ID |
Account ID |
An internally assigned unique ID |
Dual Factor Auth. |
Indication if this user has dual factor authentication activated |
Object Storage API Token |
Token to be used for authentication by the REST API The token expires in 24 hours. Good practice is for every script to start with getting a new token. See API guide http://zios-api.zadarastorage.com |
Public IP |
Public IP of the VPSA Object Storage (see: Assigning Public IPs (VPSA Object Storage Admin)) |
API Endpoint |
The effective address for REST API for all IO requests |
Auth Endpoint |
The effective address for REST API for all authentication requests |
S3 Access Key |
To be used by client using the S3 interface |
S3 Secret Key |
To be used by client using the S3 interface |
Note
The connected user can reset its Object Storage Access/Secret keys. The existing
Access and Secret keys will be revoked.

Creating user (VPSA Object Storage Admin, Account Admin)
To create a User, first select the Users entity in the Main Navigation Panel (Left Panel) under Account Management, and then click the Create button in the Center Panel.
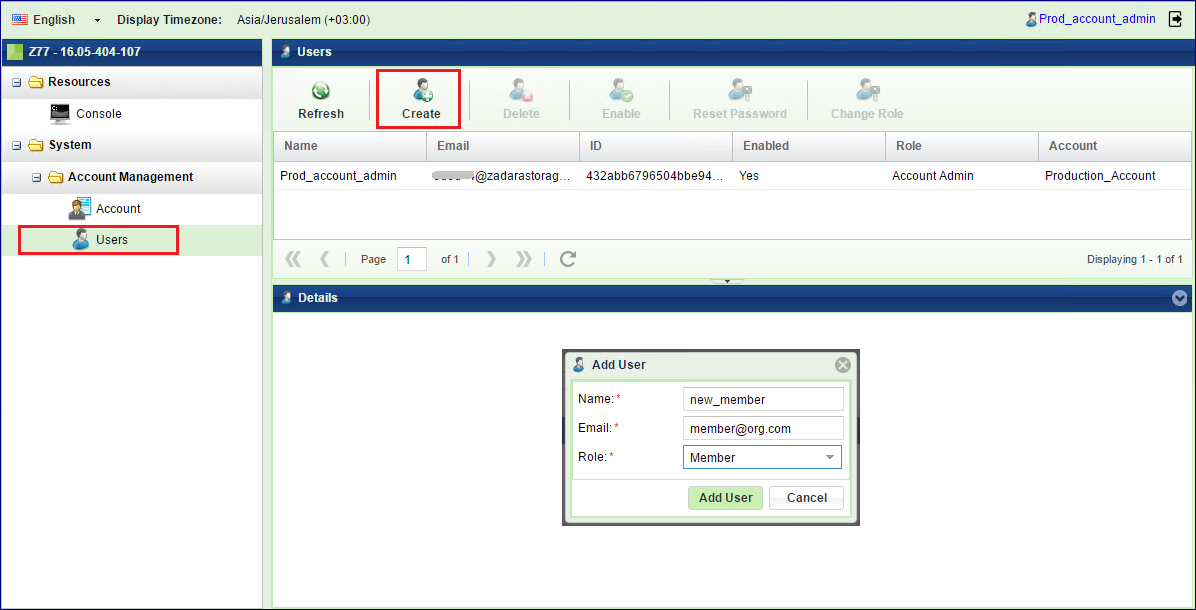
In the dialog that opens, give the user a name, select the role, enter an email address, and select the User’s Account. Click Create.
Note
Everything an Account admin does, is within the context of that Account. So, when an Account admin creates users, there is no need to select an Account.
Note
Users with VPSA Object Storage Admin role can only be created in the zios_admin account.
The new user will receive an email with links to access the GUI for their account, and the first-time password. The new user must change the temporary password at first login
Important
You were just added to Z1 as #Member user under Test_Account account. Your role allows you to manage objects in your account according to your permissions.
To start working with your Object Storage use the following information:
Console URL: https://vsa-00000144-zadara-qa3.zadarazios.com:8443
API Endpoint URL: https://vsa-00000144-zadara-qa3.zadarazios.com:443
Account: Test_Account
Username: Test_Account_Member
Temporary Password Code: 9oya82BXV53Z2_qwJGq3
Please use the Temporary Password Code when logging into your Object Storage user interface for the first time to create a new password.
Viewing Users Properties (VPSA Object Storage Admin, Account Admin)
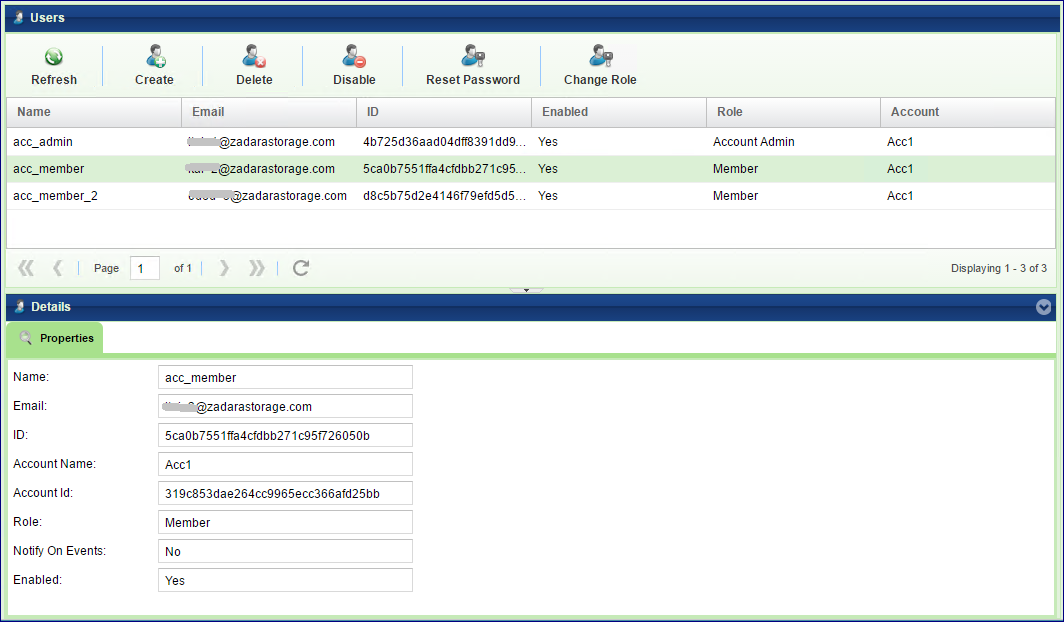
The following User’s properties are displayed:
Property |
Description |
|---|---|
Name |
The login ID of the User |
User’s email address |
|
ID |
An internally assigned unique ID |
Account Name |
The account where the user belongs |
Account ID |
An internally assigned unique ID |
Role |
VPSA Object Storage Admin, Account Admin, Member |
Notify on Events |
Specify is this user want to get email notifications for events |
Dual Factor Auth. |
Indication if this user has dual factor authentication activated |
Enabled |
User is active or not. Disabled user can’t login and can’t perform any operation |
Deleting users (VPSA Object Storage, Account Admin)
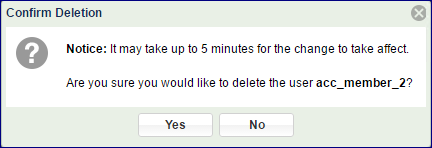
To Delete a User, first select the Users entity in the Main Navigation Panel (Left Panel) under Account Management, select the User to be deleted, and then click the Delete button in the Center Panel.

The system will ask for confirmation. By clicking Yes the deletion process will begin, and might take few minutes.
Disabling users (VPSA Object Storage Admin, Account Admin)
A disabled user cannot login to the GUI or perform any operation via the REST API. However the system remembers the User with all the properties and permissions. Once users are enabled, they can resume operations as before.
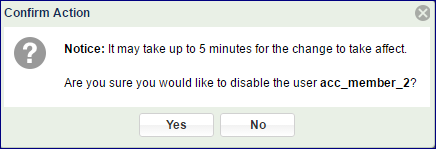
To Disable a User, first select the Users entity in the Main Navigation Panel (Left Panel) under Account Management, select the User to be deleted, and then click the Disable button in the Center Panel.
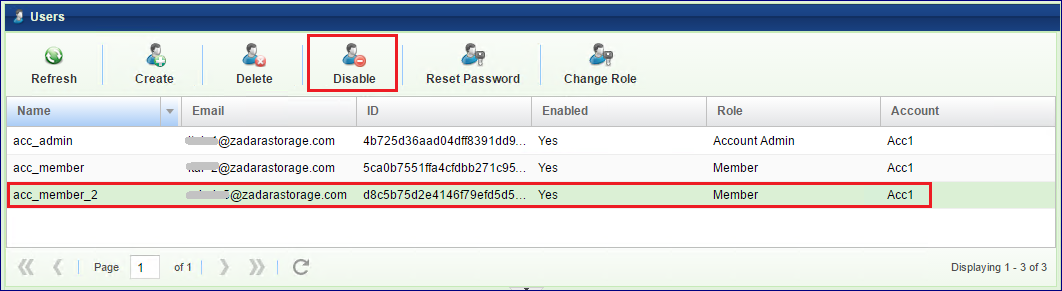
The system will ask for confirmation. By clicking Yes the disabling process will begin, and might take few minutes.
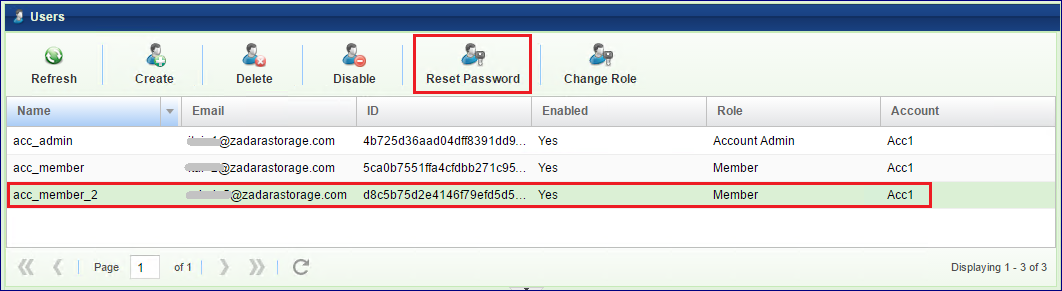
Reset password (VPSA Object Storage Admin, Account Admin)
VPSA Object Storage admin and Account admins can reset Users’ passwords. When resetting a password, the User will receive an email with a temporary password that they will have to change at the next login.
To reset someone’s password, first select the Users entity in the Main Navigation Panel (Left Panel) under Account Management, select the User for whom you will reset the password, and then click the Reset Password button in the Center Panel.
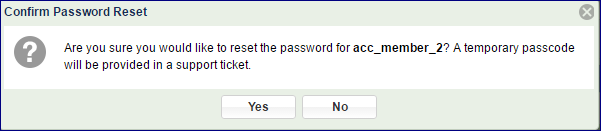
The system will ask for confirmation. By clicking Yes the user will be assigned a
temporary password that will be sent by email:
Important
Subject :Forgot Z888 Password - acc_member_2 - requested at: 2016-06-28 12:10:49 +0300
You requested to reset the password on your VPSA Object Storage Z888. If you made this request follow the instructions below:
Your temporary passcode is: t5CpKs_M-oMNwqX6jiJ4
In order to reset your password, you must login to the VPSA Object Storage at https://vsa-00000154-zadaraqa3.zadarazios.com:8443 using your username and the supplied password code as your
password.Account: Production_Account
Username: Prod_account_adminAccount: Production_Account
Note
Users who have forgotten their password do not need to refer to the admin to reset their password. They can click the Forgot Password link on the login screen.
Change Role (VPSA Object Storage Admin, Account Admin)
Account member can be promoted to become an Account Admin, and vice versa. Users under the system account zios_admin can be promoted to VPSA Object Storage Admins only by VPSA Object Storage Admin.
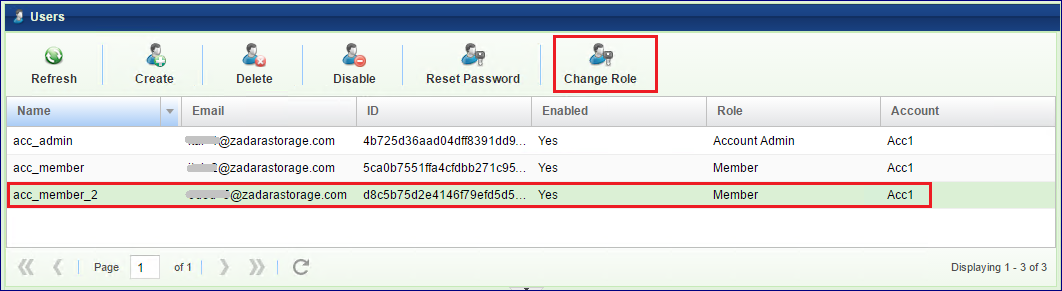
To change someone’s role, first select the Users entity in the Main Navigation Panel (Left Panel) under Account Management, select the User for whom you want to promote, and then click the Change Role button in the Center Panel.
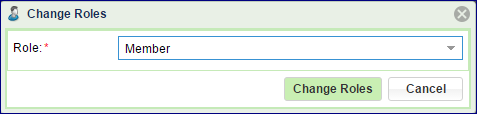
In the dialog that open select the new role and click Change Roles
Dual Factor Authentication
The VPSA Object Storage supports Dual Factor Authentication (DFA) using Authenticator mobile application. It is a common practice to protect access in case of compromised password, as a password is not enough in order to login. Each user can turn Dual Factor Authentication on/off for themself. The VPSA Object Storage admin can force Dual Factor Authentication on all users.
Enabling Dual Factor Authentication
To enable DFA open the current User Properties by clicking the user name on the upper right corner of VPSA GUI screen.
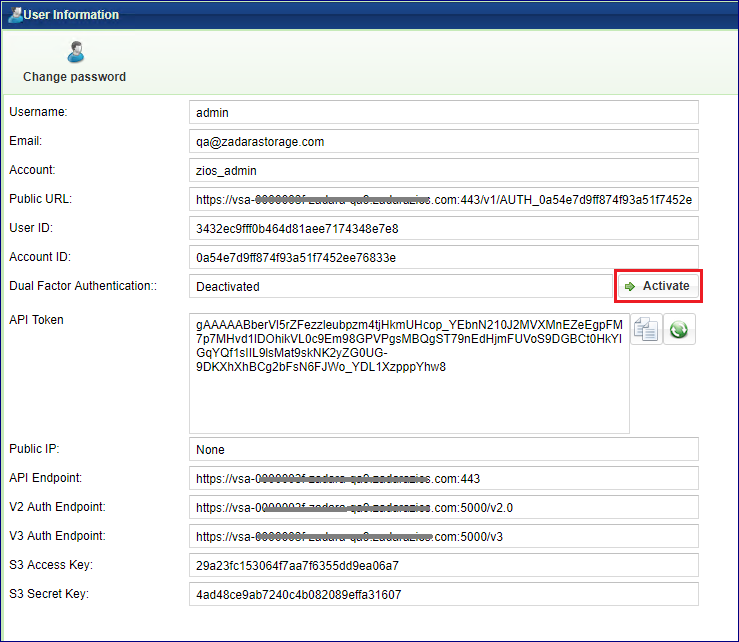
Click Activate or Deactivate. Close the properties dialog, and logout.
The first time you login again, the following screen will pop up.
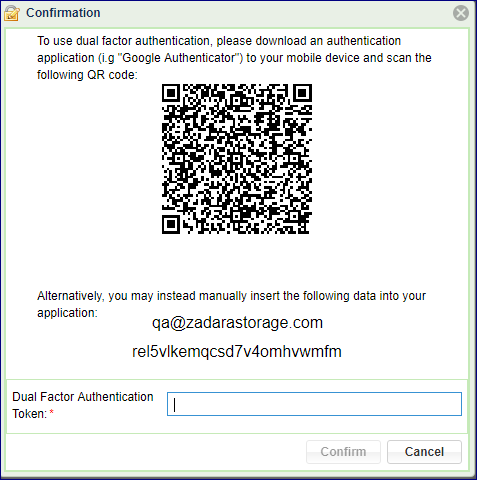
Install Authenticator mobile app. (e.g. Google Authenticator) from Google Play or Apple AppStore, and scan the QR code. Enter the code you get on the Authenticator. You are now set.
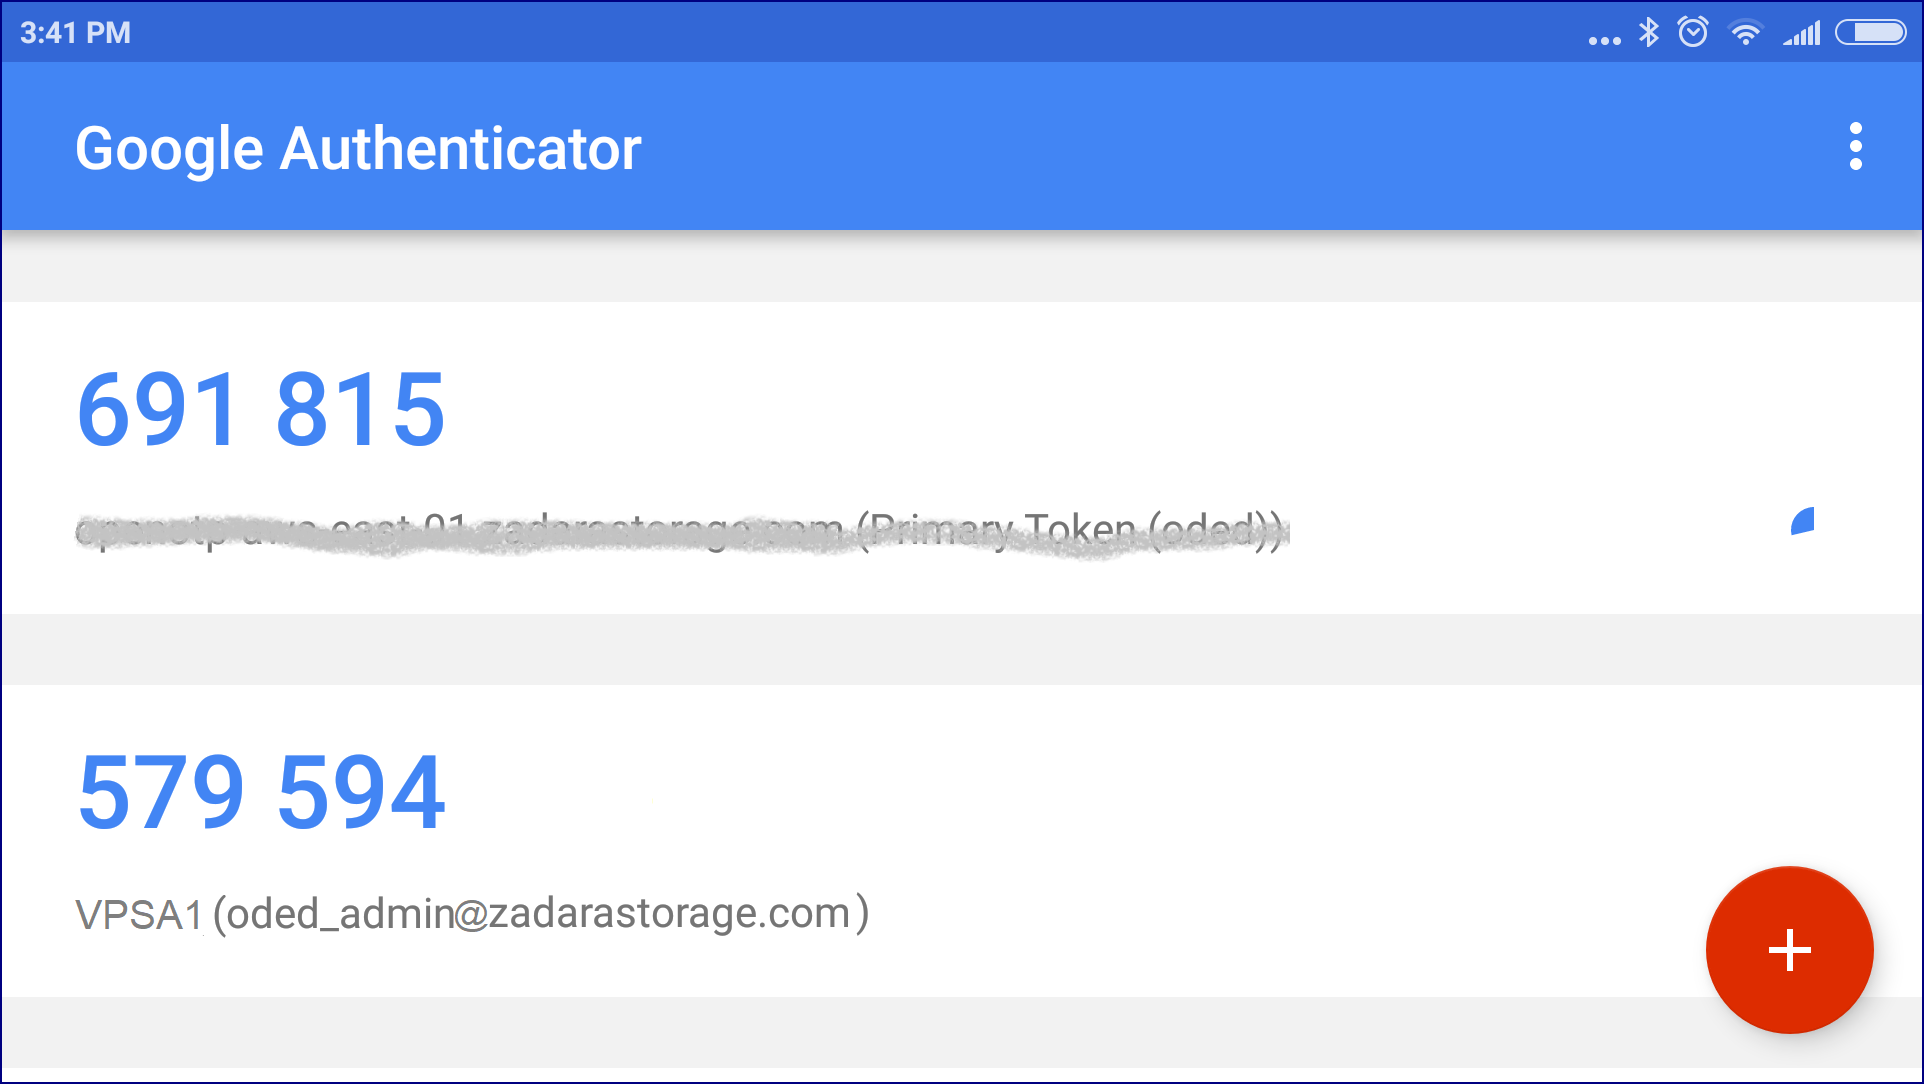
Every login, from now on will require the temporary code from the Authenticator app.
Important
The mobile device that runs the Authenticator app is needed for login. In case the device was lost or replaced, the user must ask the VPSA admin to reset their DFA settings. VPSA admin must contact Zadara support for reset the DFA.
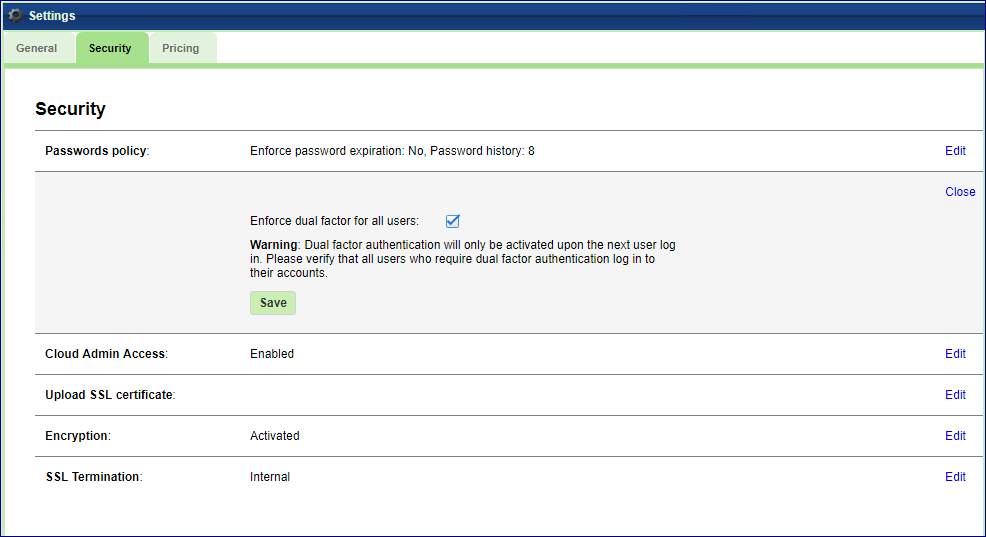
Enforcing Dual Factor Authentication
VPSA administrator can force DFA for all users. In setting/Security click Edit on the Dual Factor Authentication, check the checkbox and Save. This setting change doe not have immediate effect. Next time each user will login, she will be required to set her mobile device Authenticator app as described above.
Note
When DFA enforcement is removed, the users with DFA configured are still required to use the temporary code when logging in. However each user can change her settings in the user properties as described above.
Managing Access Control (Permissions)
Understanding Permissions
VPSA Object Storage provides 2 levels of permissions: Account and Container.
Both permissions types are enforced on account Members only, account Admins will always have all permissions.
Account-level permissions enforce Read (listing) and Write (creating/deleting) option for containers under an account.
Container-level permissions enforce Read (list/download) and Write (upload/delete) options for objects under container.
Default Permissions:
An account is created with default Account-level permissions that allow all account members to list/create/delete containers in the account.
The Account-level permissions can be set after account is created, by Account admin or VPSA Object Storage admin.
Container is created with default Container-level permissions that allow all account members to list/get/put/delete objects in the container.
The Container-level permissions can be set after container is created, by account admin or VPSA Object Storage admin.
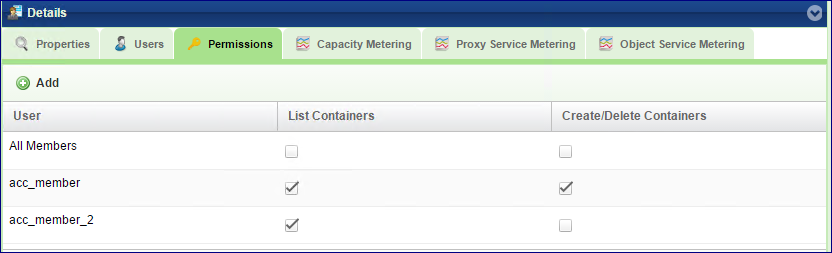
Setting Account Permissions (Account Admin)
Account-level permissions are set in Account south panel of the GUI by the account admin.

It can be set globally (apply on ALL account members), or explicitly per member or members list.
When setting permission per member or members list, the global setting is removed.
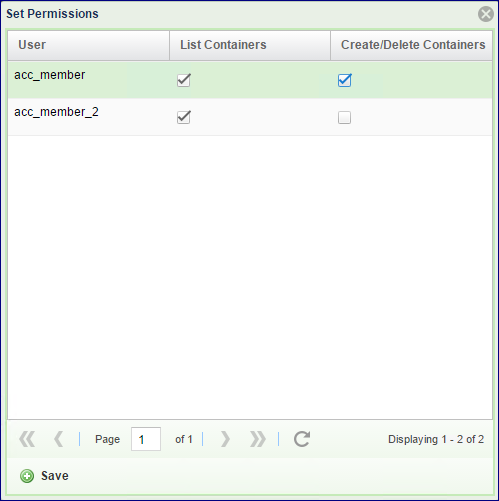
To set an explicit permission per user:
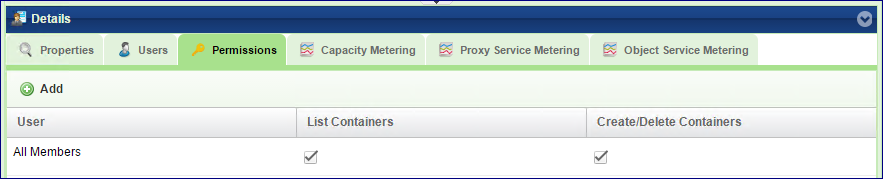
Click on Add button in the permission tab
Set the required permissions per user
Click the Save button
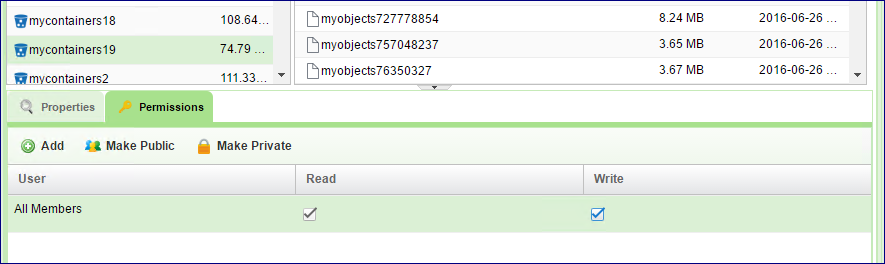
The global permissions were removed when the member was added:
When setting the global permissions back, the member permissions will be removed.
Use the Save button in the down right corner to set permissions in the south tab.
Setting Container Permissions (Account Admin)
Container-level permissions are set in Container south panel in VPSA Object Storage Console by the account admin.
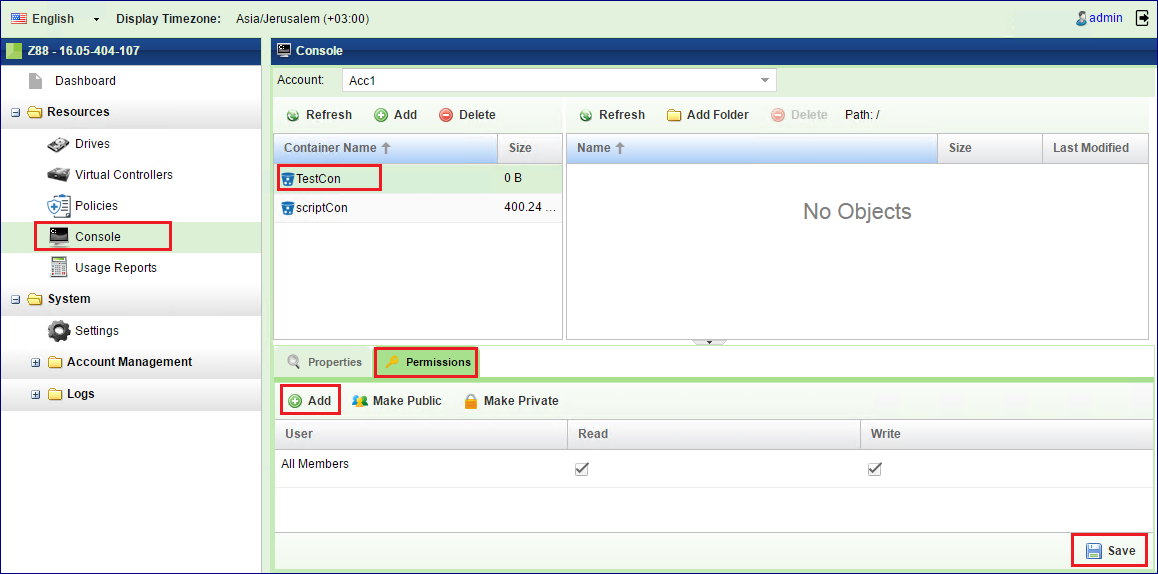
It can be set globally (apply on ALL account members), or explicitly per member or members list.
When setting permission per member or members list, the global setting is removed.
Note
By making a container public (Make Public/Private button) any user can list this container’s objects (using “referral” API) even without permissions for this container.*
To set an explicit permission per user:
Select the Container of interest
Click on Add button in the permission tab
Set the required permissions per member
Click the Save button
The global permissions were removed when the member was added:
When setting the global permissions back, the member permissions will be removed.
Use the Save button in the down right corner to set permissions in the south tab.
Generating Usage Reports (VPSA Object Storage Admin)
a VPSA Object Storage administrator (zios_admin) can create a report with all billing metering information, and export the data into any billing system used. This report uses the pricing information that you have set as described in the Pricing settings options and in the Creating Policy (VPSA Object Storage Admin) wizard.
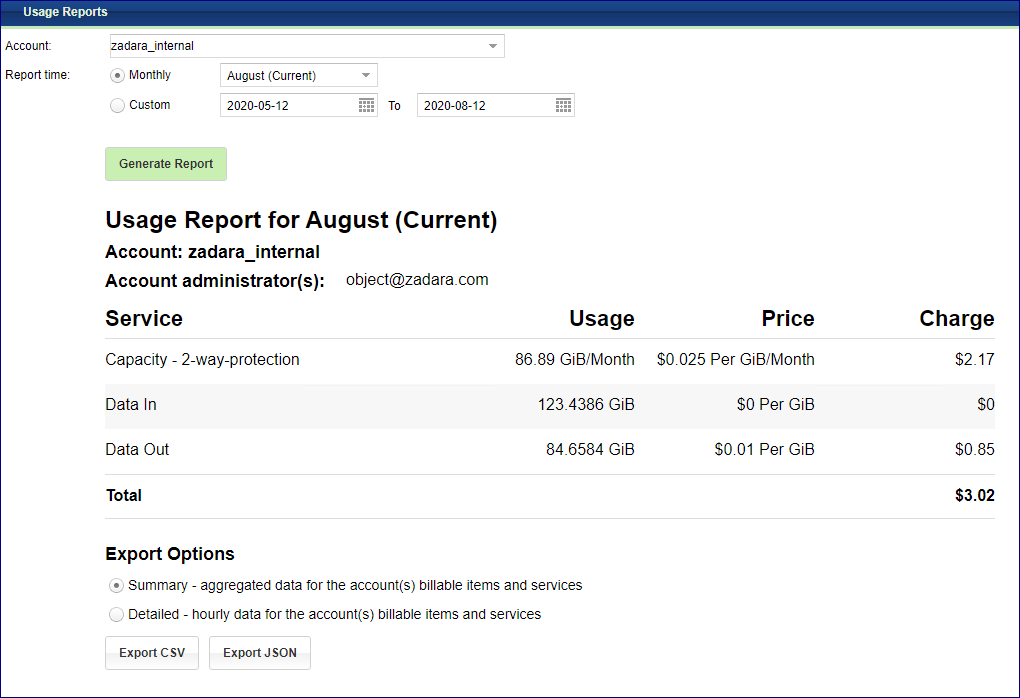
To create a Usage Report, first select the Usage Reports view in the lef navigation menu (left navigation menu) under System. In the main form select the Account you want to create the report for. (You can also select All to create a report for all accounts). Select the period of time for the report (typically monthly, however custom time range can be selected as well), and click Generate Report.
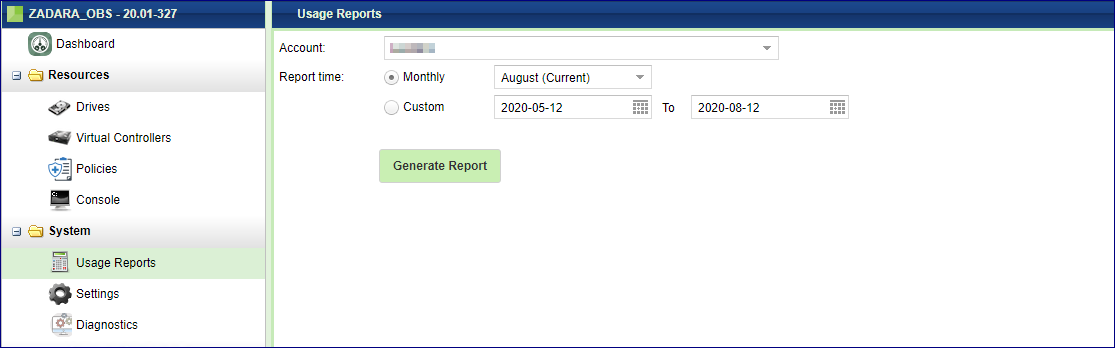
A high level summary of the report will be displayed, the report can be exported to JSON or CSV format with finer granularity.
Usage Reports - Exporting a Summary Report
The exported “Summary Report” include a high-level report, with the same granularity as presented in the management GUI.
For the CSV option, the exported report archive include two CSV files:
Report header - the general information for the Object Storage and the account such as:
VPSA Object Storage ID
VPSA Object Storage name and URL
VPSA Object Storage Version
Pricing information
Reporting interval
Usage Summary - the actual usage report information:
Billing units
Billing sub-category (incoming_bytes, outgoing_bytes and used capacity)
Container & Object count
Account information
The JSON option will include all of the above information in a single JSON object.
Usage Reports - Exporting a Detailed Report
The exported “Detailed Report” include a finer resolution report, that can assist the VPSA Object Storage administrator to break down the usage report to its building block during the requested time frame.
For the CSV option, the exported report archive include two CSV files:
Report header - the general information for the Object Storage and the account such as:
VPSA Object Storage ID
VPSA Object Storage name and URL
VPSA Object Storage Version
Pricing information
Reporting interval
Usage - the actual usage report information, with an hour by hour service breakdown:
Billing units
Billing sub-category (incoming_bytes, outgoing_bytes and used capacity)
Container & Object count
Account information
Object Storage Logs
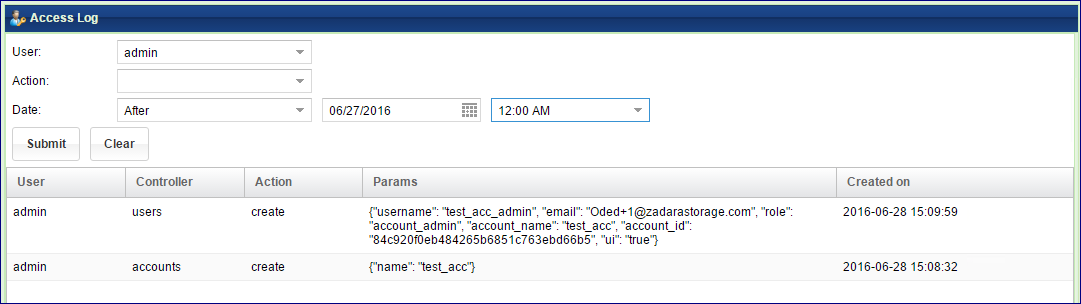
Access Log (VPSA Object Storage Admin)
Access log lists all operations done by Any user, either using the GUI or the REST API. Each operation is list with all given parameters.
The list can be filtered by:
User who took the action
Action type (e.g. create account)
Date and time
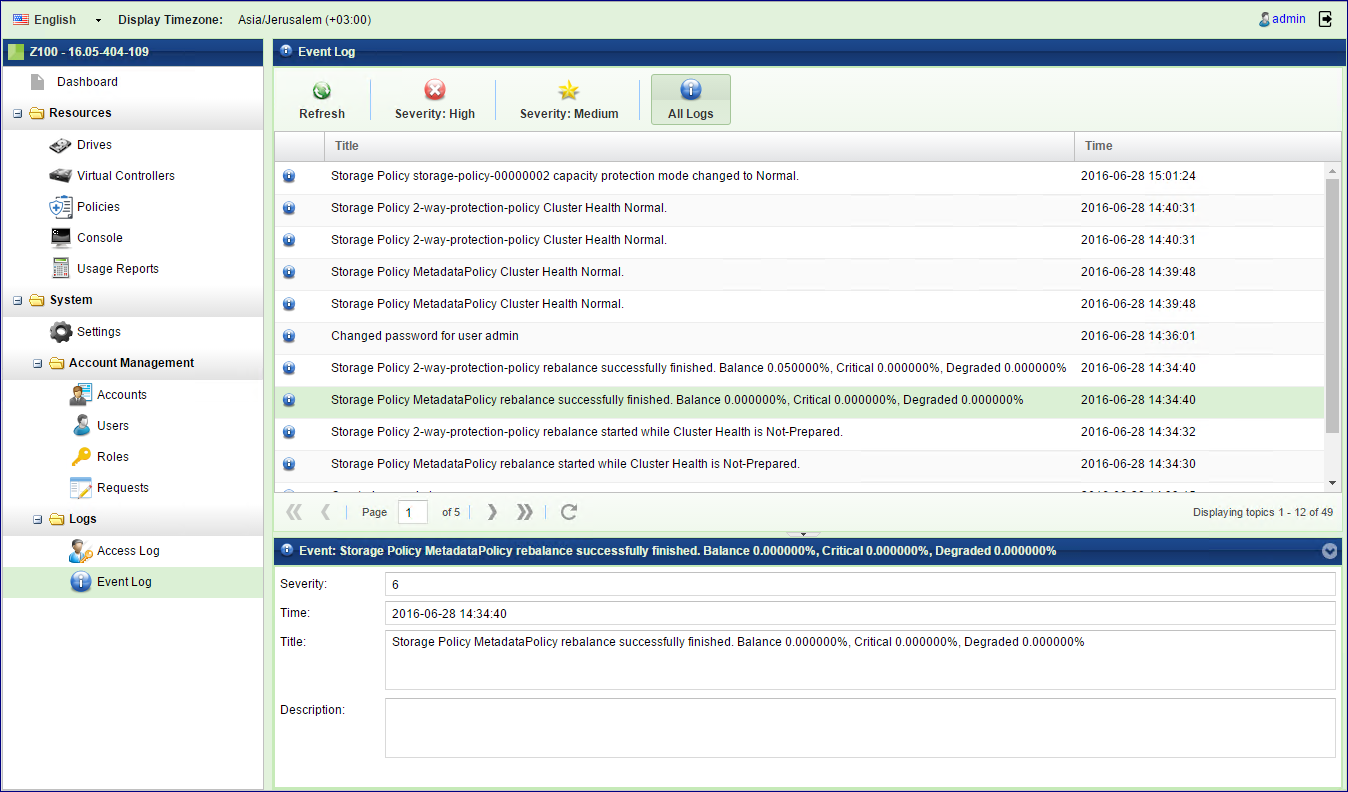
Events Log (VPSA Object Storage Admin)
The events log lists all the events reported by the system. The list can be filtered by severity.