Deployment Workflow
Note
The initial deployment flow is identical for both VPC Peering for multiple Zadara Edge Clouds and for VPN Service for Zadara Edge Clouds.
The following workflow must be run on a VPC GW instance that is configured with:
Public and Private Subnets
A Security Group preconfigured for this deployment. See the section on Security Hardening at the end of this page.
A preloaded image is available in the zCompute Marketplace, and provides an easy to use pfSense OpenVPN deployment option.
Download the pfSense image from Marketplace
In the zCompute UI, go to Machine Images > Marketplace and select the pfSense-CE (VPC Peering GW) image.
Set the Scope to Project or Account, and download the image.
Create an instance based on the pfSense image
In Machine Images > Images, select the VPC Peering GW (pfSense-CE) image.
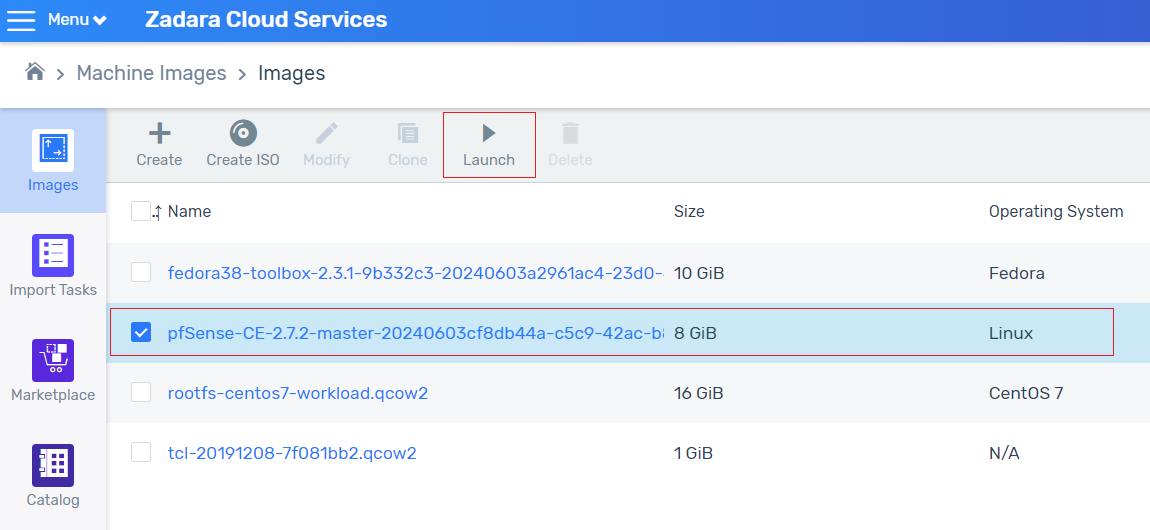
Click Launch to create an instance with 2 subnets.
One subnet is for the internal VPC LAN. The other subnet will be used for the public-facing WAN interface.
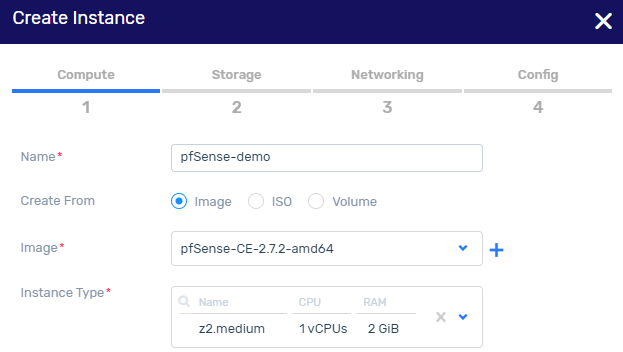
In the Storage tab, accept the default settings. Click Next.
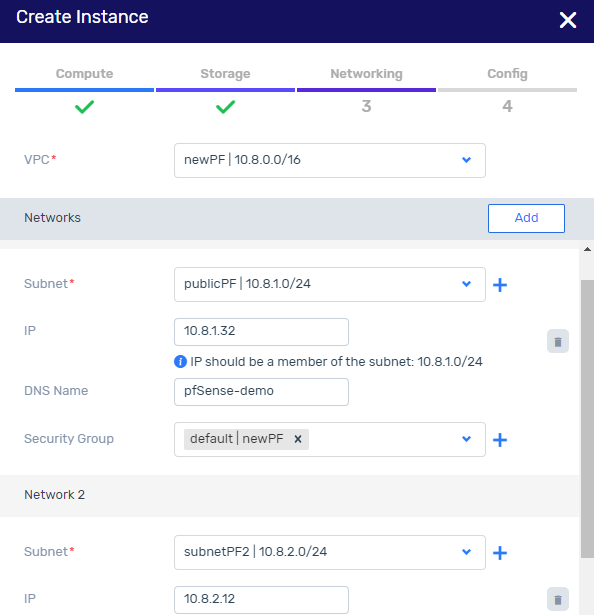
In the Networking tab, configure the public subnet.
On completion of the public subnet configuration, click Add to configure the private subnet.
Note
The significance of first configuring the public subnet followed by the private subnet is so that the public subnet should be associated with eth0, and the private subnet associated with eth1.
Networking configuration for the pfSense instance
Go to Compute > Instances and select the instance.
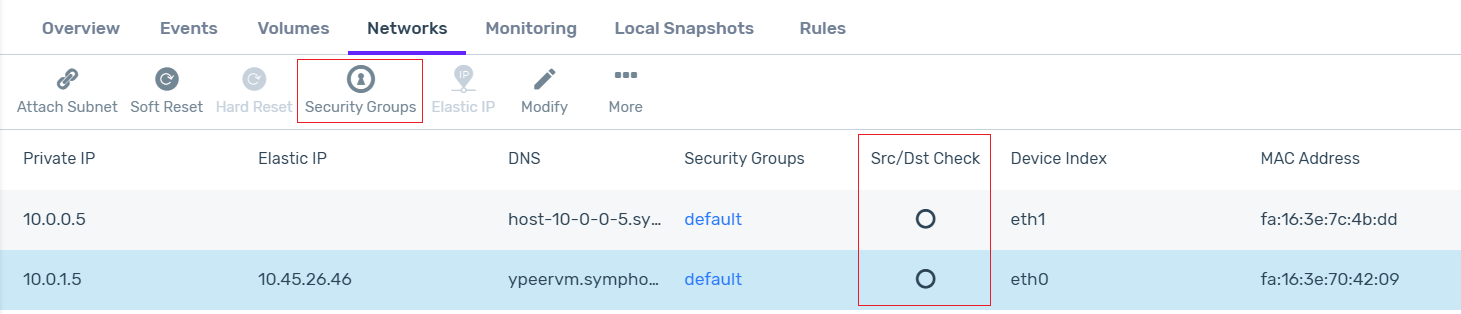
In the instance’s lower pane, click the Networks tab.
Attach an Elastic IP to the public subnet:
Click the row of the public subnet.
In the lower menu, select More > Attach Elastic IP. Attach an Elastic IP to the NIC attached to the WAN/public subnet, for example eth0.
The Elastic IP will be used for the WAN interface on the VPC GW.
For each of the eth0 and eth1 interfaces (both the public and private subnets), disable the Src/Dst Check:
In the instance’s Networks tab in the lower pane, click the network interface row.
Click Security Groups. In the Security Groups modal that opens, uncheck the Source/Destination checkbox, and save the configuration.
Networking setup on the pfSense VM
Connect to the VM VNC to set up the networking configuration.
Go to Compute > Instances > [VM instance name] > Connect.
The VNC window opens, and the pfSense menu displays:
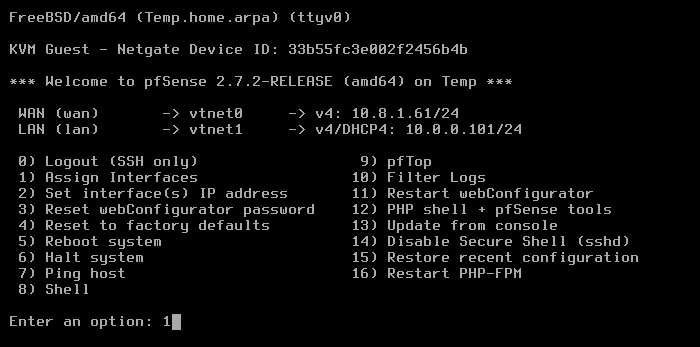
From the menu, select option 1: Assign interfaces:
Note
There is no need to set up VLANs.
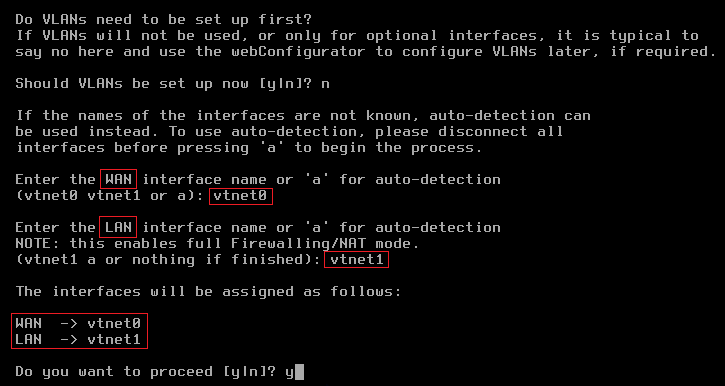
Set up vtnet0 for WAN (mapped to eth0 on the VM instance).
Set up vtnet1 for LAN (mapped to eth1 on the VM instance).
After assignment of the network interfaces, the pfSense menu reappears.
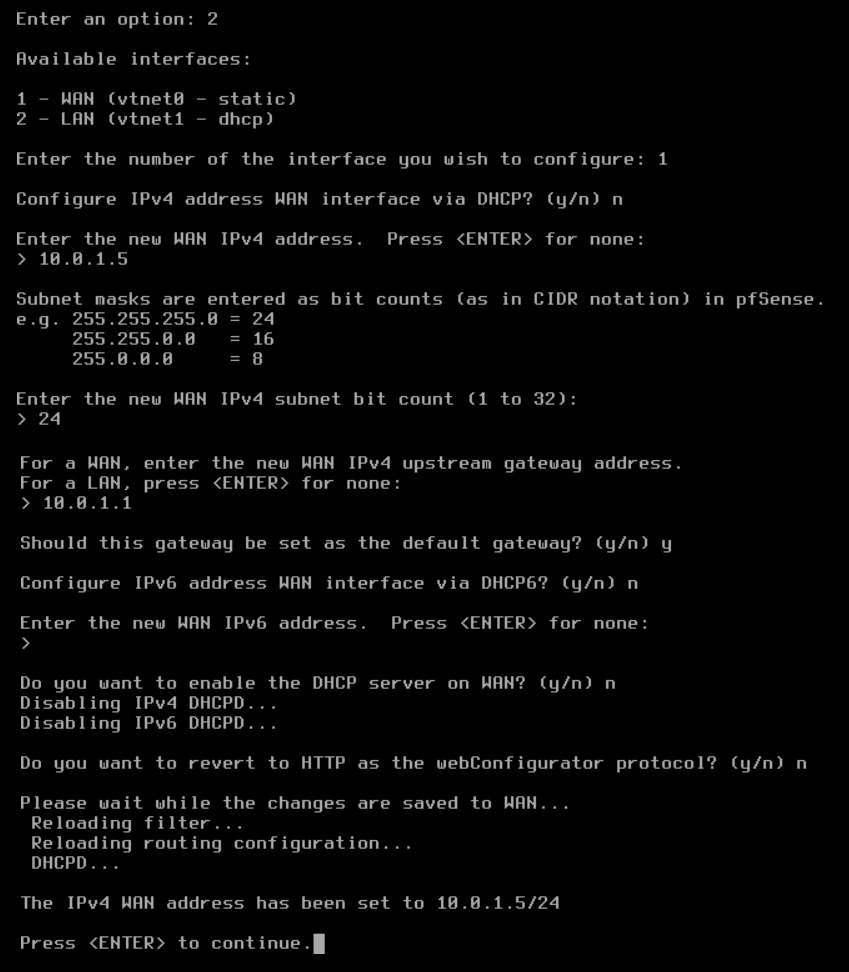
From the menu, select option 2: Set interface(s) IP address.
Setup the WAN to static IPv4.
For example:
Set up the LAN interface with IPv4 DHCP.
For example:
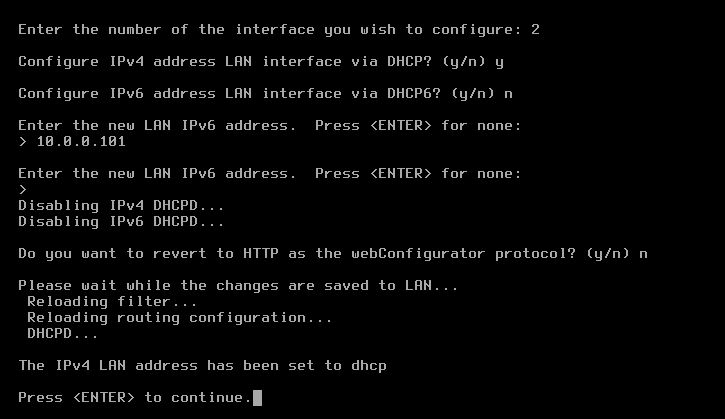
On completion of the IP setup, the updated WAN and LAN IP assignments display, followed by the pfSense menu.
Note
The deployment flow up to this step is identical for both VPC Peering for multiple Zadara Edge Clouds and for VPN Service for Zadara Edge Clouds.
Sign on to the pfSense web client to continue the specific deployment implementation.
In a browser window, launch the pfSense web client using the Elastic IP assigned earlier to the public subnet. For example,
https://10.41.31.5.The pfSense web client’s default credentials:
username:
adminpassword:
pfsense
Note
The recommended best practice is to change the pfSense admin password at the first sign-on to the pfSense web client.